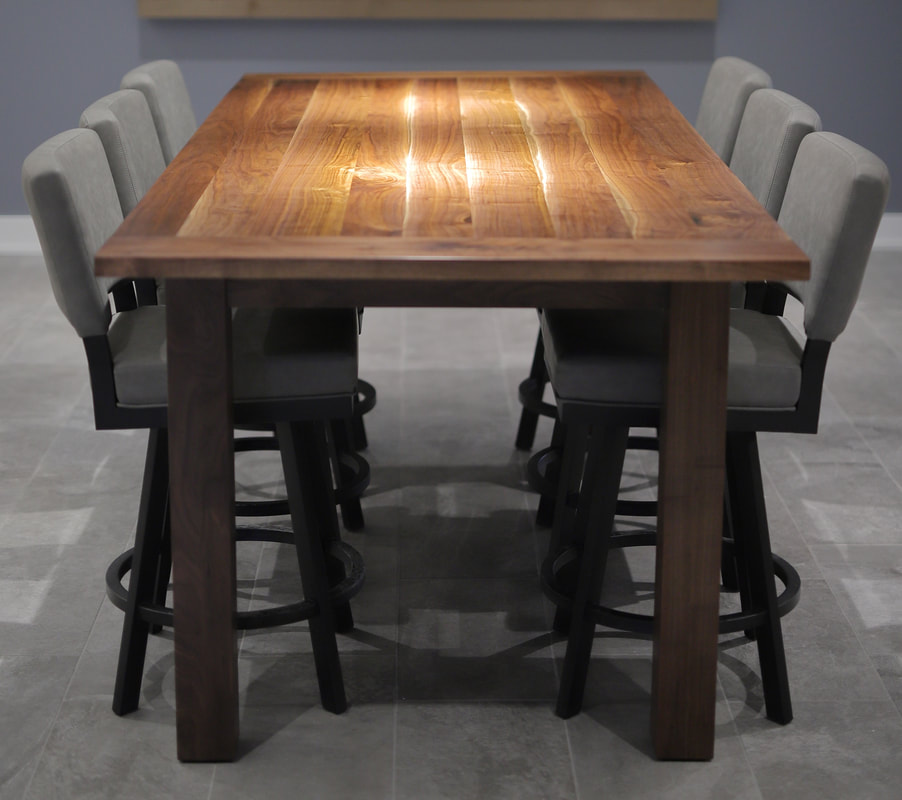
 This is our dining room. It's also where our daughter plays. This is the cleanest it can look and the metal shelf doesn't go very well with a walnut trestle table. We can do better.
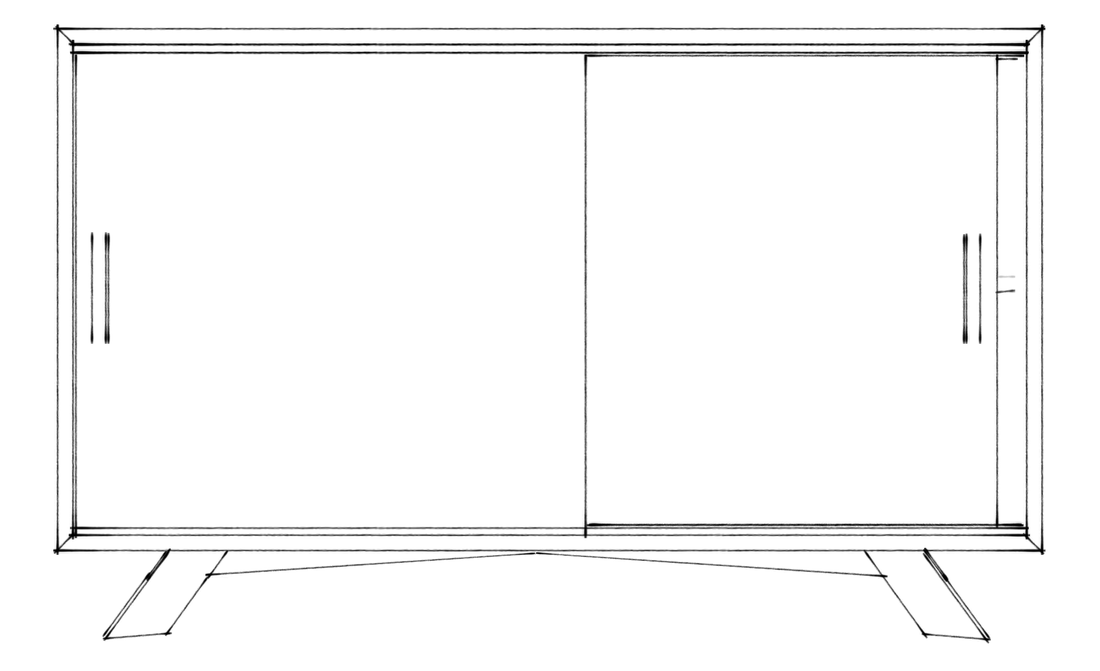
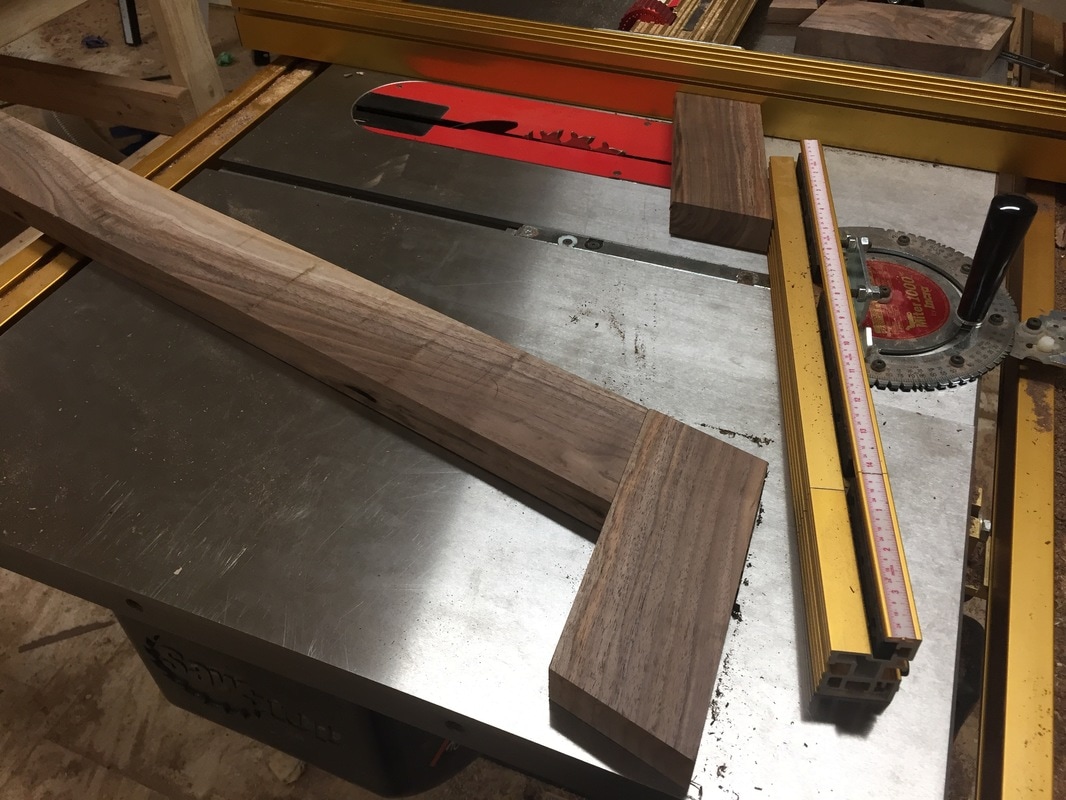
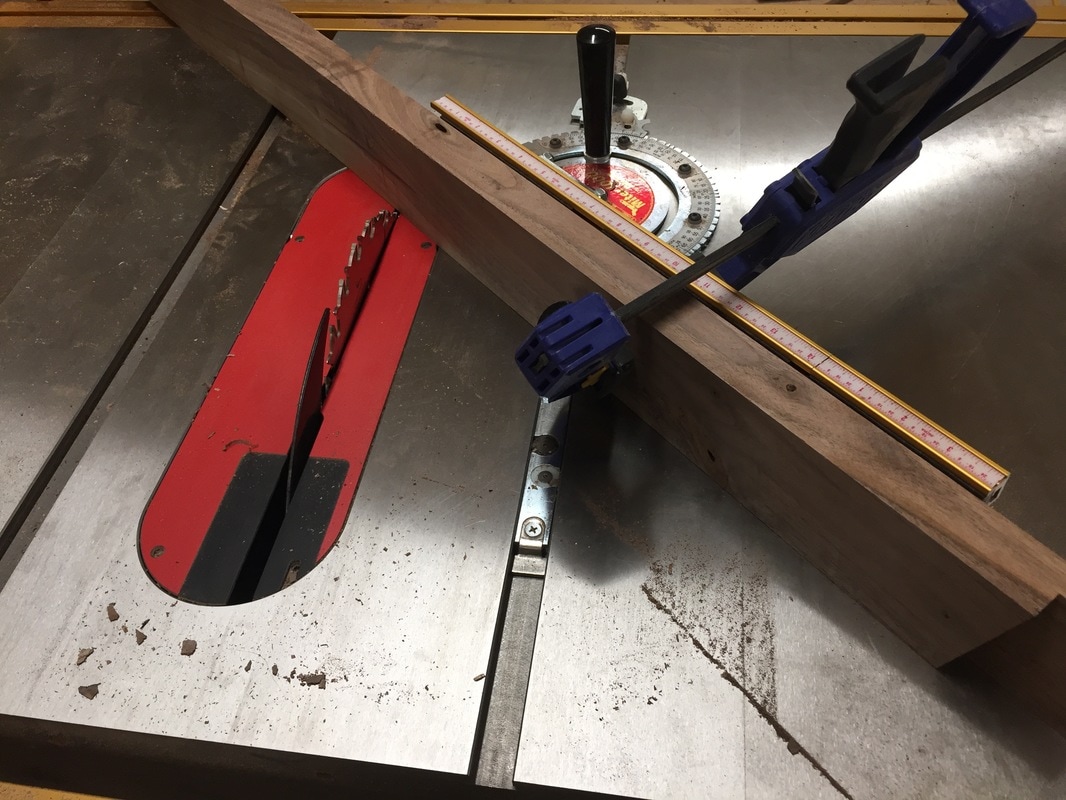
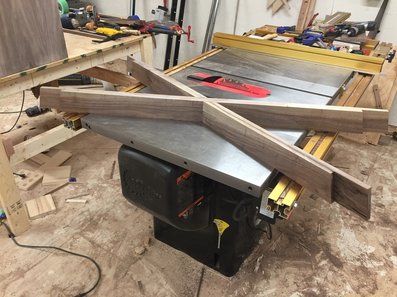
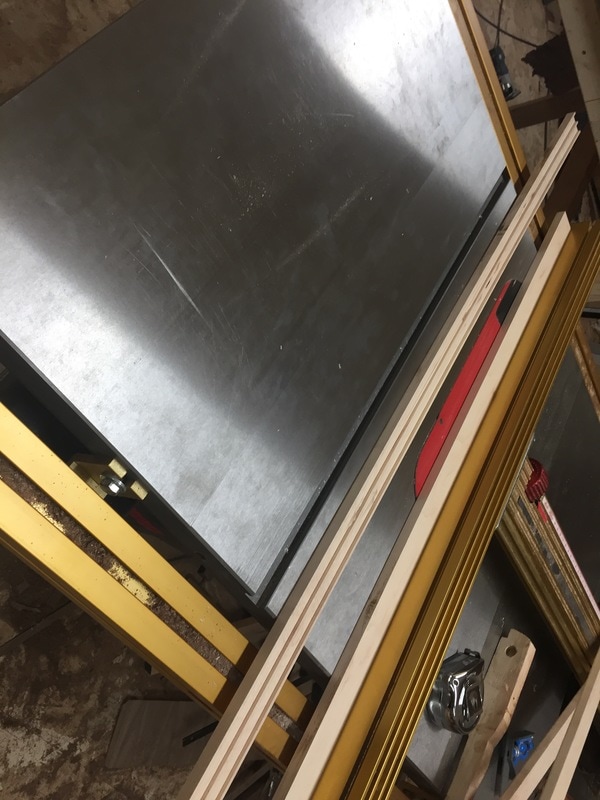
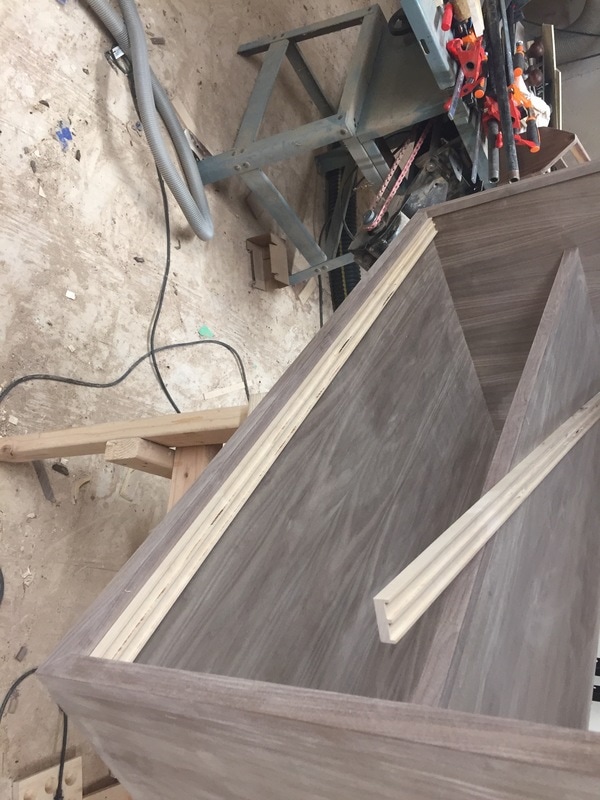
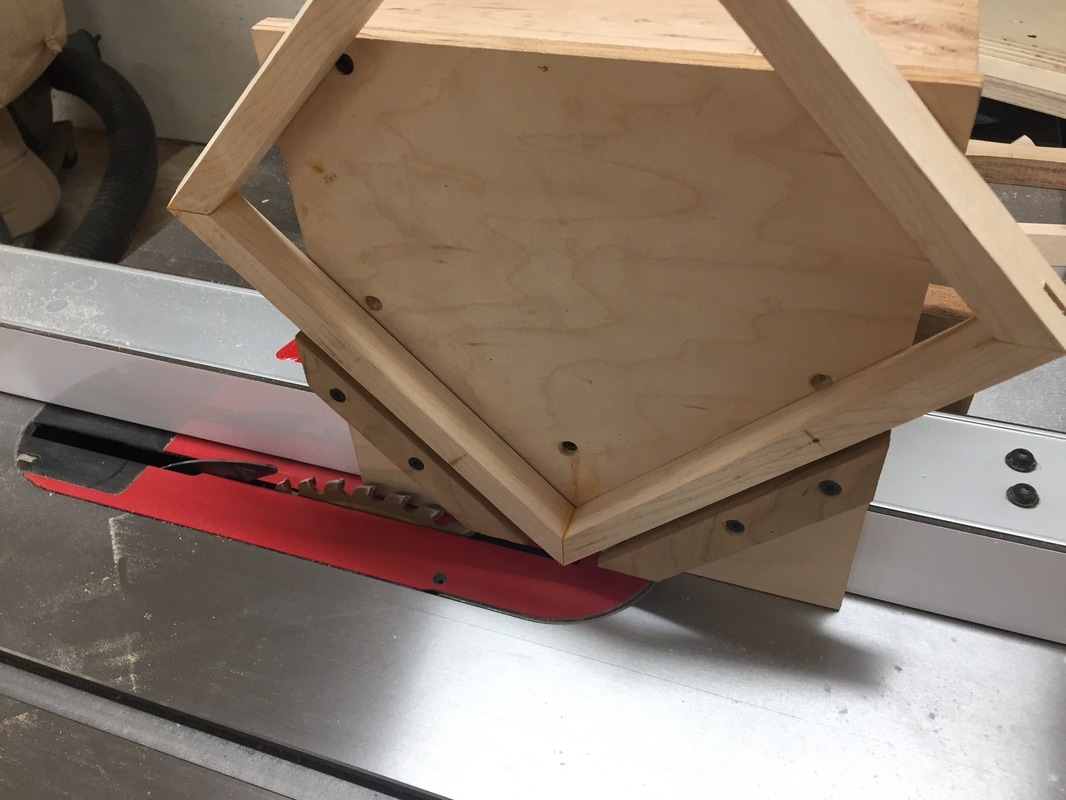
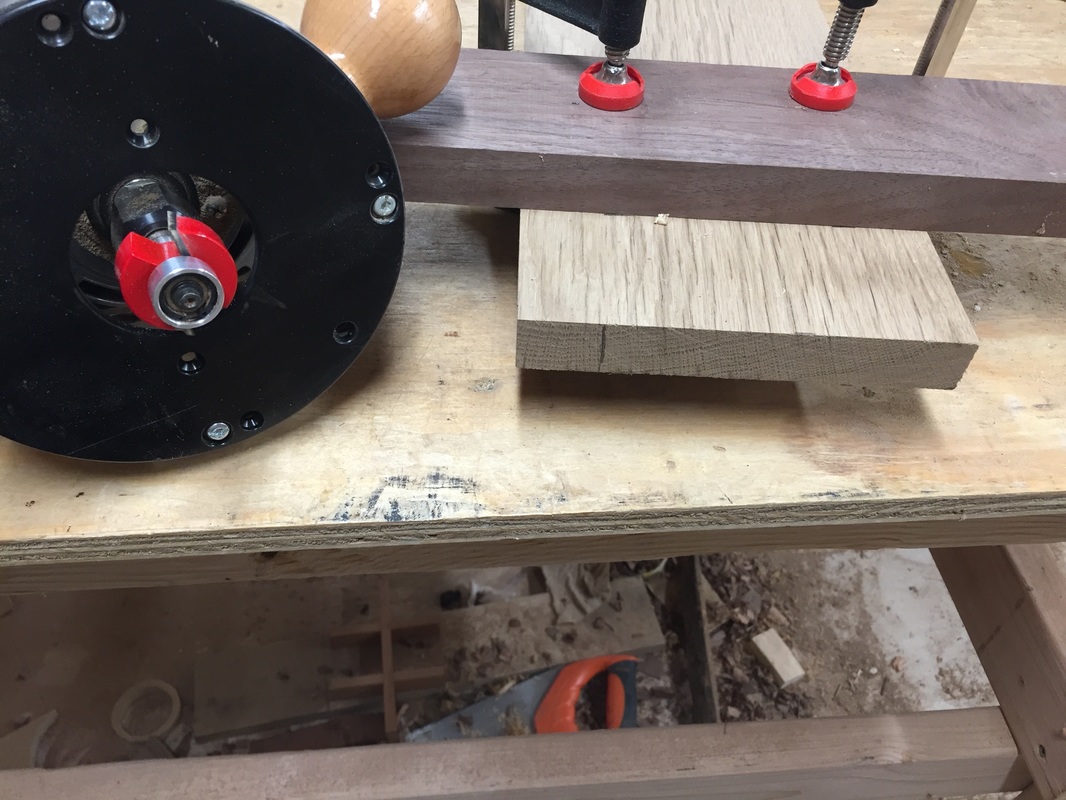
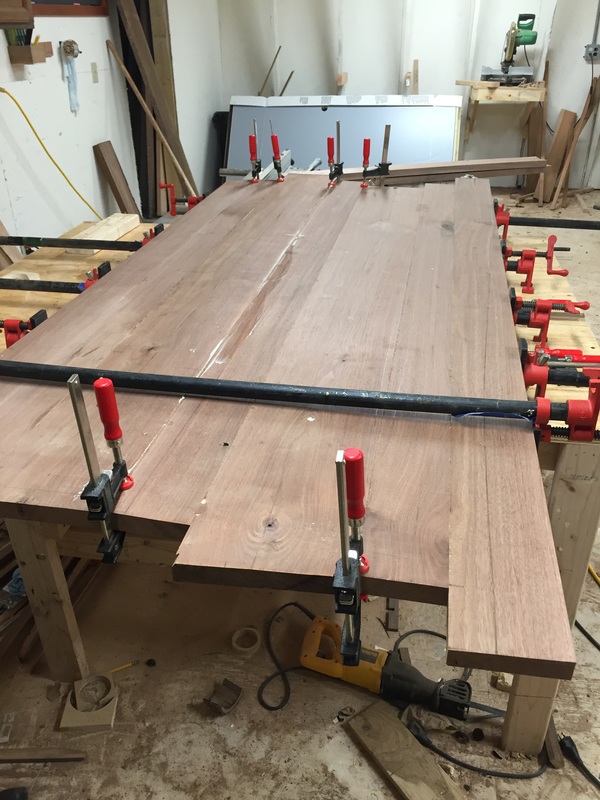
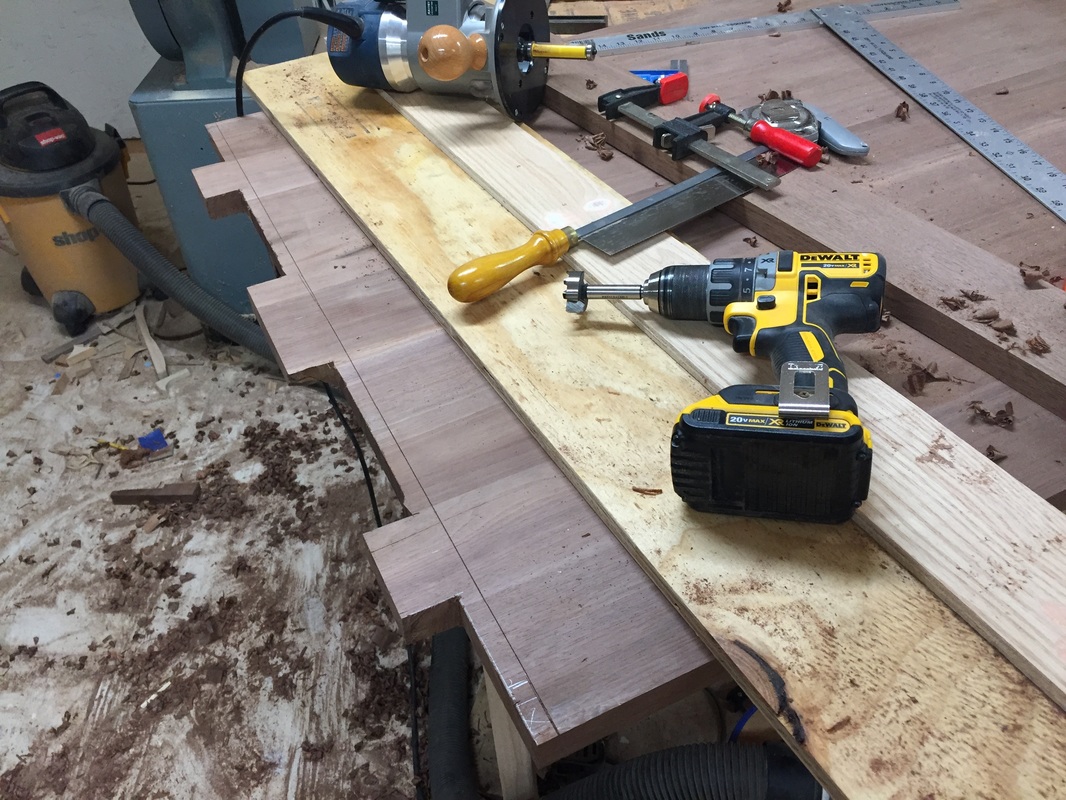
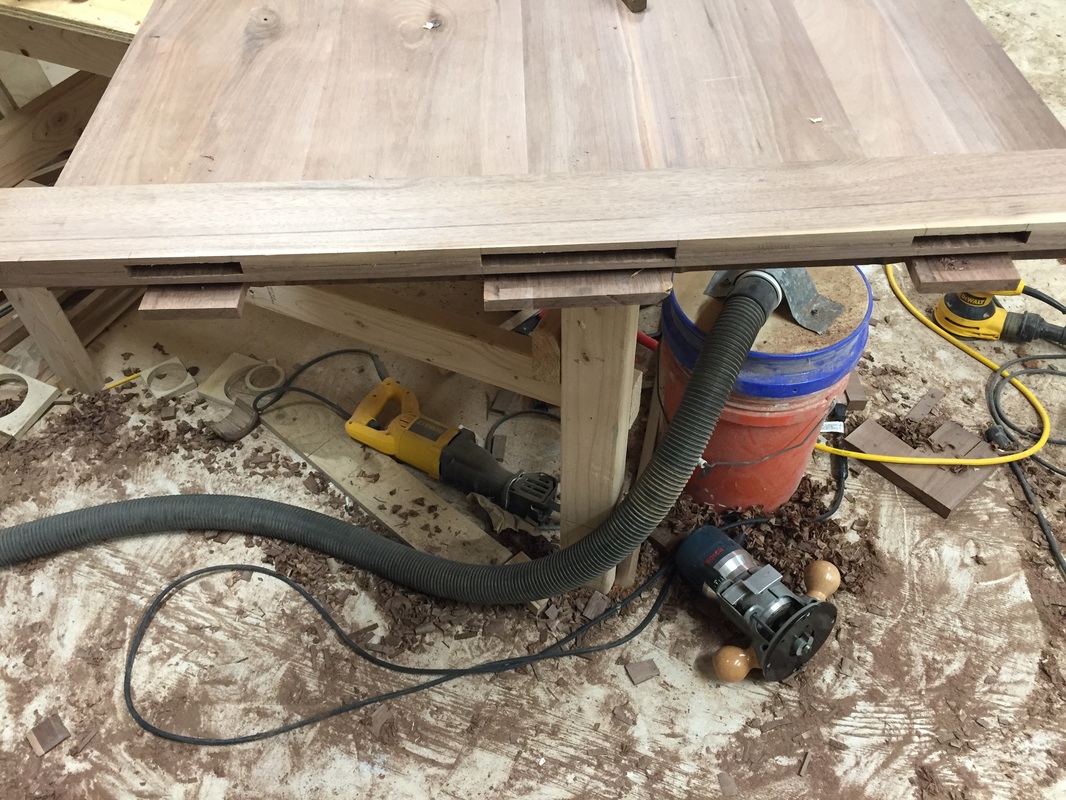
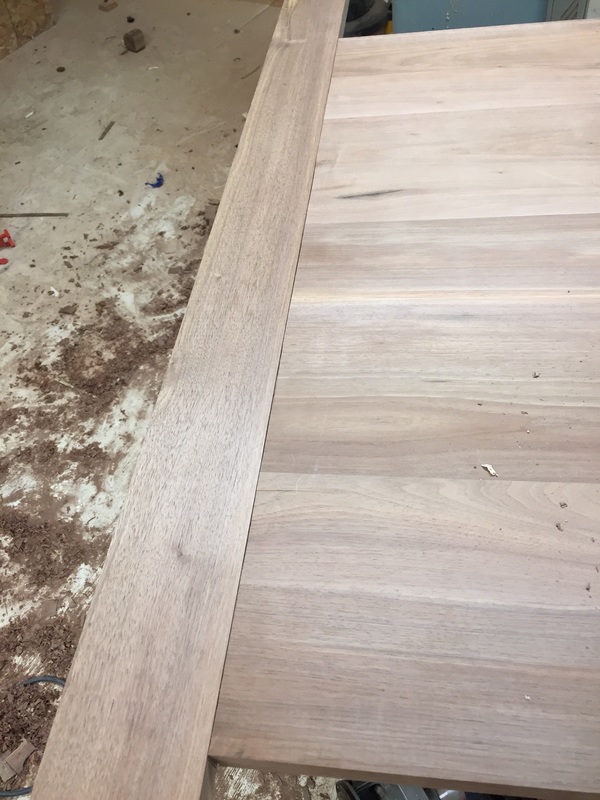
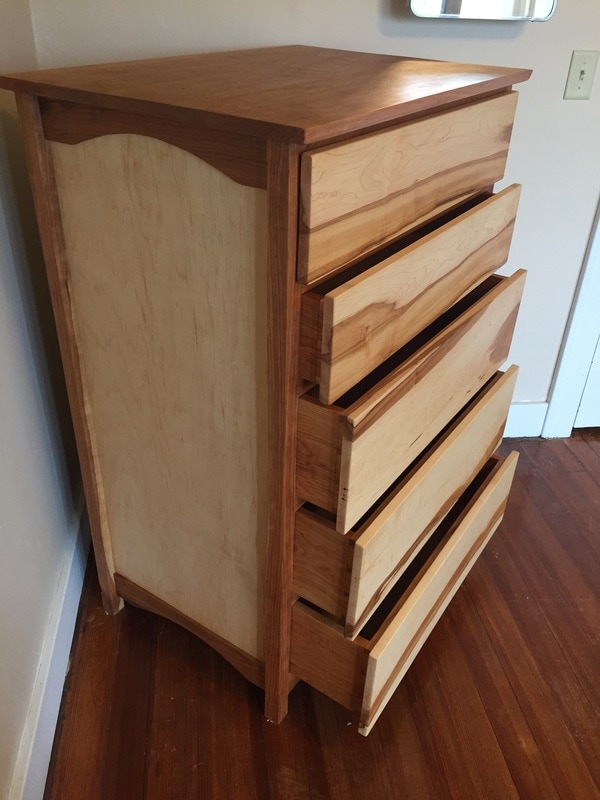
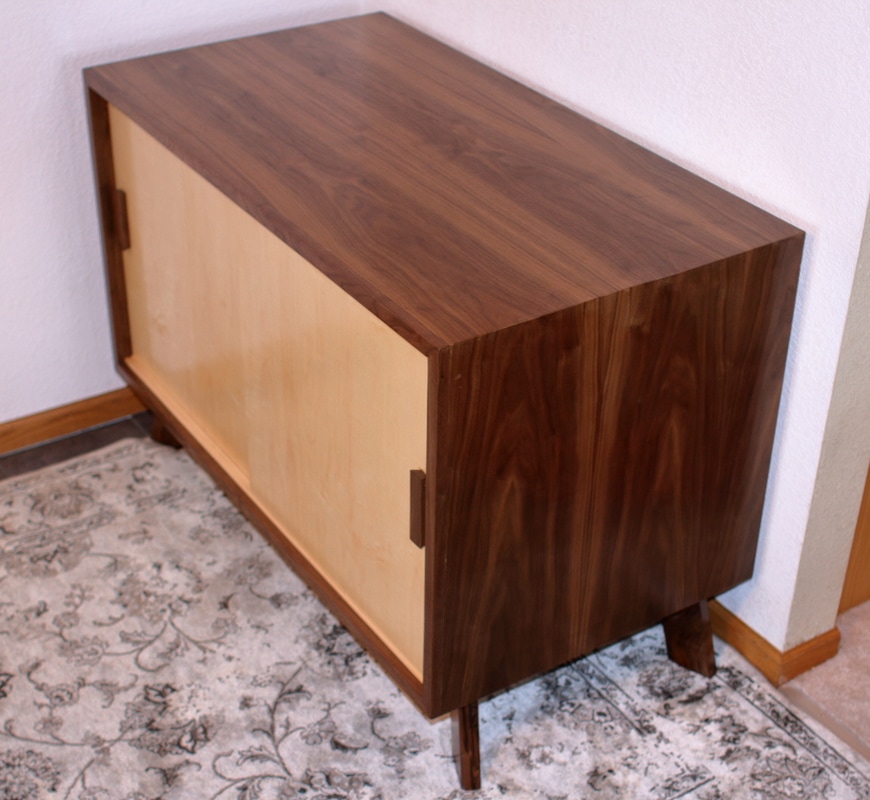
Here's the plan. I don't usually have one of those. Why is this project different? The cabinet portion will be made from a single sheet of walnut veneered plywood. It's a special order, takes 7-10 days to arrive and cost $130 each. I better not mess this up. 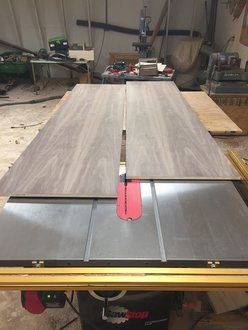 Have you ever cut a 130 dollar bill in half? It's as scary as it sounds. There is almost no waste in this design. The first cut takes the sheet perfectly in half leaving 23-15/16" for each side. This is an 80 lb sheet 4 feet wide and 8 feet long. It isn't exactly friendly to work with. The sides and top come out of one half and the bottom and shelf come out of the other. The waste is just two strips. 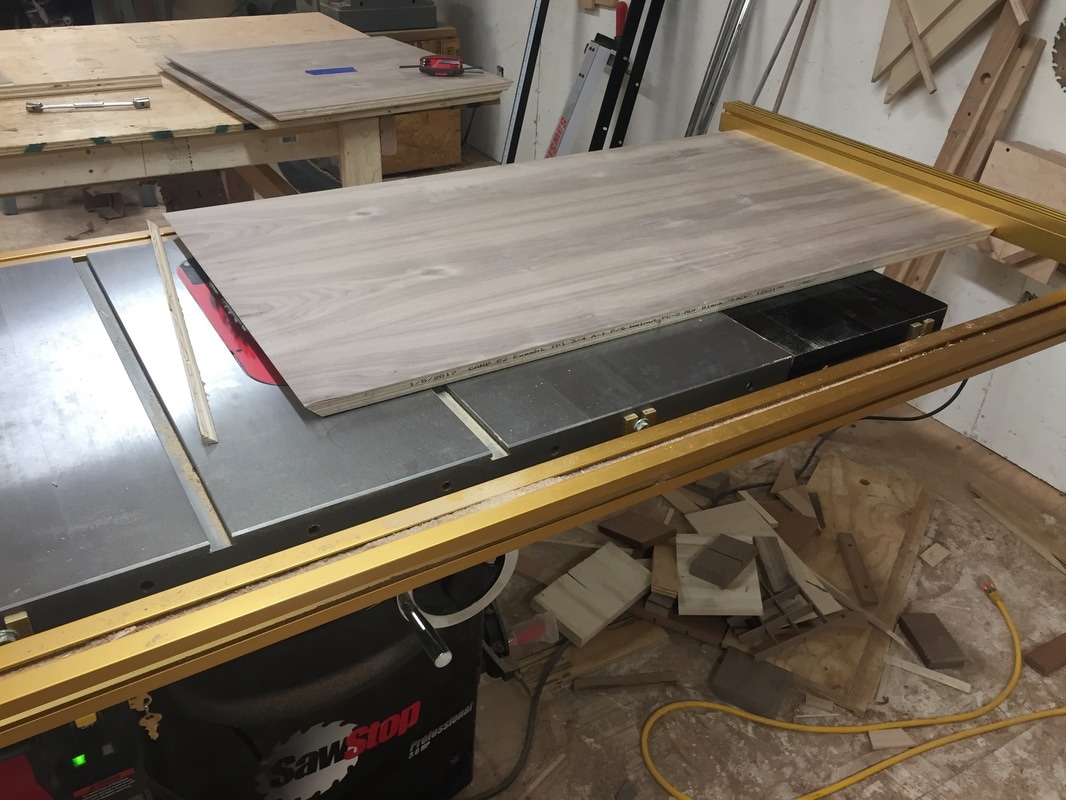 The top, bottom and shelf are about 46" wide. The top and bottom need 45 degree angles cut on each side and they need to be nearly perfect to glue up well with the sides. The only way I have to do this is on the table saw but even then I had to move my fence rails over and clamp the fence directly to the rails, This was a lot of messing around to make a few cuts but I think it was worth it. 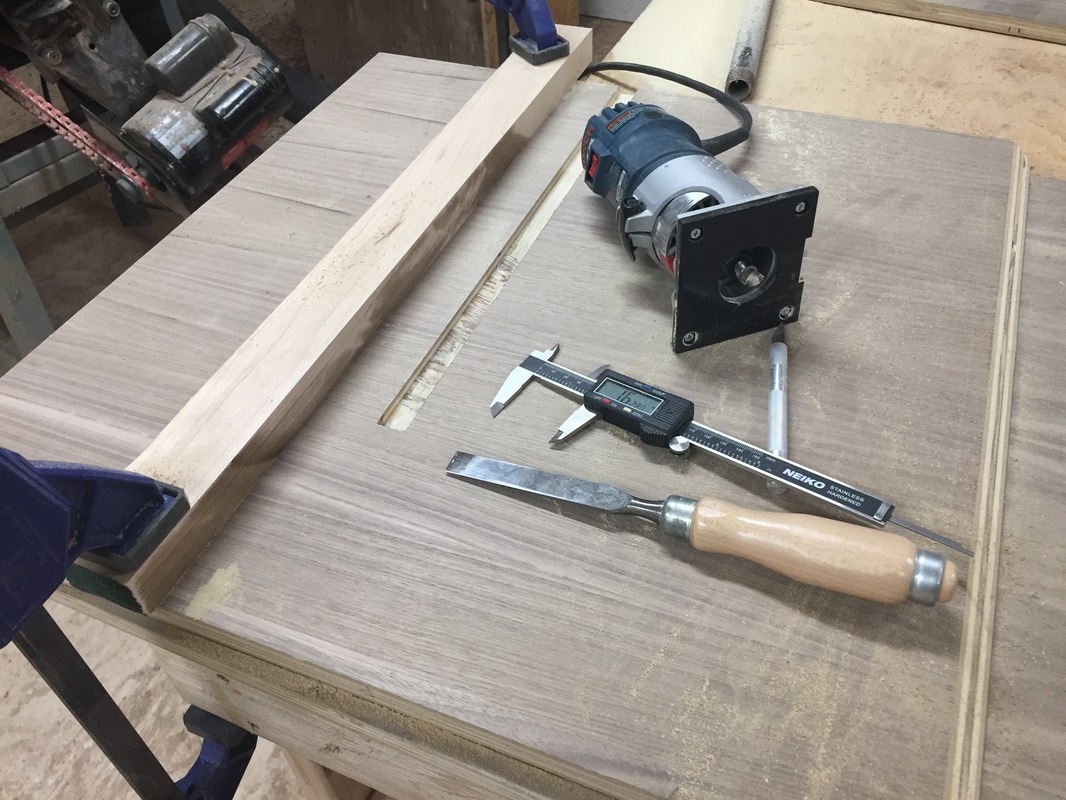 A slot gets routed into each side pice to accept the shelf and the corners are cleaned up with a sharp chisel. 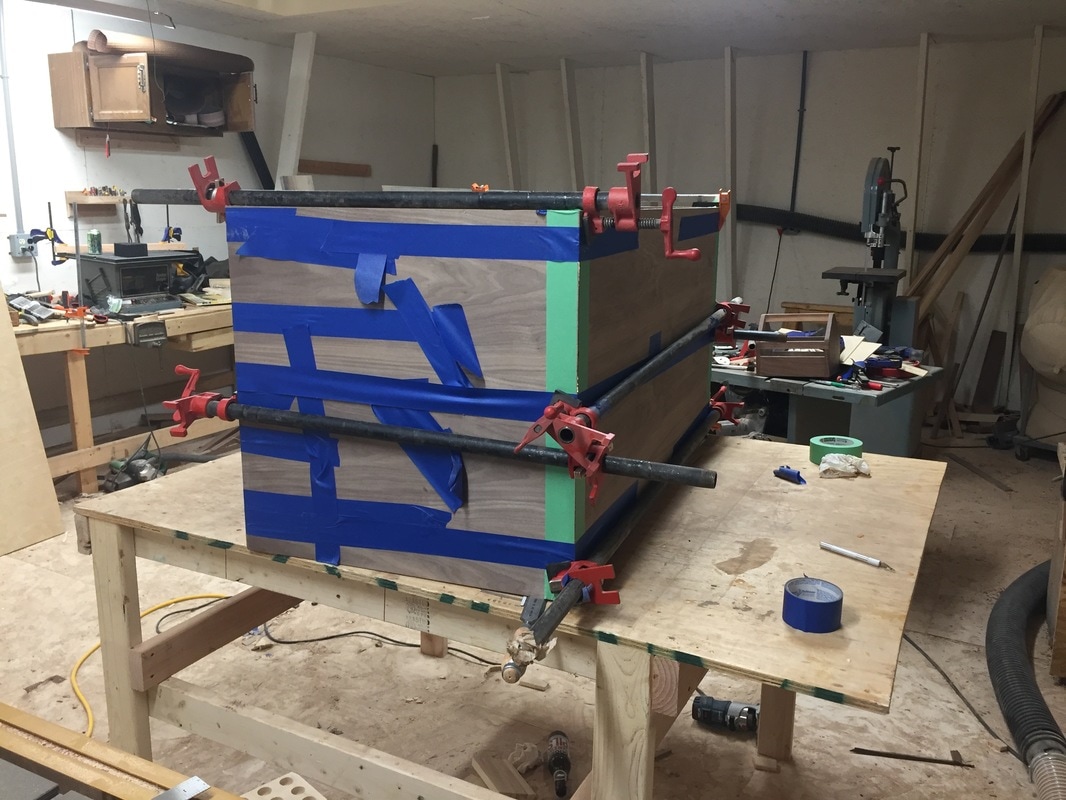 This escalated quickly... I tried "the tape method" of glueing this up and things got out of hand really quickly. On such long pieces tiny errors multiply and gaps start to grow on all the corners. I ended up grabbing a few pipe clamps and still used about half a roll of blue tape. I might need to try something different next time. 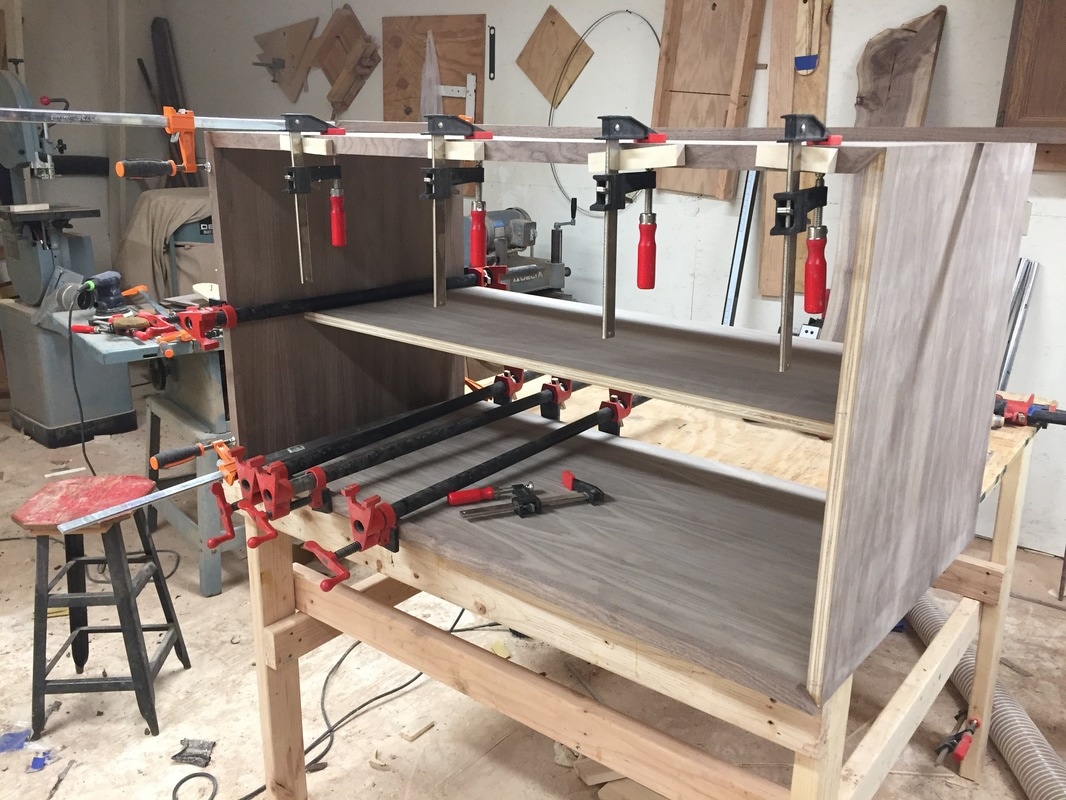 Next I worked my way around the front to add the face frame. These are all just simple miters and working it around gives me a chance to tweak each cut to be just right.
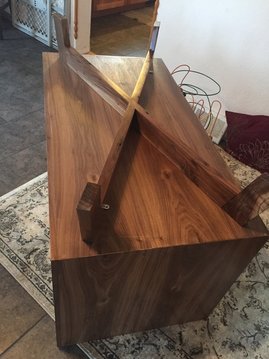
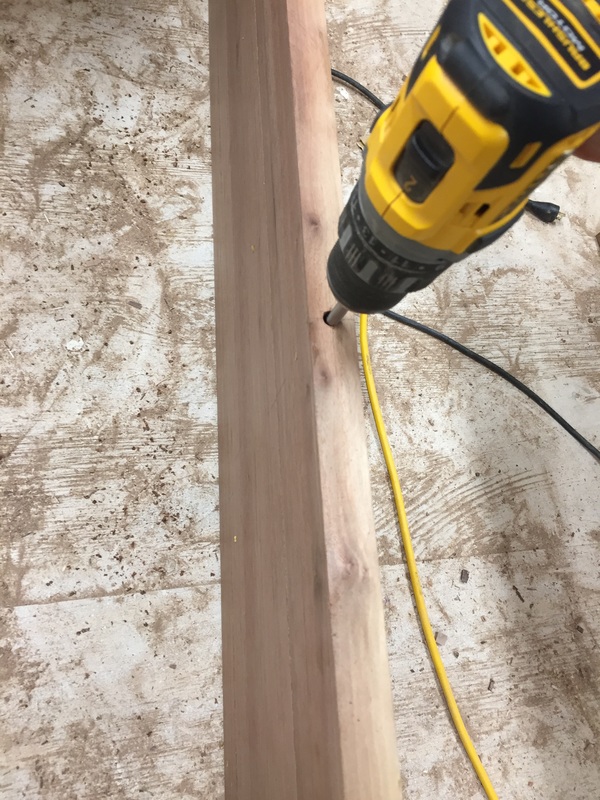
The base is two pieces of walnut with small legs attached with half lap joints. There is a notch cut in each cross piece so they slide together. I like how this lifts the credenza off the floor just a bit and adds another dimension to the look of the piece.
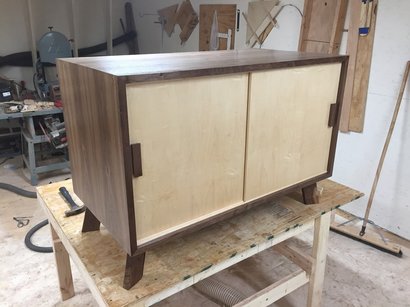
Next I needed a way for the doors to slide side to side. I wasn't quite sure how this was going to go together but ultimately decided to make some tracks out of maple. It's hardness was a big part of the choice and the doors are maple so it was an easy choice. These are basically just 1/2" stock with two groves cut just over 1/2" wide so the panels will slide freely. The top rail is attached with 4 screws so I can get the doors in and shim it to exactly the right fit. 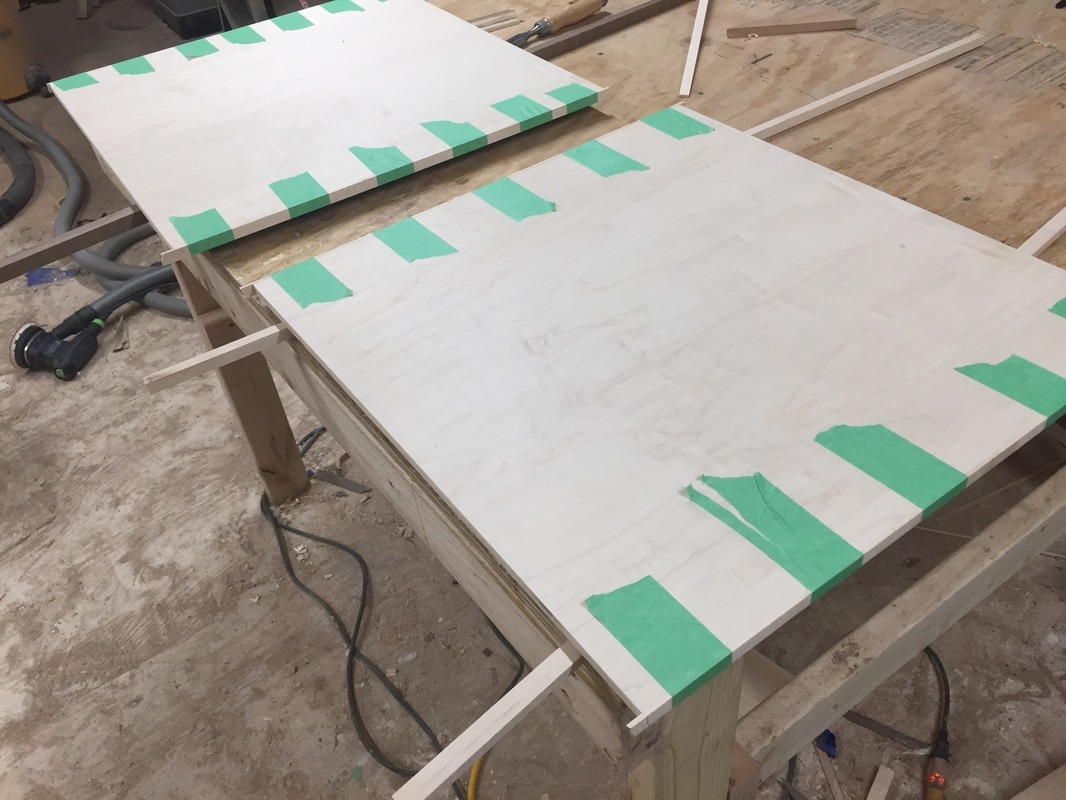 The doors are cut from a sheet of 1/2" plywood and maple edge banding is used to cover the edges. Later, walnut handles were glued to each side.
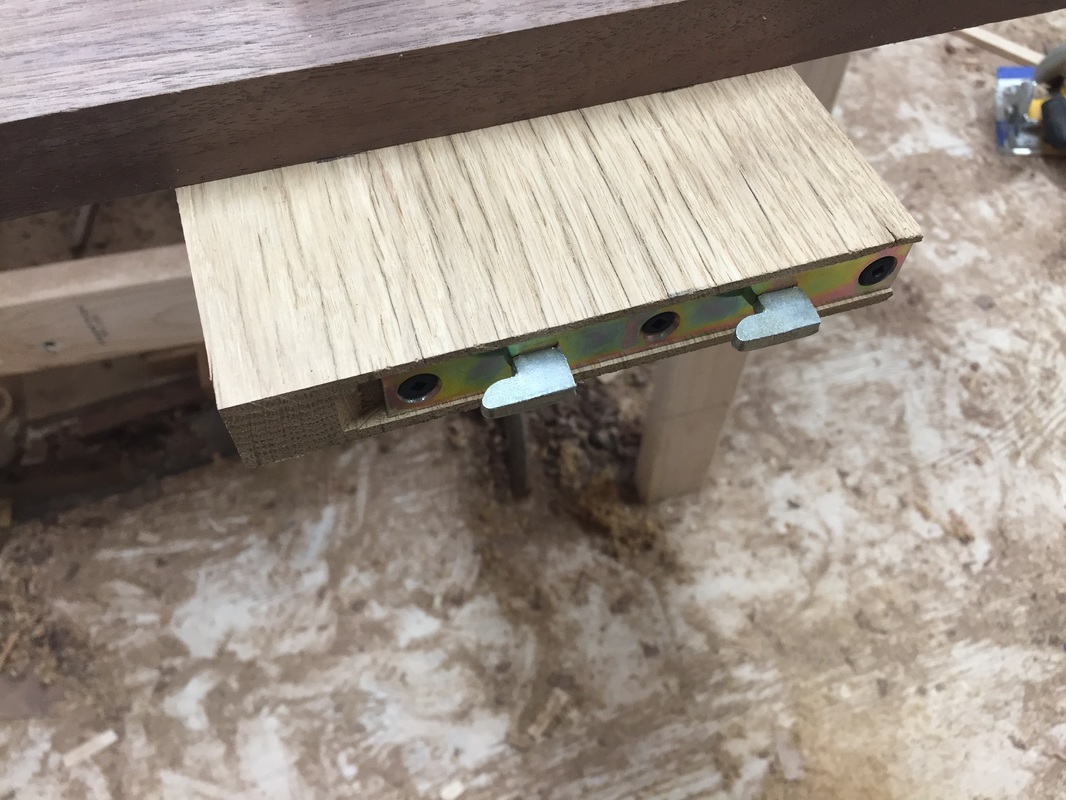
All parts got 3 coats of oil based polyurethane. Once inside, the base was attached to the cabinet with 4 figure 8 desktop fasteners. The completed credenza turned out better than I expected. I really like how smoothly the doors slide and the combination of walnut and maple. The handles fit the style perfectly and compliment the angles created by the base. It adds a ton of storage to our dining room / play area and allows for the area to clean up very nicely. 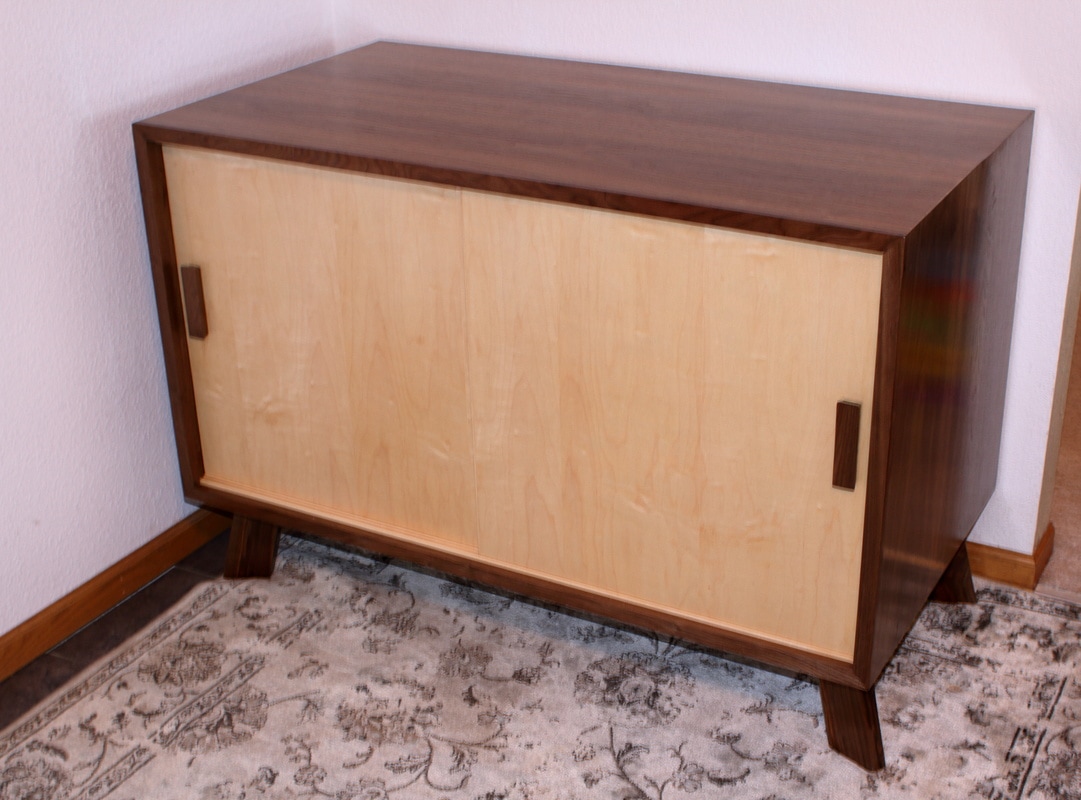  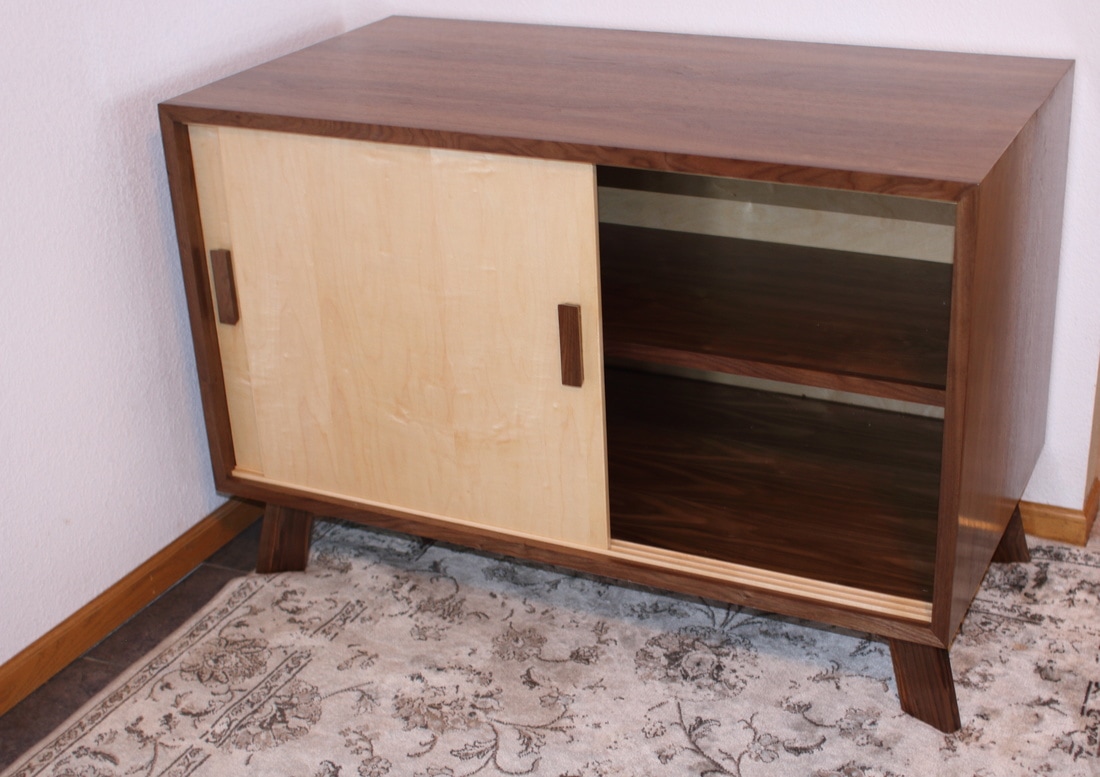 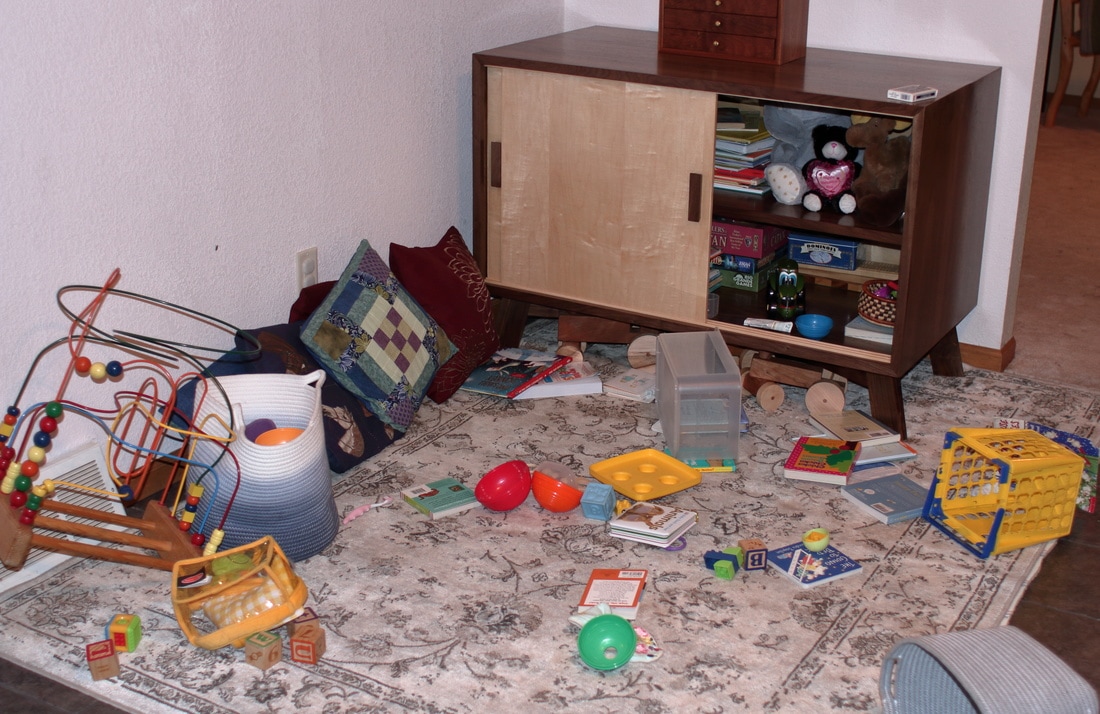 And this is how it looks after a vigorous 30 minute play session...
0 Comments
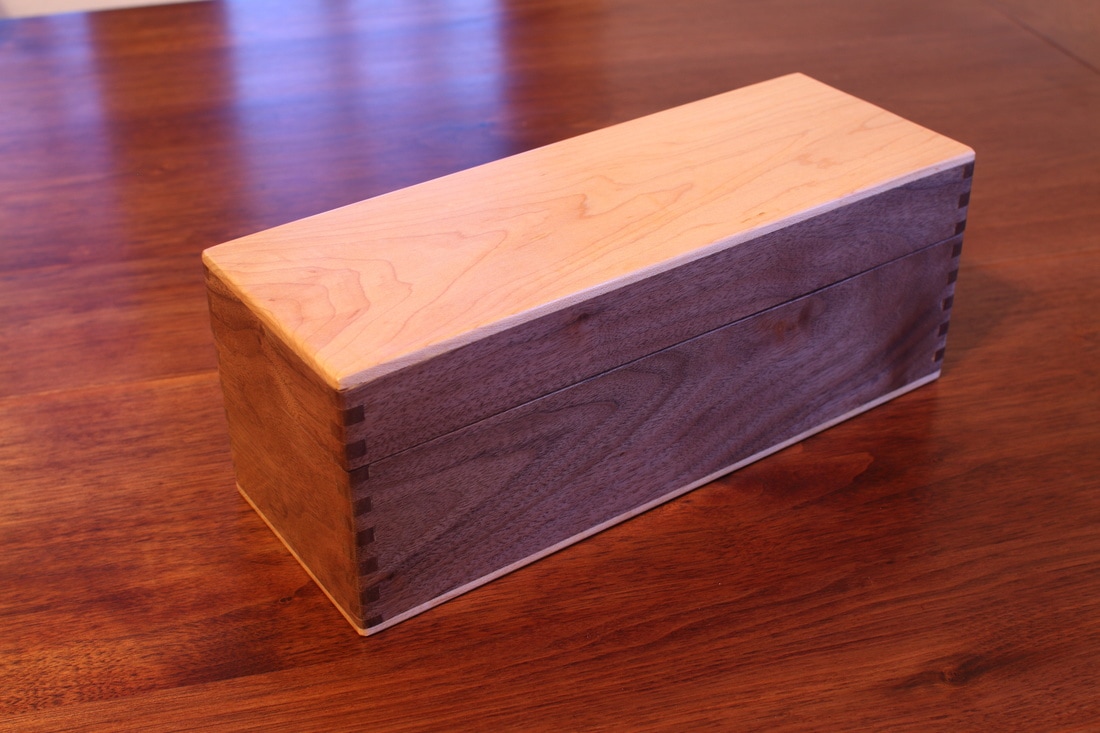
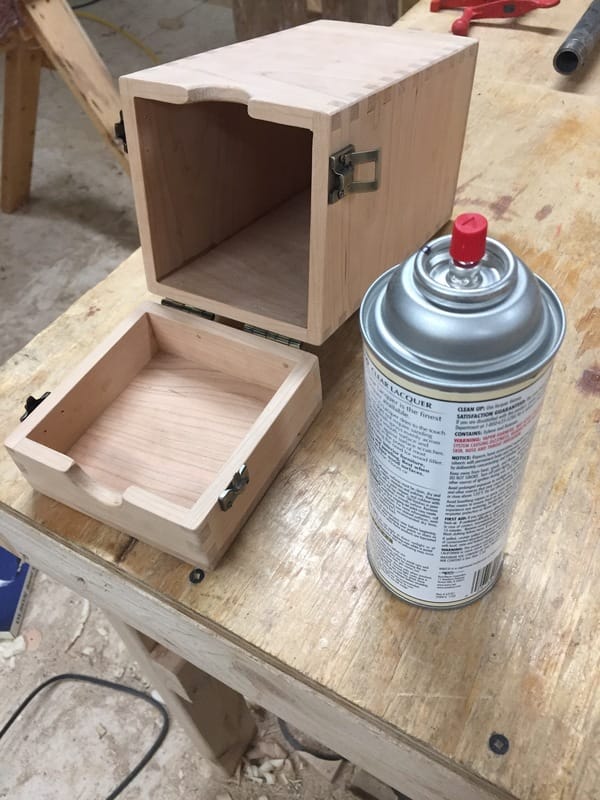
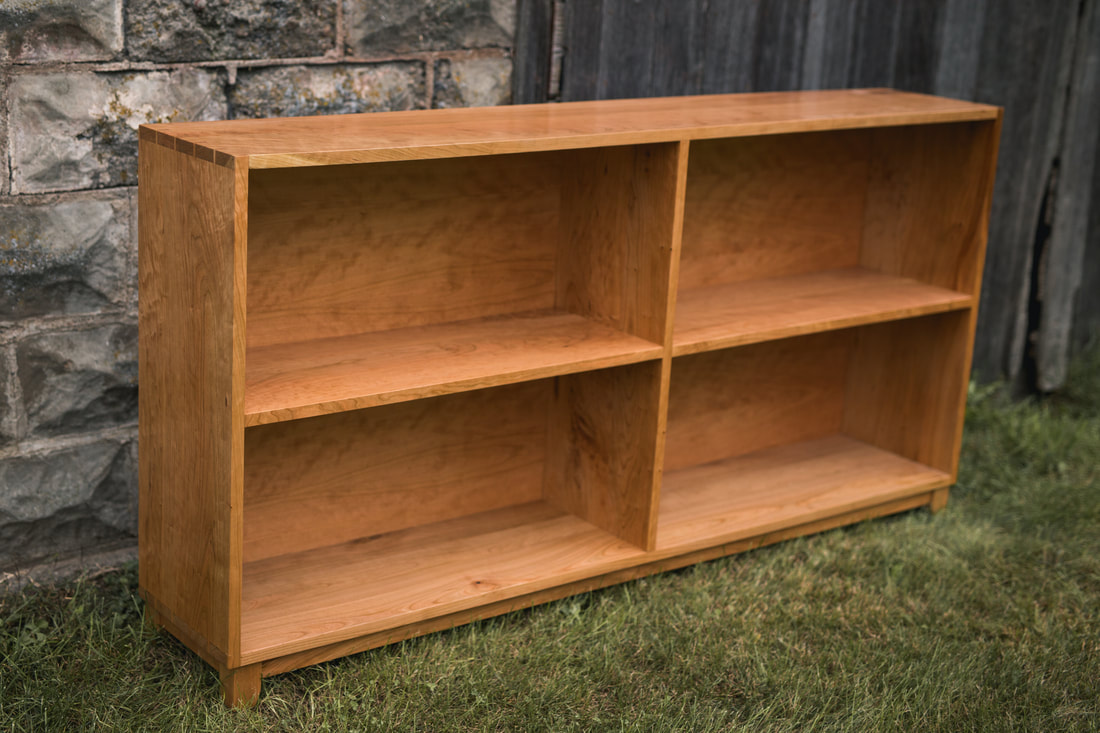
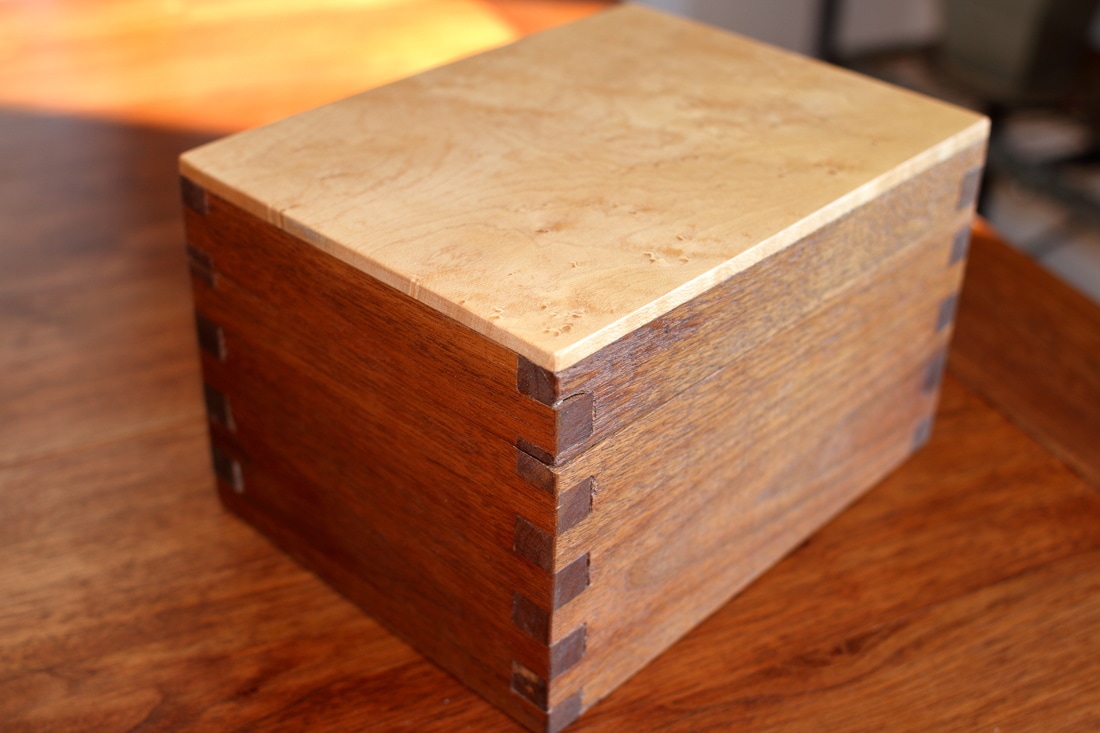 This is the box that started it all. It has many flaws. The box joints were so tight I had to pound them together with a mallet. There is chip-out on on all the corners and the top half of the box doesn't fit quite right. None of that matters though because I learned so much on this project. Almost all of woodworking is just making different kinds of boxes. Because of this, building small boxes is one of the best ways of to learn woodworking. Most only take a couple days to complete and they allow you to practice all of the techniques of a large project without significant material commitment. With just a single board, or even scraps, you can build some pretty awesome boxes.
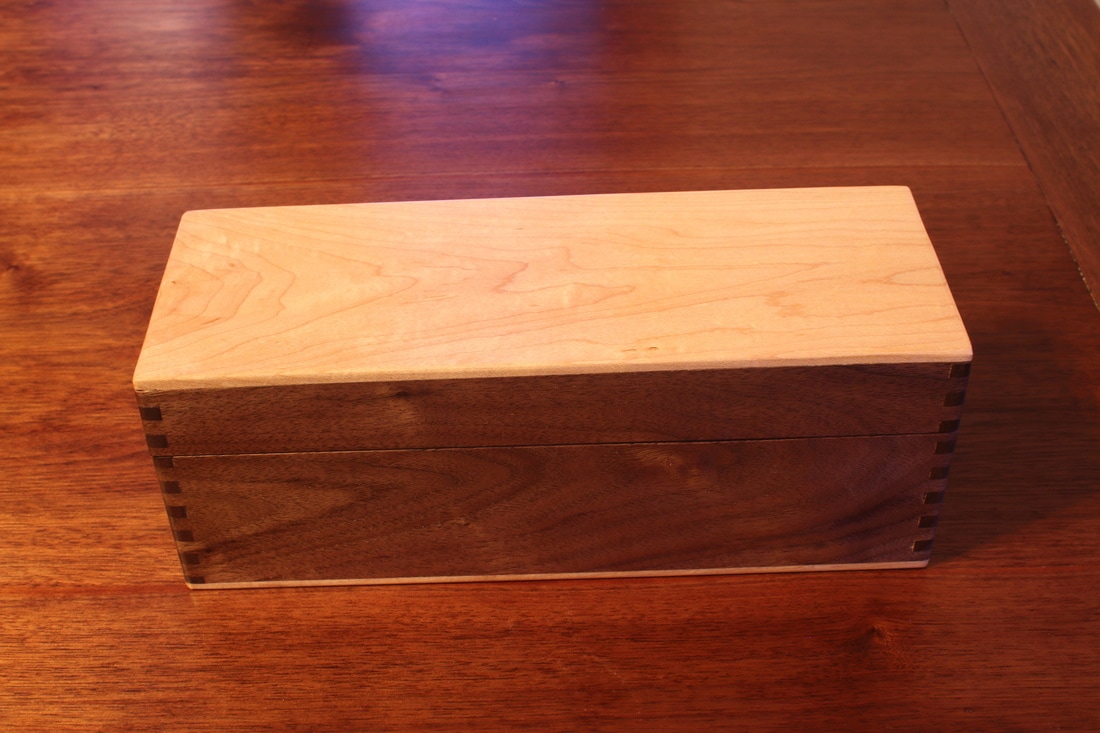
This is a tea box I made almost exactly a year later. It's still not perfect but there are many improvements on this over my first one. One of things I've learned over the last year is how important proportions are in box making. My first box was made with 1/2" material. It looks a bit bulky and feels chunky. By planing the material to 1/4" the box gets a light feel but still doesn't feel fragile.
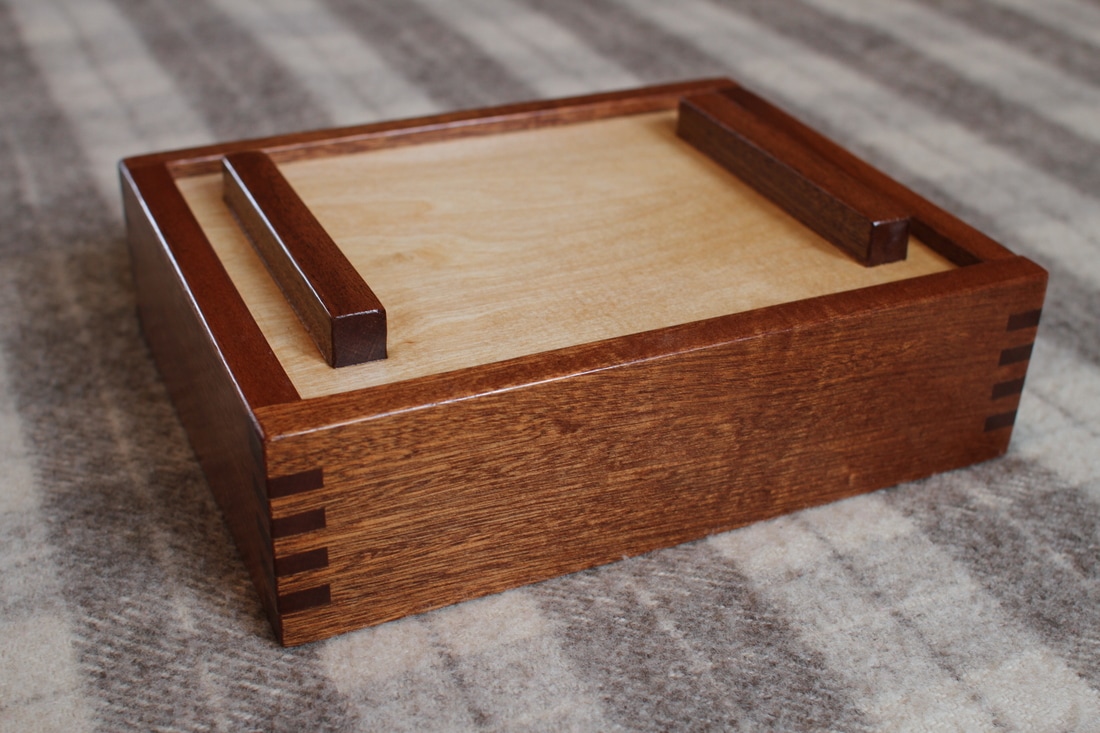
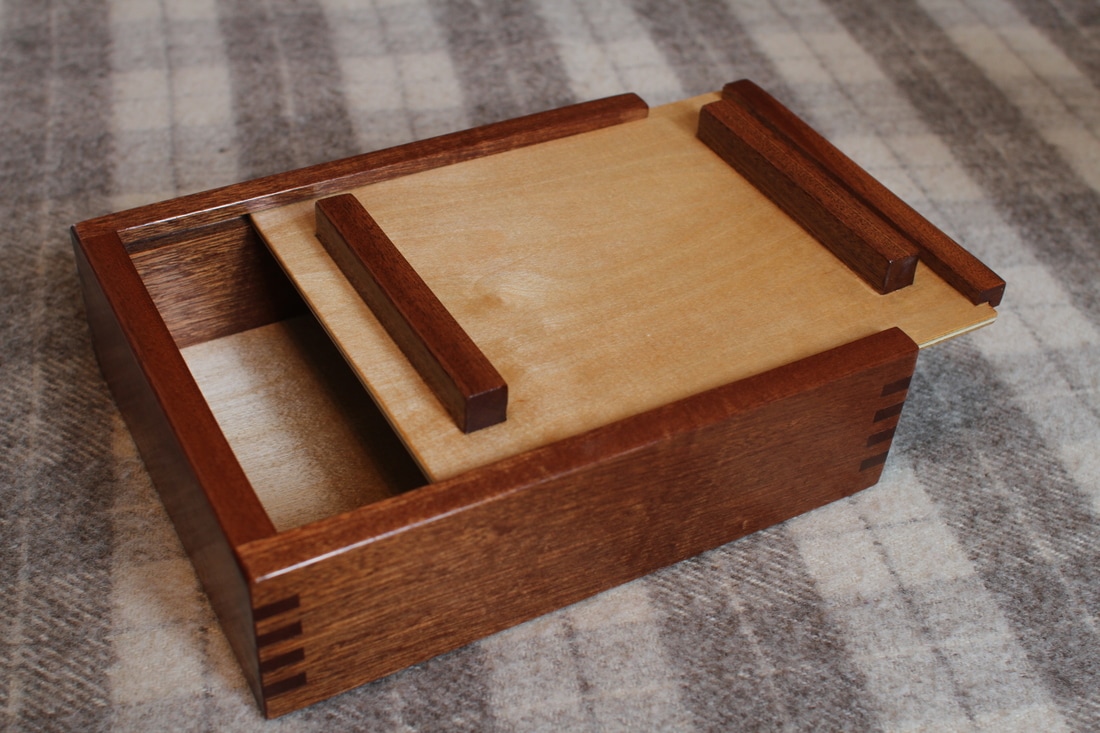
I don't always know what I'm going to make when I'm out in the shop. This box was born out of a new box joint jig I had just built and a bunch of scrap mahogany I acquired from our local door and window shop. Inspiration for the box came from a cigar box.
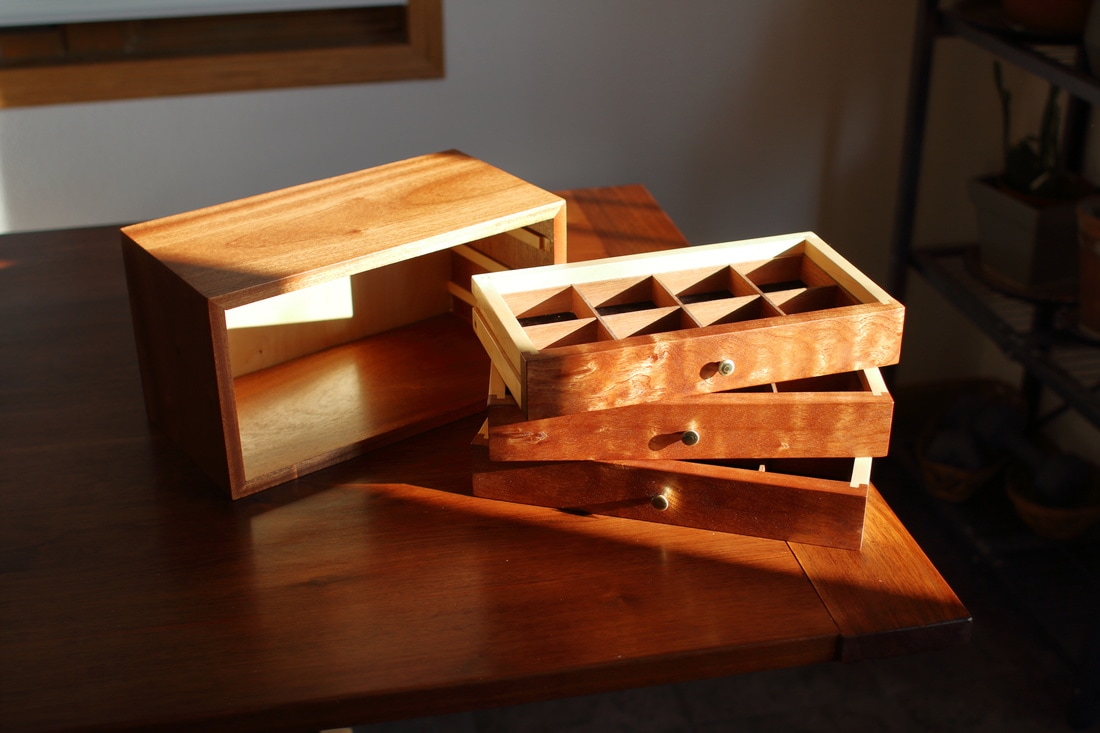
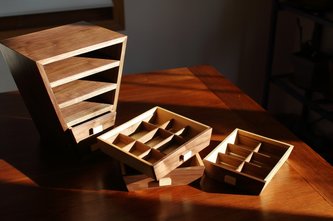
This jewelry box came from that same pile of mahogany scraps. The drawer fronts started as a single piece of very figured mahogany. It was the only piece of figured mahogany I could find in the entire pile. Light dances off drawer fronts and looks like a hologram when rotated to different angles. The drawers are lined with velvet to protect the jewelry inside.
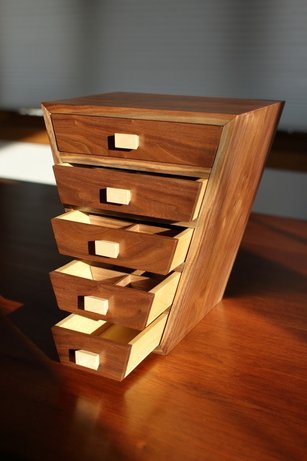
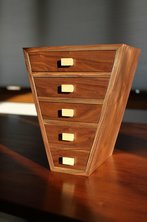
This one was just plain fun. Everything is at a 15 degree angle so the challenge was getting all the pieces to line up just right. Some people have said it looks like something out of Alice In Wonderland.
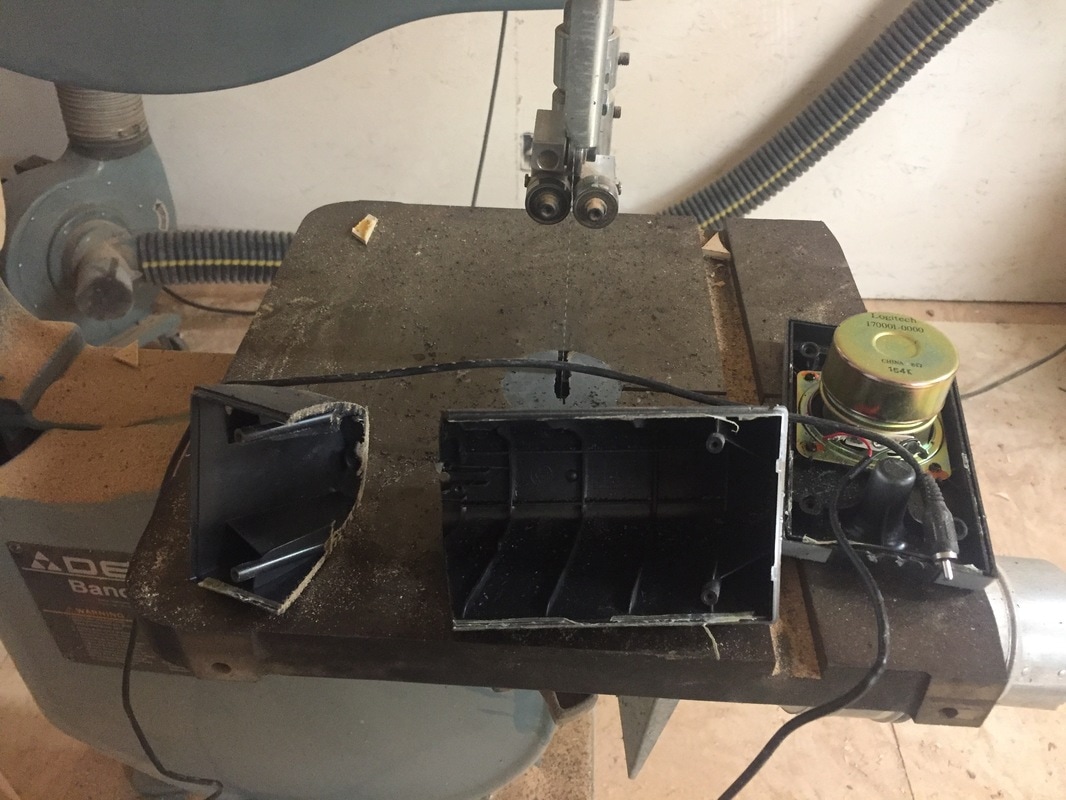
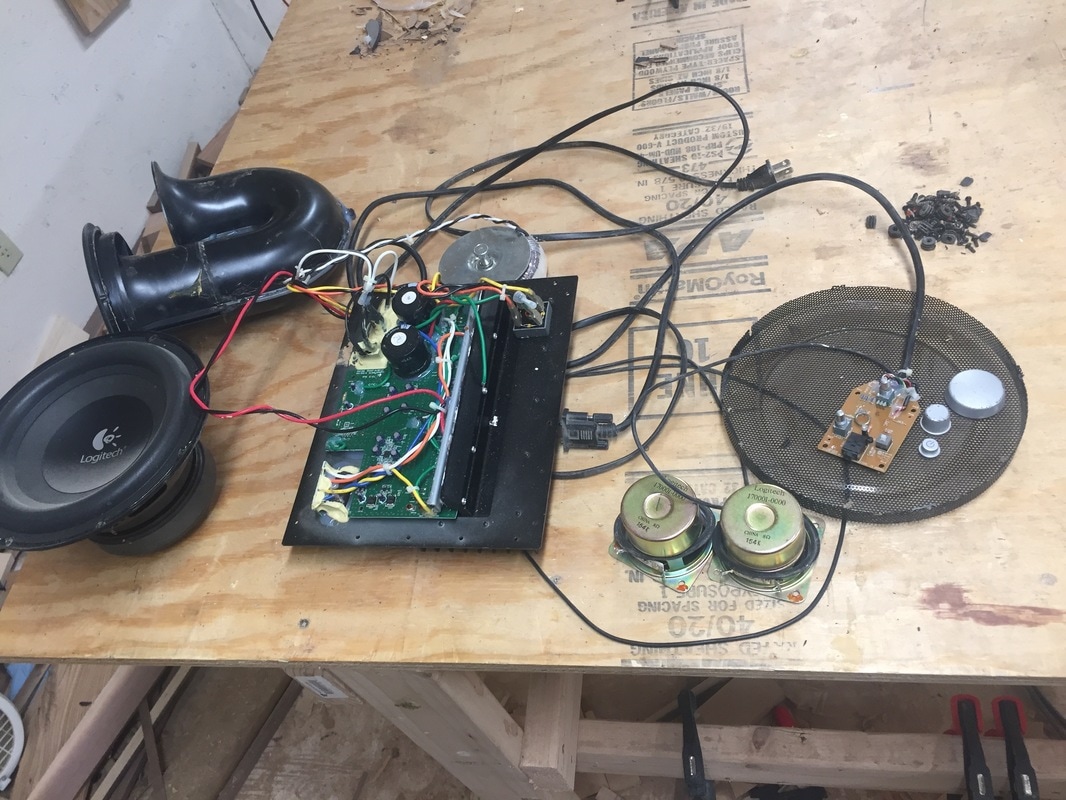
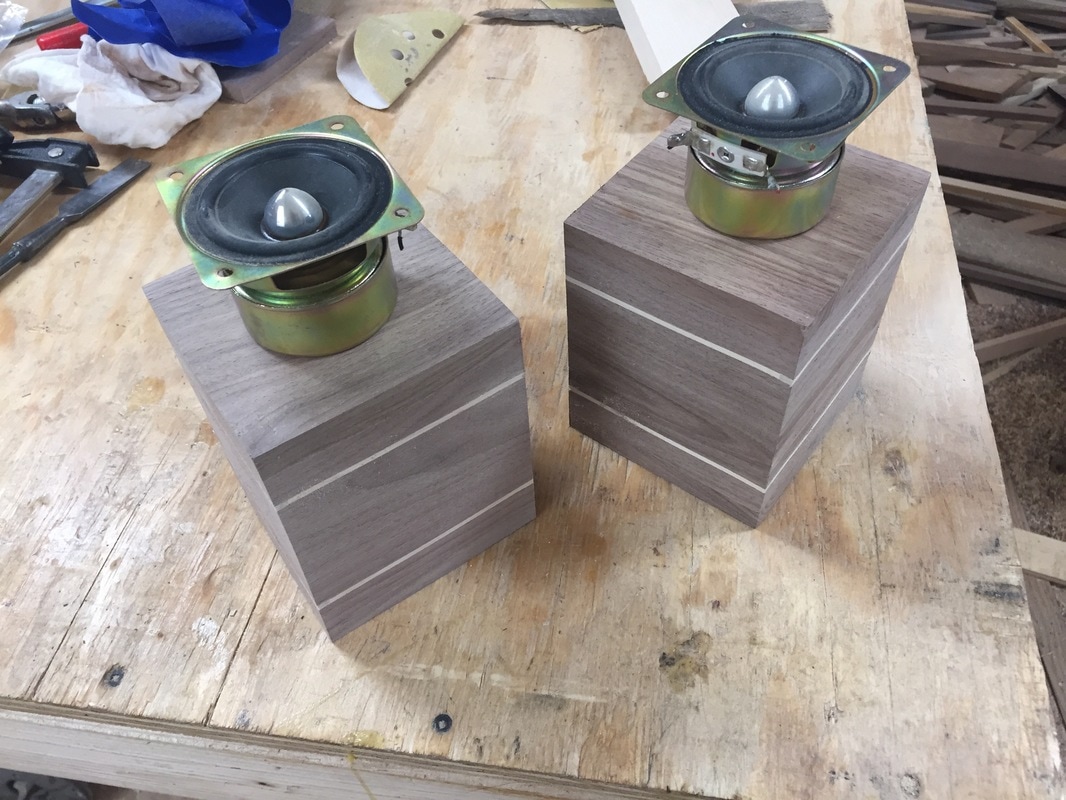
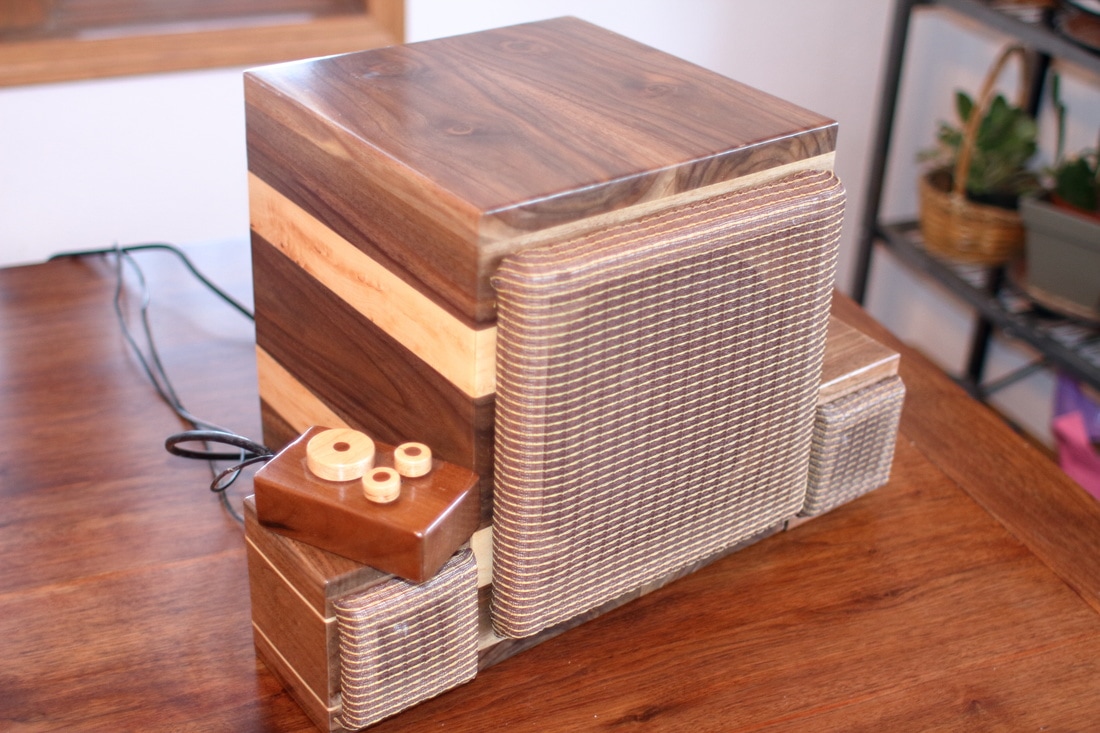
Each of these boxes taught me a new skill in woodworking, a new technique, a new way to use a tool or a new jig. The required attention to details on these small projects is multiplied because of their size. On a larger project small errors go unnoticed but on projects that can fit in your hand everything must be almost perfect. In the end these are all just boxes, but building them has been an integral part of my woodworking development.  "Our stereo is our most prized tool" - Nick Offerman I received Nicks new book for Christmas. It is jam packed with 344 pages of shop tips, jokes and overall is a great piece of well written literature by the Parks and Recreations star Nick Offerman. It's impossible not to read the book without Ron Swanson narrating it my head. The beginning of the book goes into detail on all of the shop tools he uses. He takes two full pages just to talk about table saws. At the end of the section he says the most prized of all of the tools is his stereo. This is my stereo. 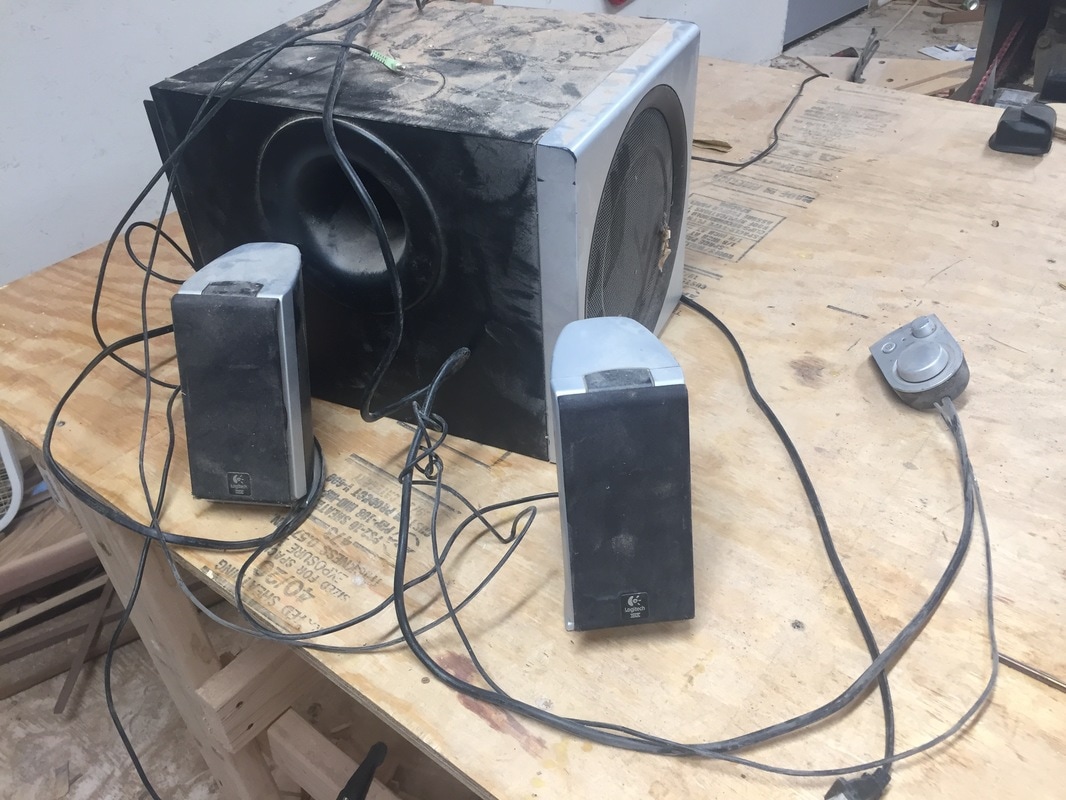 Believe it or not, these are the same speakers. I got them in 2005. They've always been really good to me, but they don't look very good.
I had to cut them in half to get the speakers out. No turning back now. Here is a pile of speaker guts.
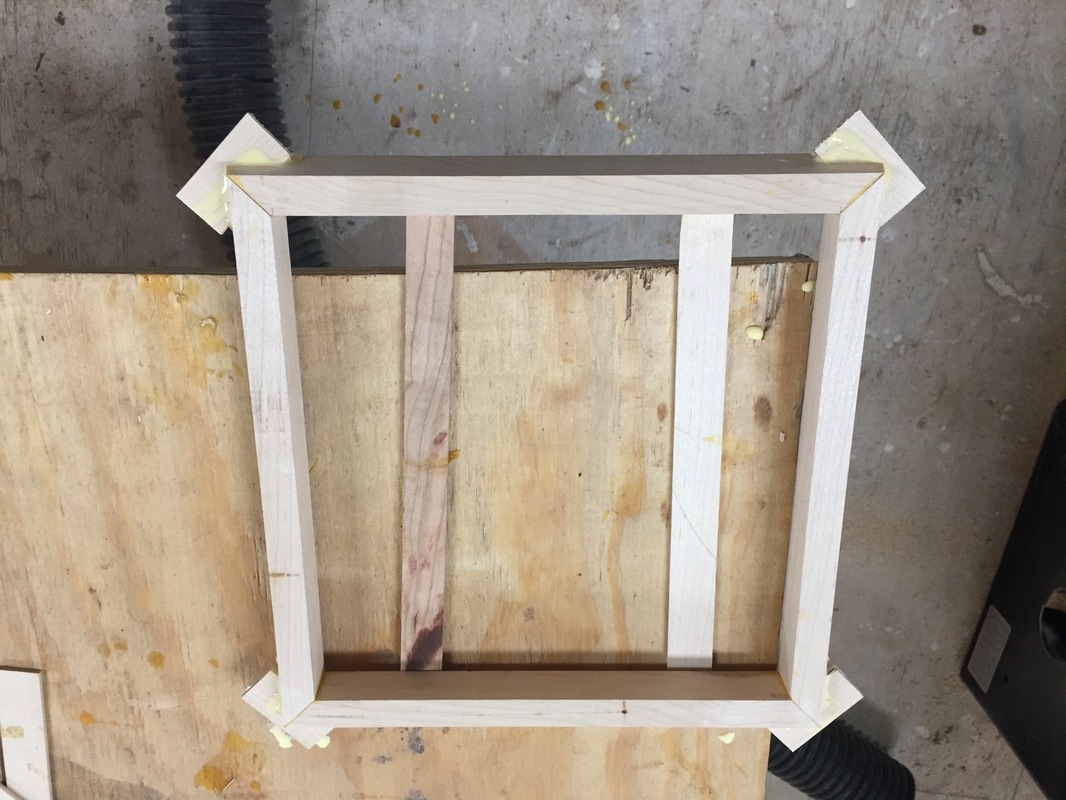
Here's a neat little trick for glueing up mitered boxes. After all the pieces are cut at 45 degrees tape the corners together and put glue in the corners. Fold up the box and tape the last corner. If it needs more pressure, go around once with tape to close it up. Clamping mitered boxes is almost impossible.
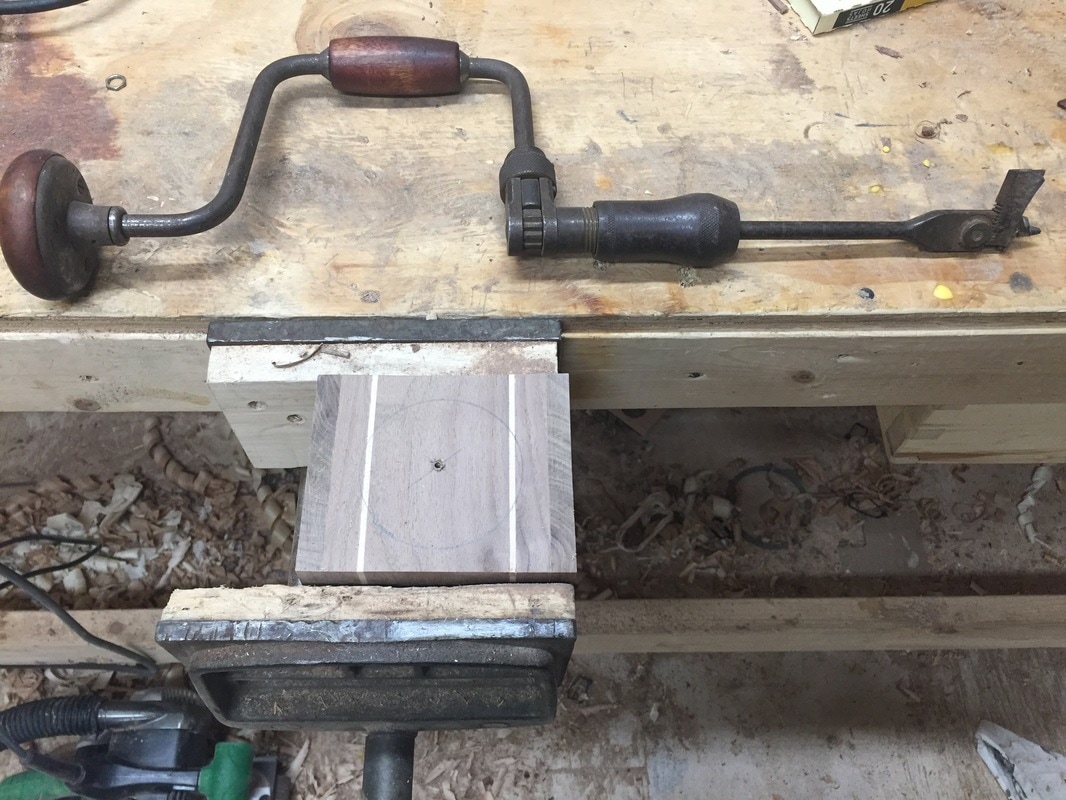
Next I cut a groove all the way around it on the table saw and inlayed some maple to add a stripe. Just like your old Pontiac in high school, these stripes give it 10 extra horsepower and make them go much faster. The only drill bit I had that was the right size was for this old brace. Time for arm day.
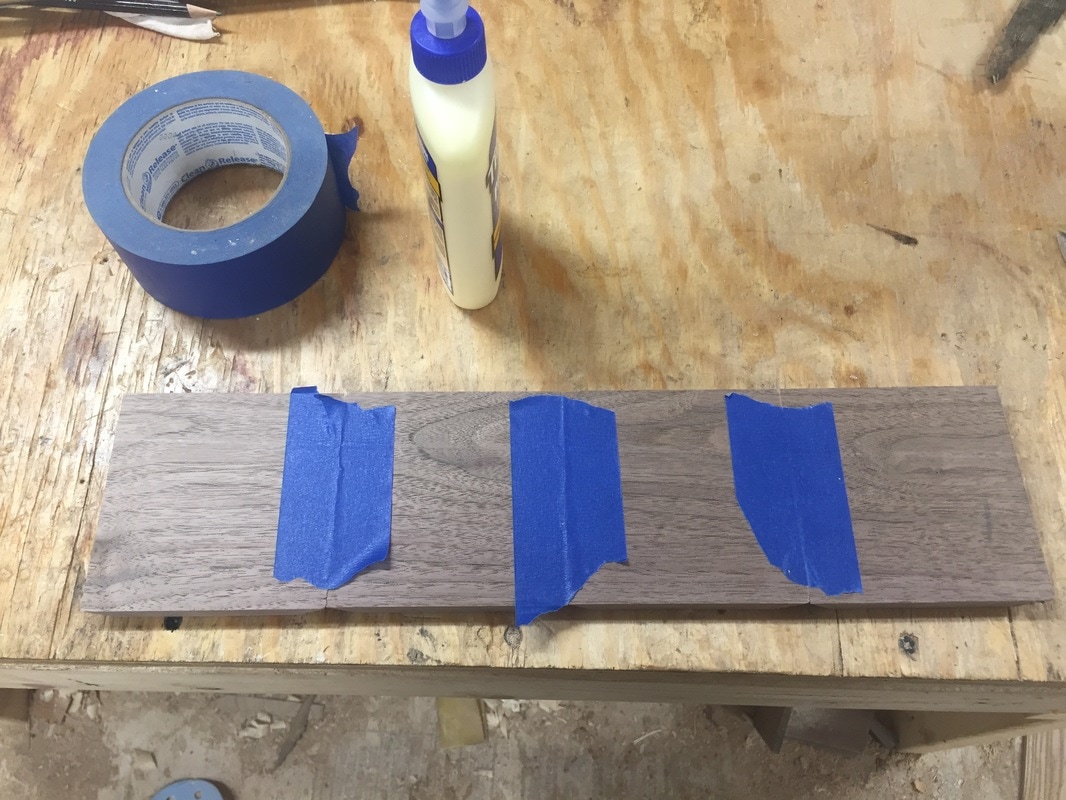
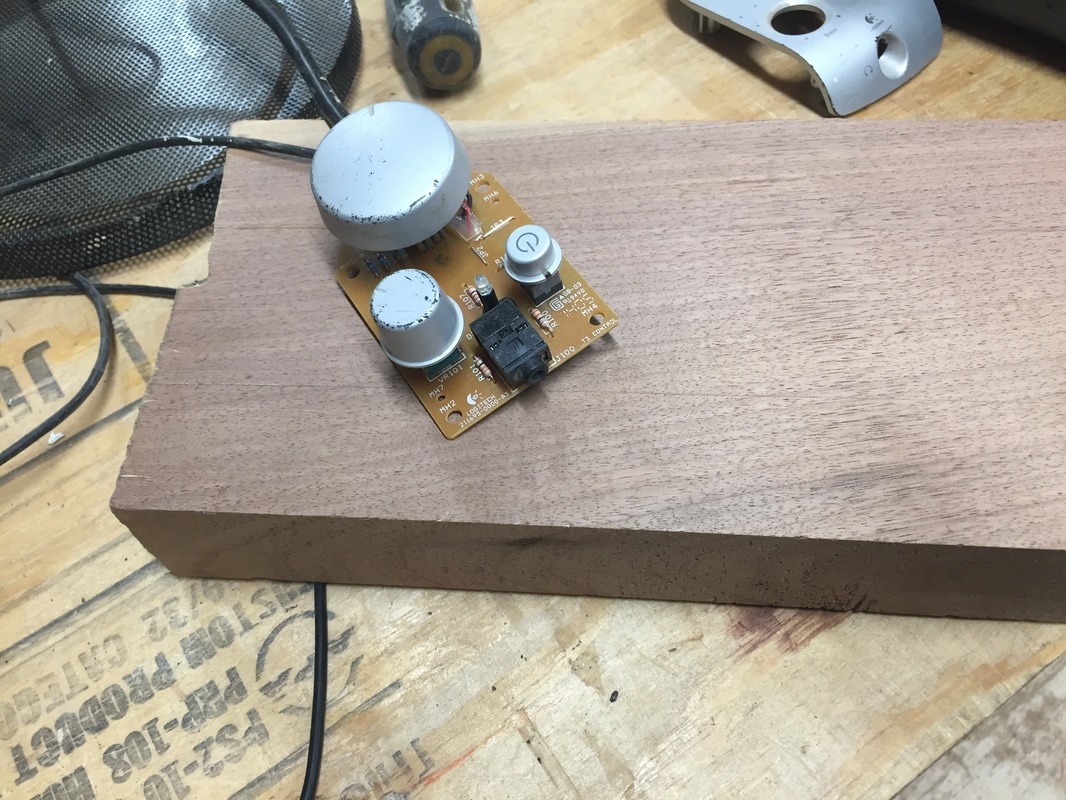
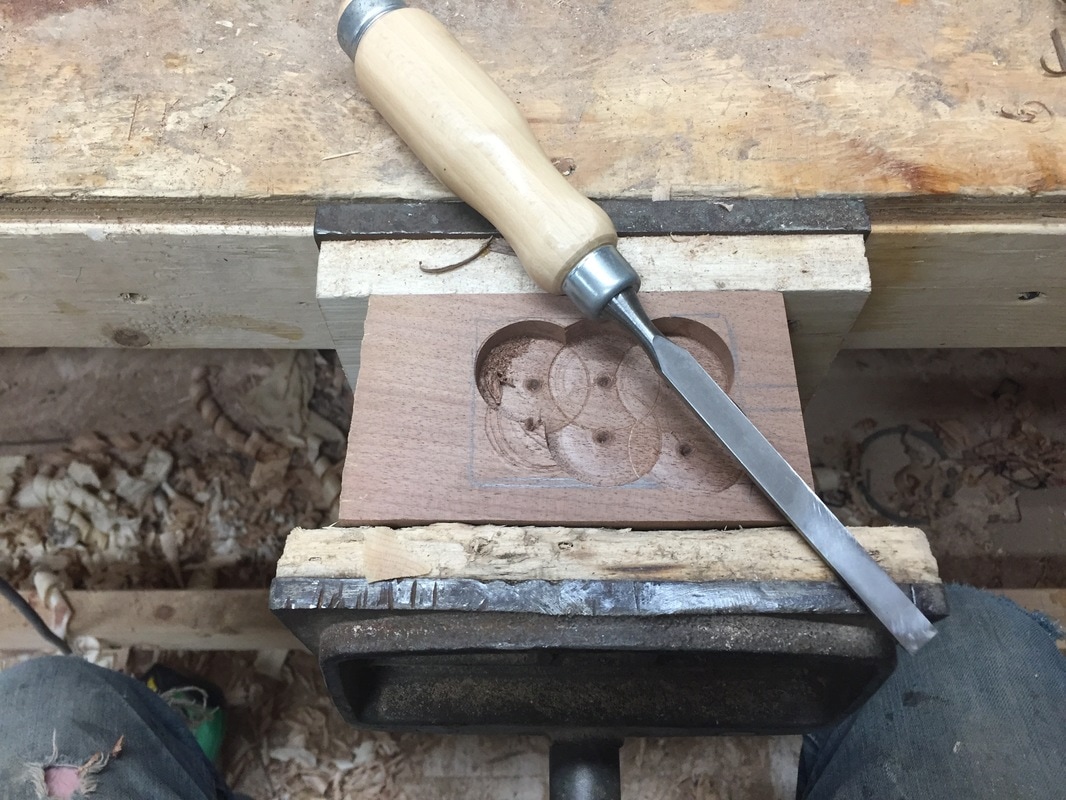
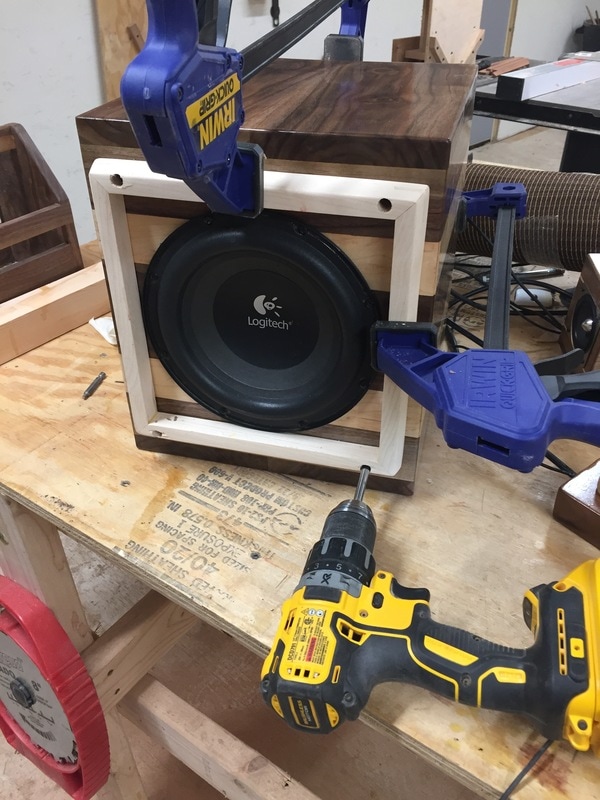
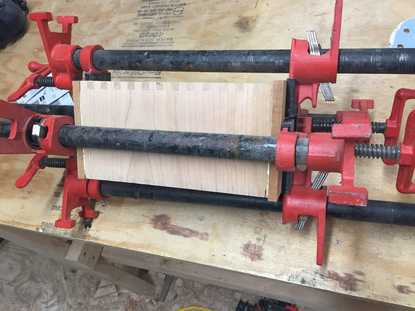
Next I started on the controller box. A piece of 8/4 walnut was cut in half and the inside was carved out to make room. After it was glued back together its hard to see the seam.
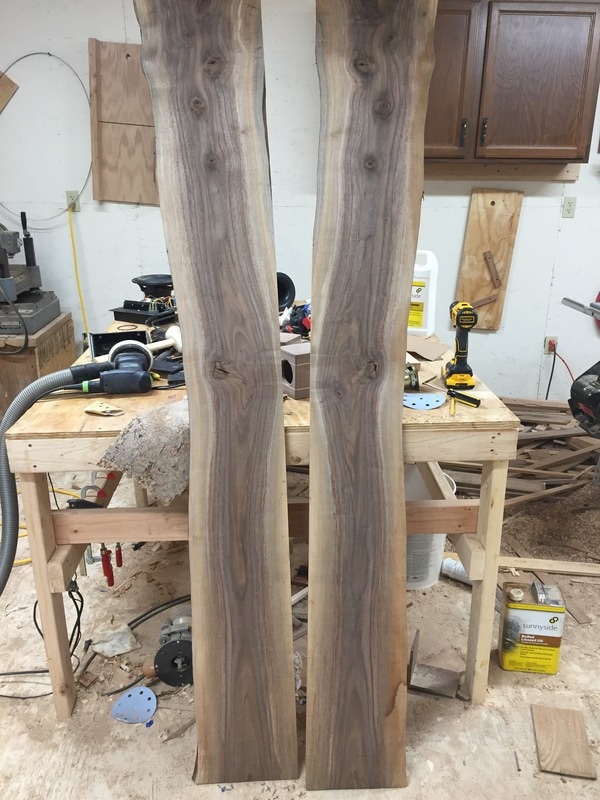
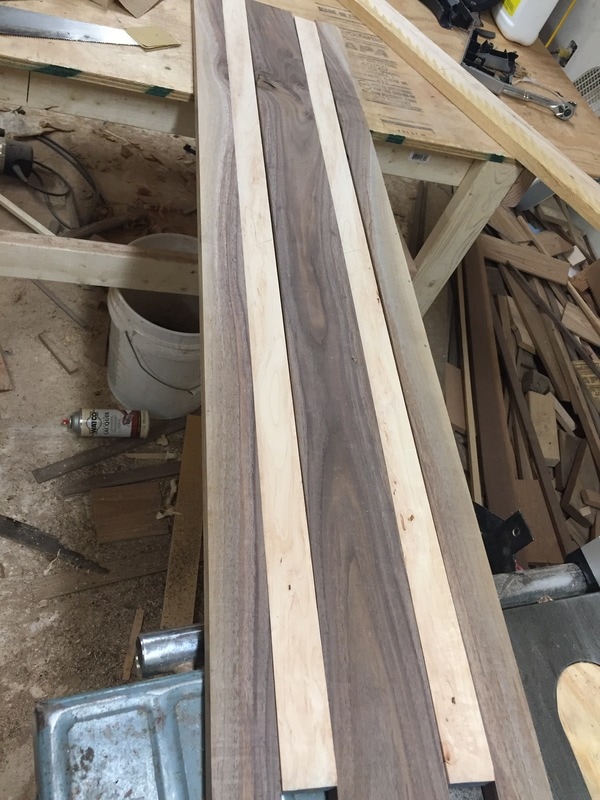
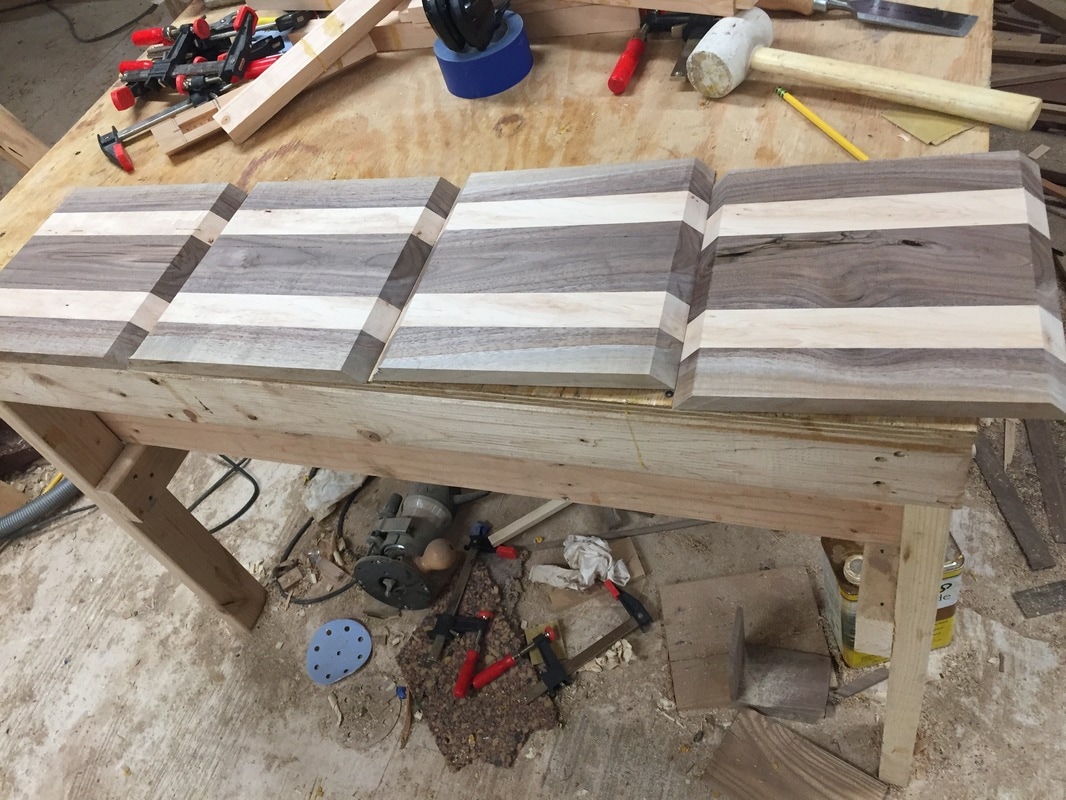
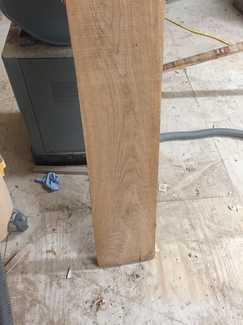
This walnut is pretty special. I cut the tree down about 18 months ago. My dad sawed it and is has been drying for over a year in my barn. I used about 4 feet of it for the box sides and then book matched pieces for the top. The stripes on the big box are solid maple because I needed a little more width.
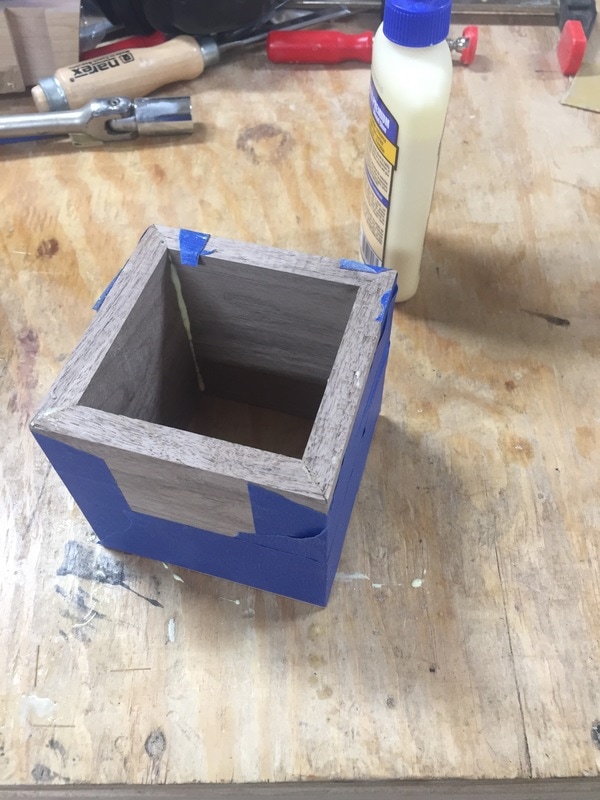
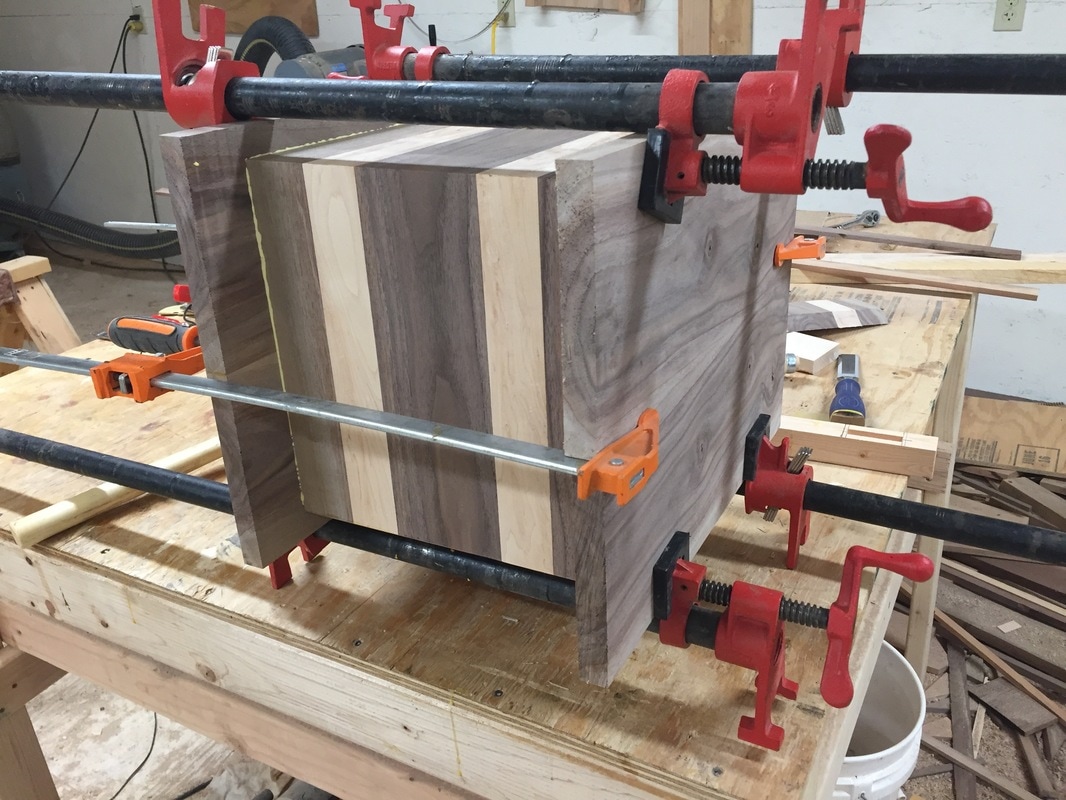
Using the tape method again. Even on this big box the corners came out perfectly.
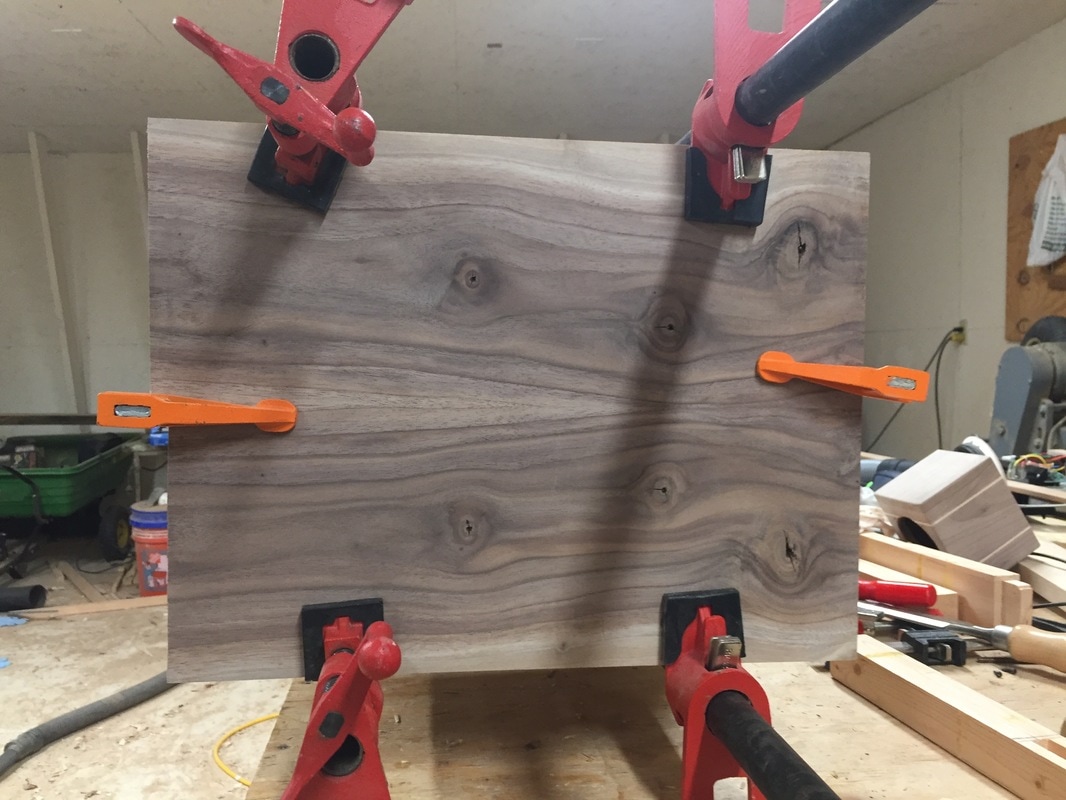
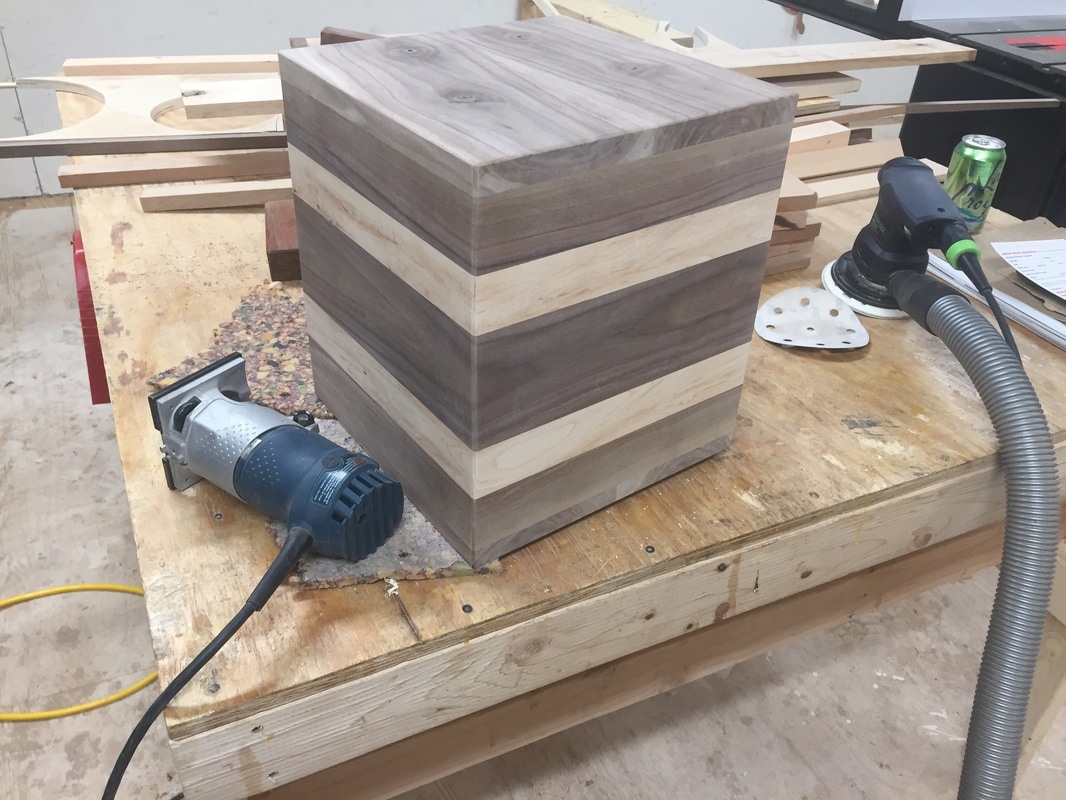
Glueing it all together. The book matched top turned out great. Little holes in the knots were filled with epoxy to keep the box sealed tight.
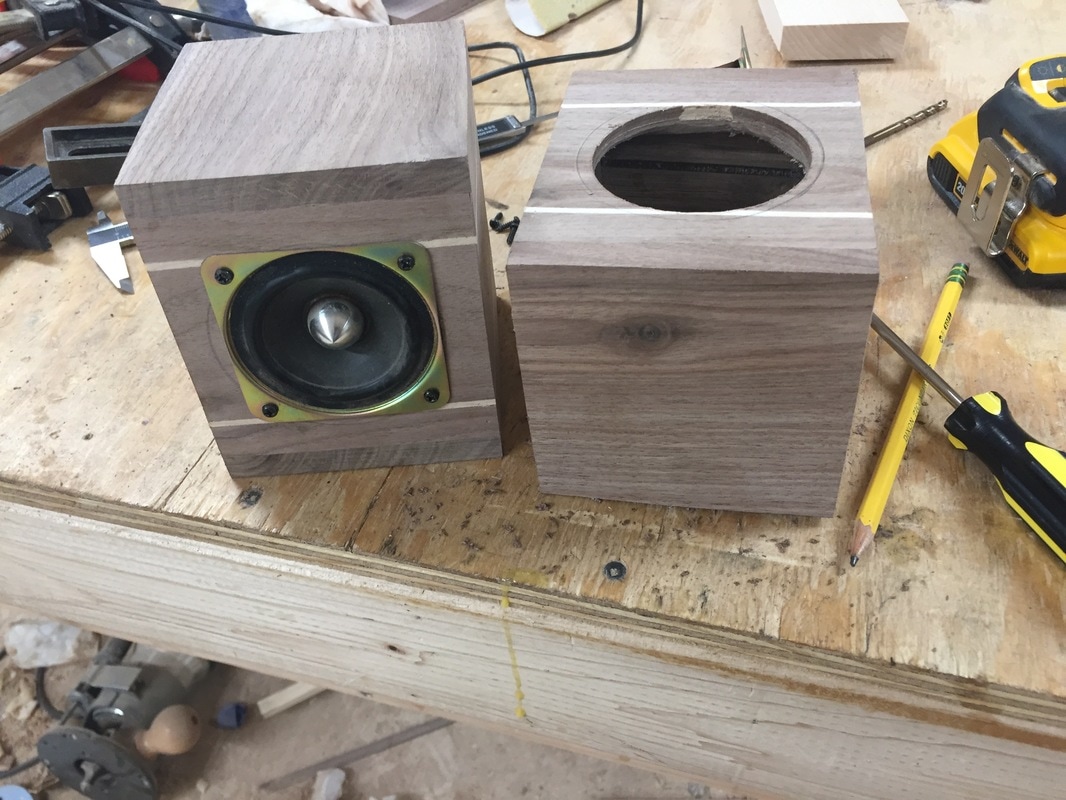
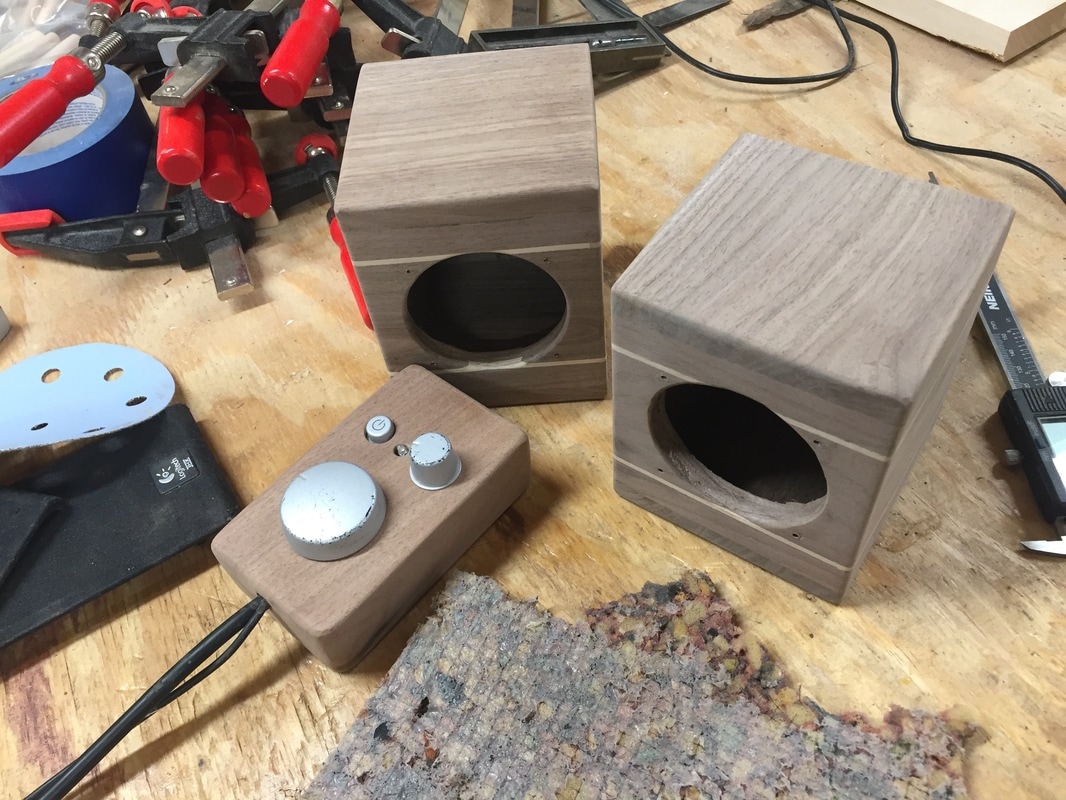
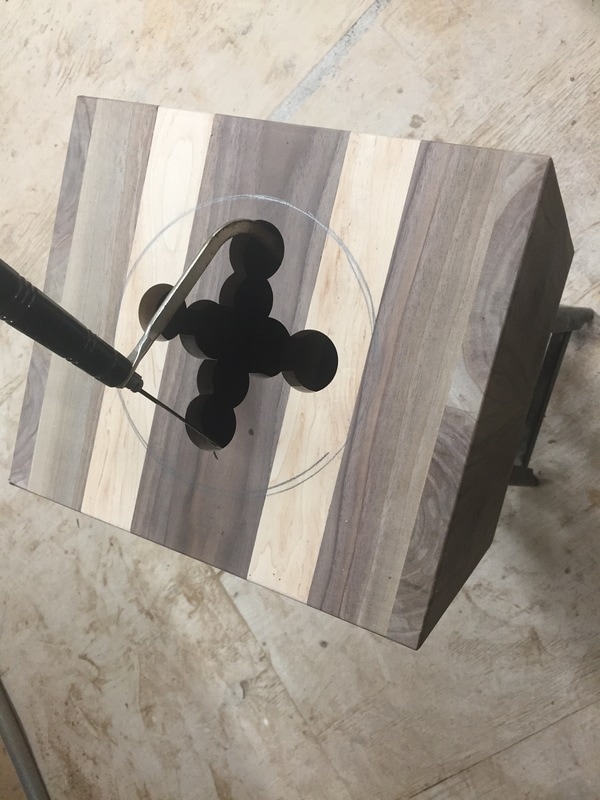
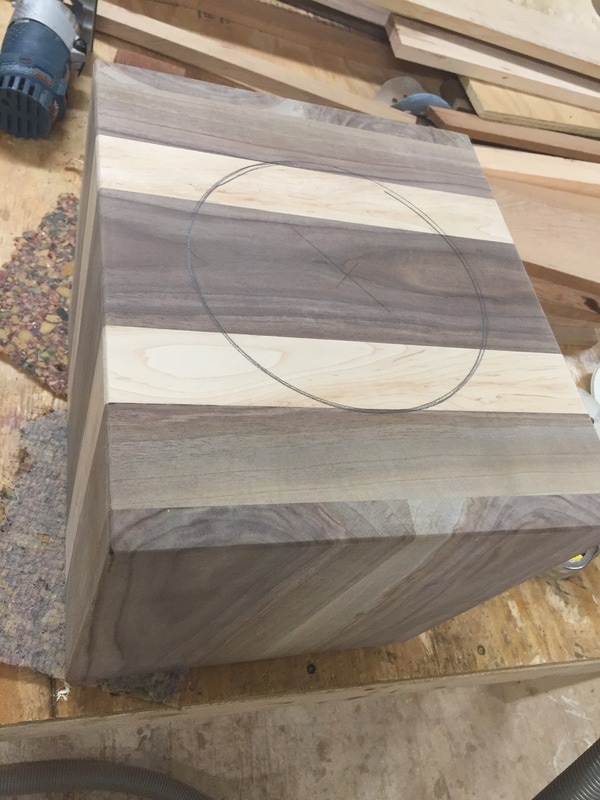
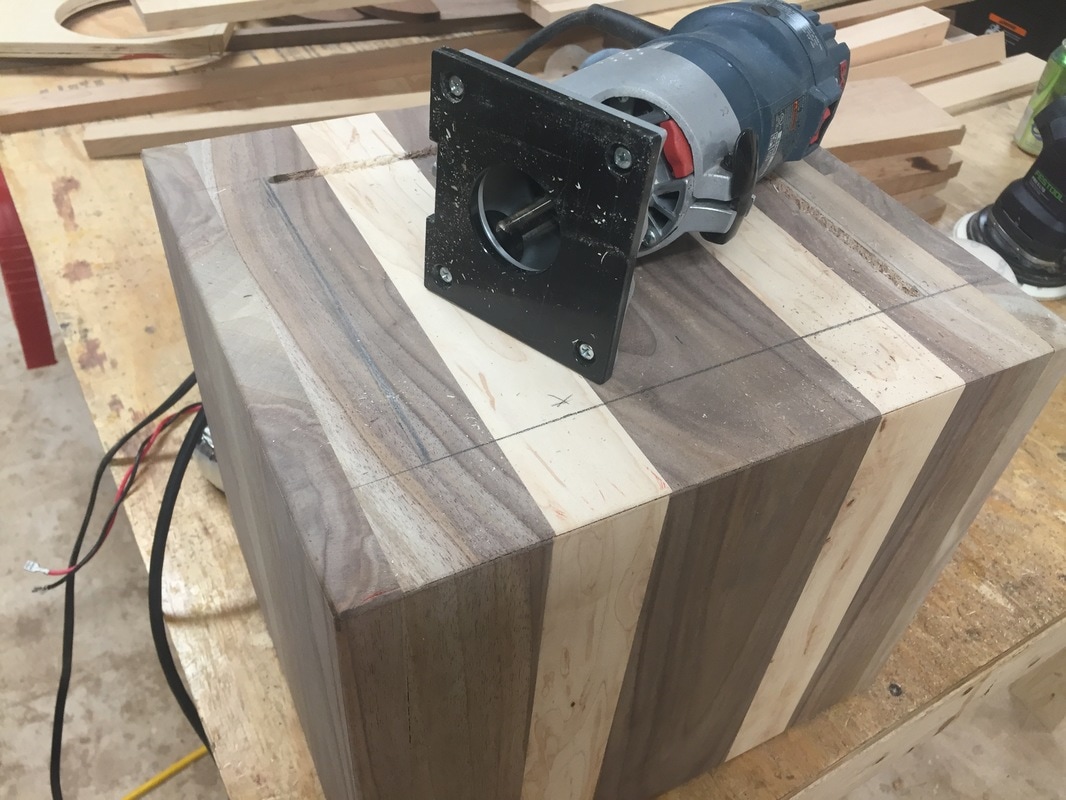
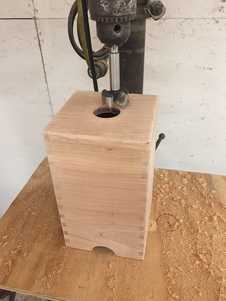
This might be the scariest part. Cutting giant holes into a box I have several hours in. 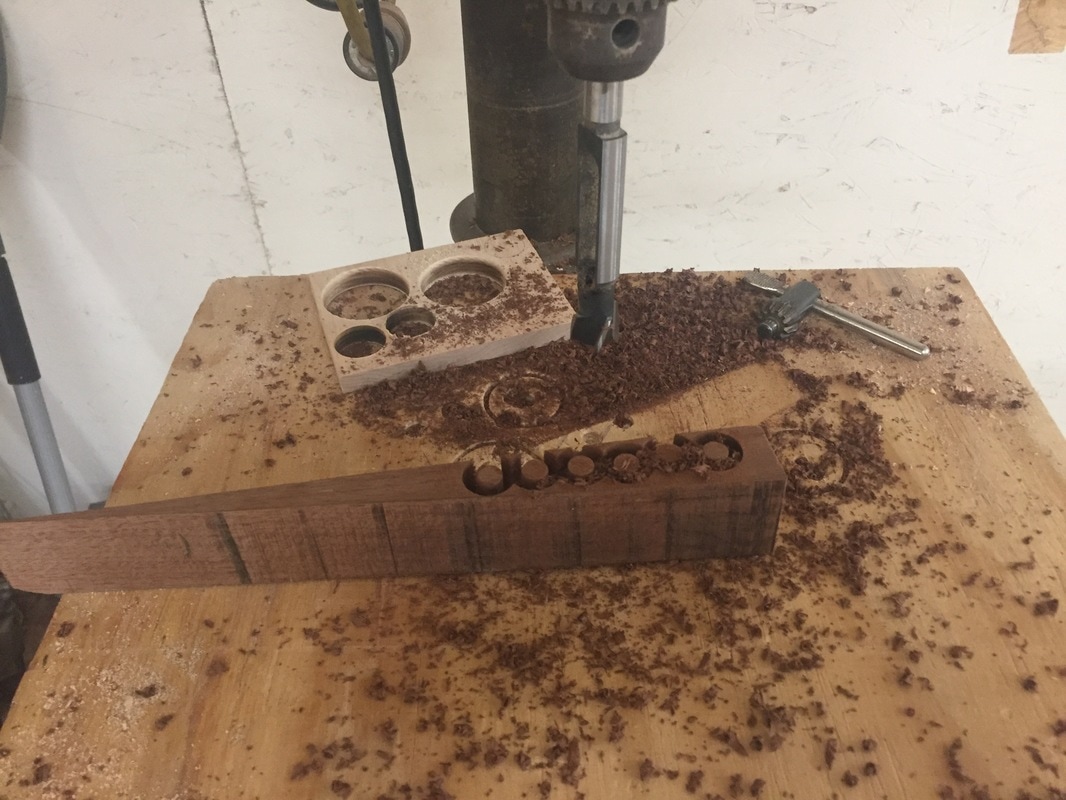 Over at the drill press I knocked out a couple knobs to replace the plastic ones.
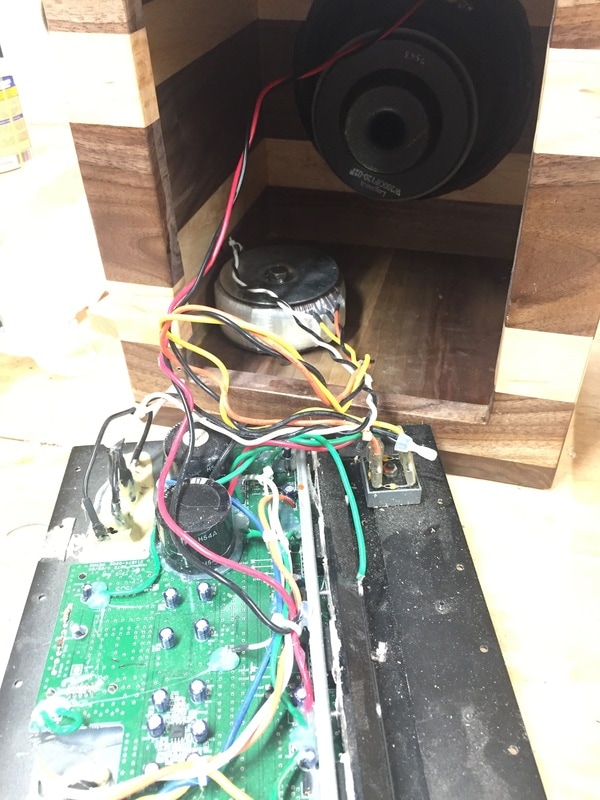
Putting it all back together. If you don't know how to solder, it is a great skill to learn. The biggest thing to remember is to heat the object, not the solder.
After 3 coats of polyurethane finish I made some quick frames for the speaker fabric. The fabric was a bit tough to work with and didn't stretch over the corners as well as I had hoped. 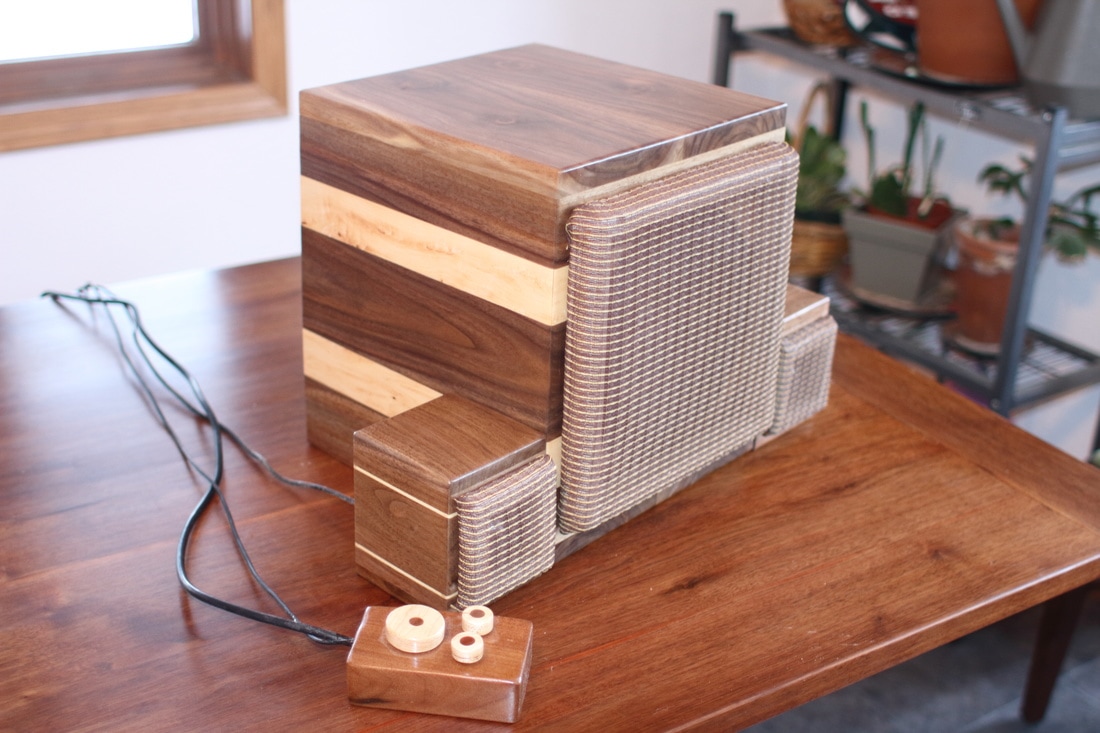 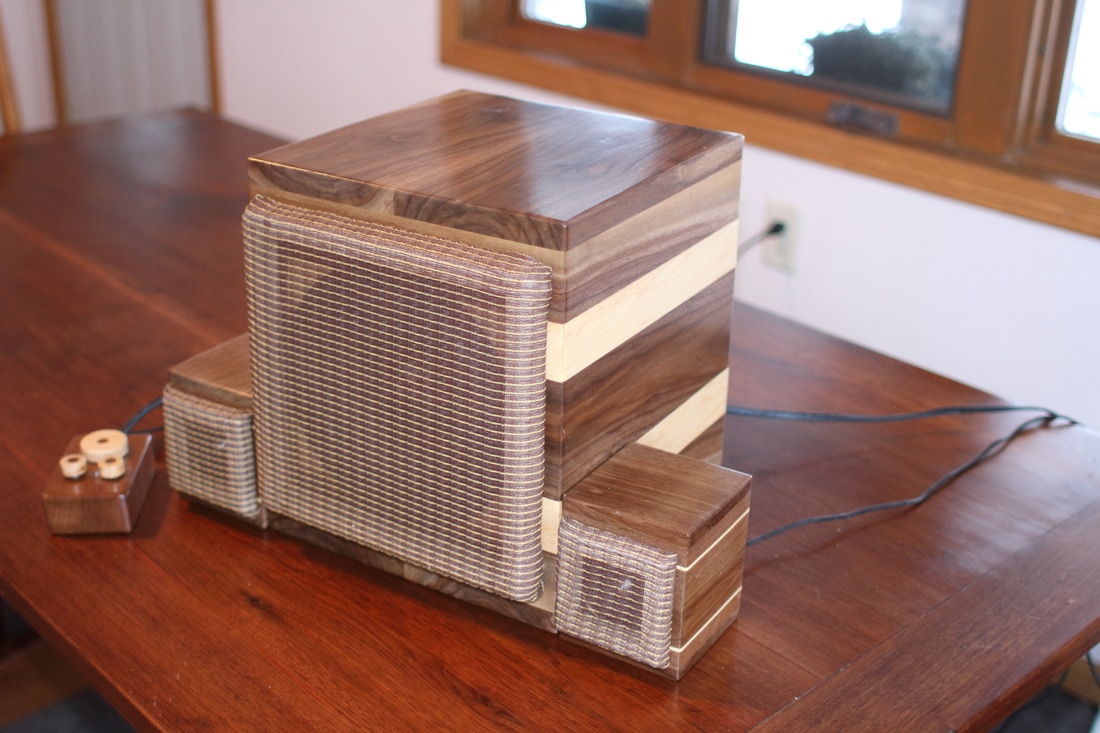 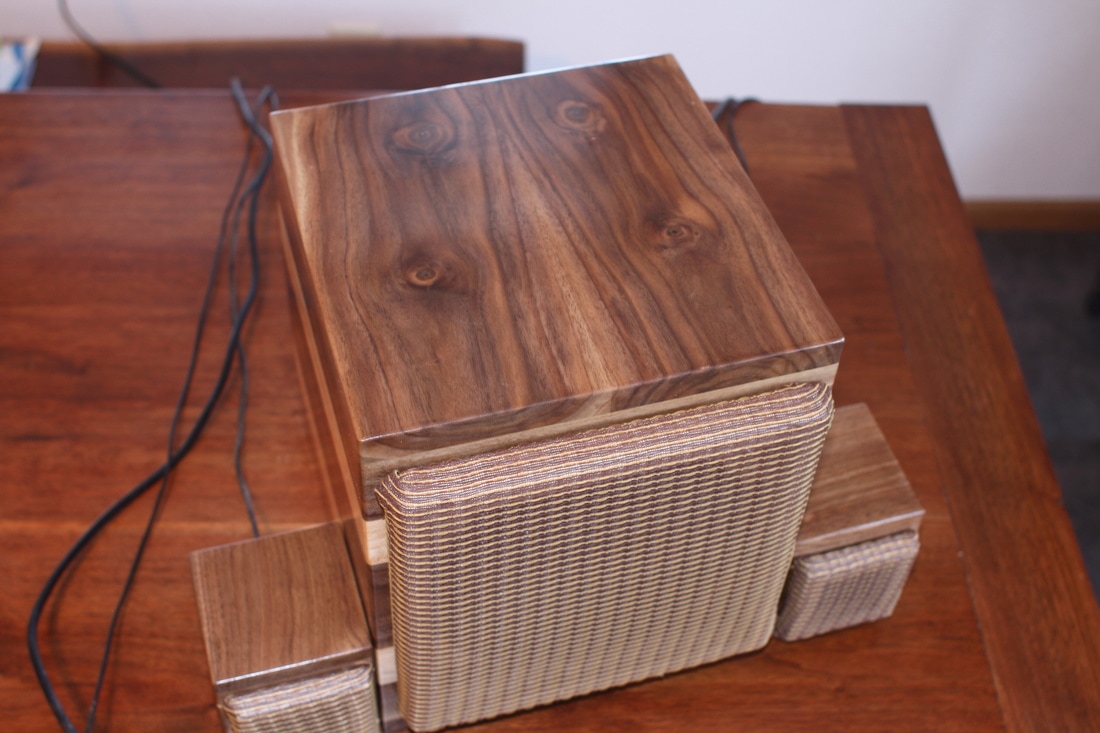 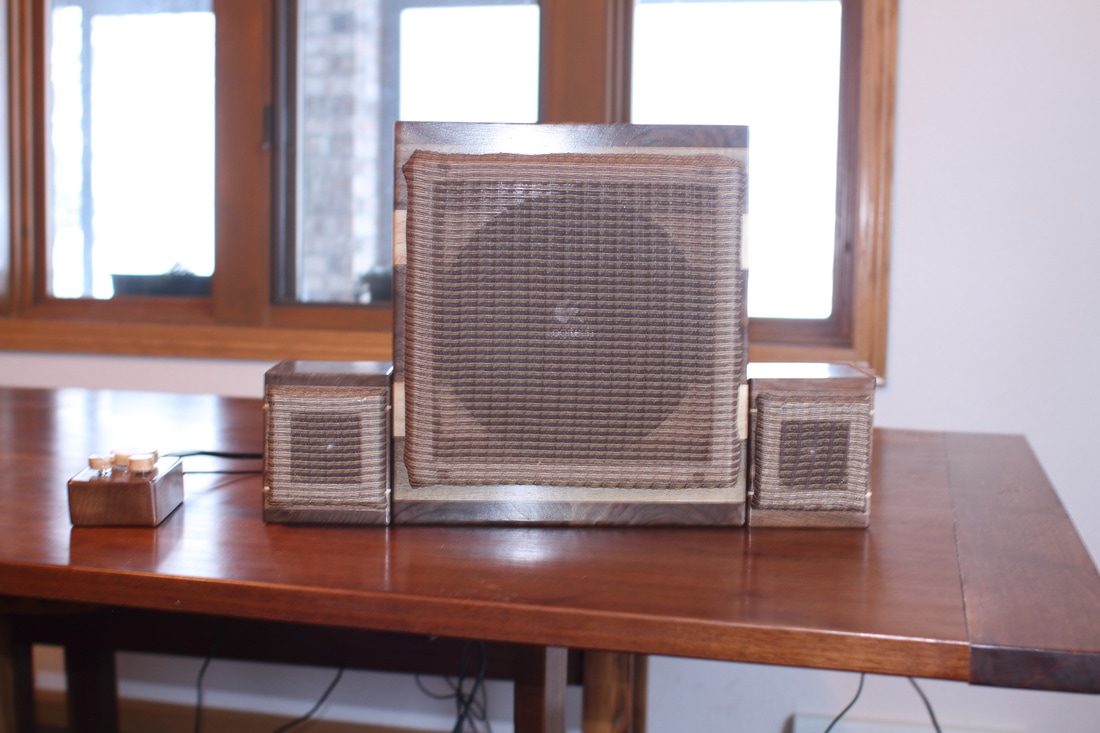  Overall, I'm pretty happy with how these turned out. There are a few things that could be improved on, but that's life. As always, thanks for viewing!
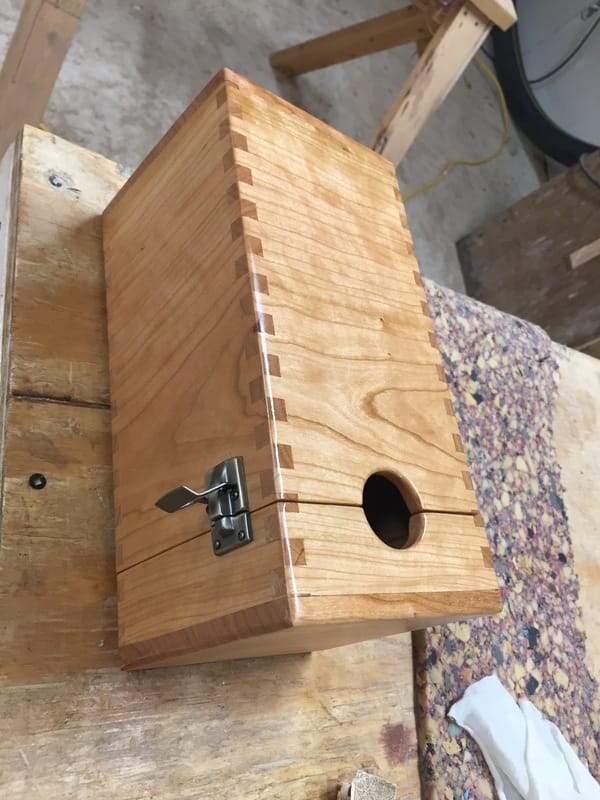
Box wine goes back a long time. If you believe wikipedia, 1935 was the birth year for this wonderful way to efficiently package and ship 1 gallon quantities of wine. It was a brilliant invention that is still underrated and underappreciated. Rectangular boxes stack way better than bottles and the polyethylene bladders held up to shipping better than glass bottles, but not everyone sees it this way. Some look down upon the giant bags of wine and made up reasons why their old bottles are better. I'm not a big wine drinker, I've probably had more wine while writing this post than in the last year, but my understanding is the main advantage to box wine is that it holds its freshness much better than bottle wine once opened. The bladder doesn't allow any air into it which prevents oxidation of the wine. This is what spoils opened bottles of wine. Most boxes of wine will remain good for up to 6 weeks after opening vs a couple days to a week for bottled wines. The other advantage is they can be kept at room temperature. Once a bottle of wine is opened it should be kept in the refrigerator to minimize the oxidation. Because there is no oxygen, box wines don't need to be kept in the fridge, but wine people tell me it tastes better at room temperature. There are some pretty good boxed wines now and they are getting fairly popular, but the boxes are always so ugly. Fixing this is something I have a lot more experience in. Let's build a Classy boxed wine box! Grab a glass and lets get started! 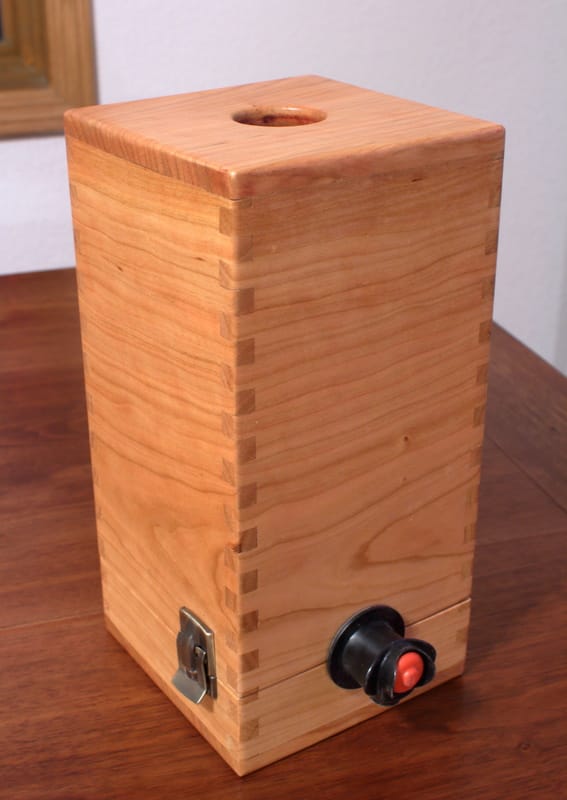 Finished product - This looks a lot better than a cardboard box on your counter.
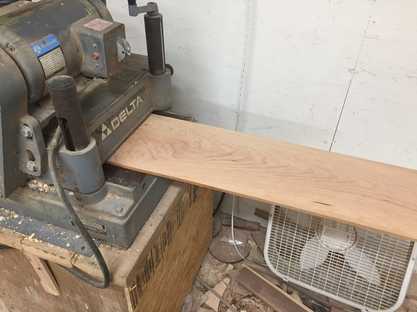
Almost all projects start the same. Take a board and run it through the planer to flatten both sides and get it to the thickness you are looking for. This was no exception. I needed the full width of the board at about 3/8". These start at about 1" so most of the board gets planed away.
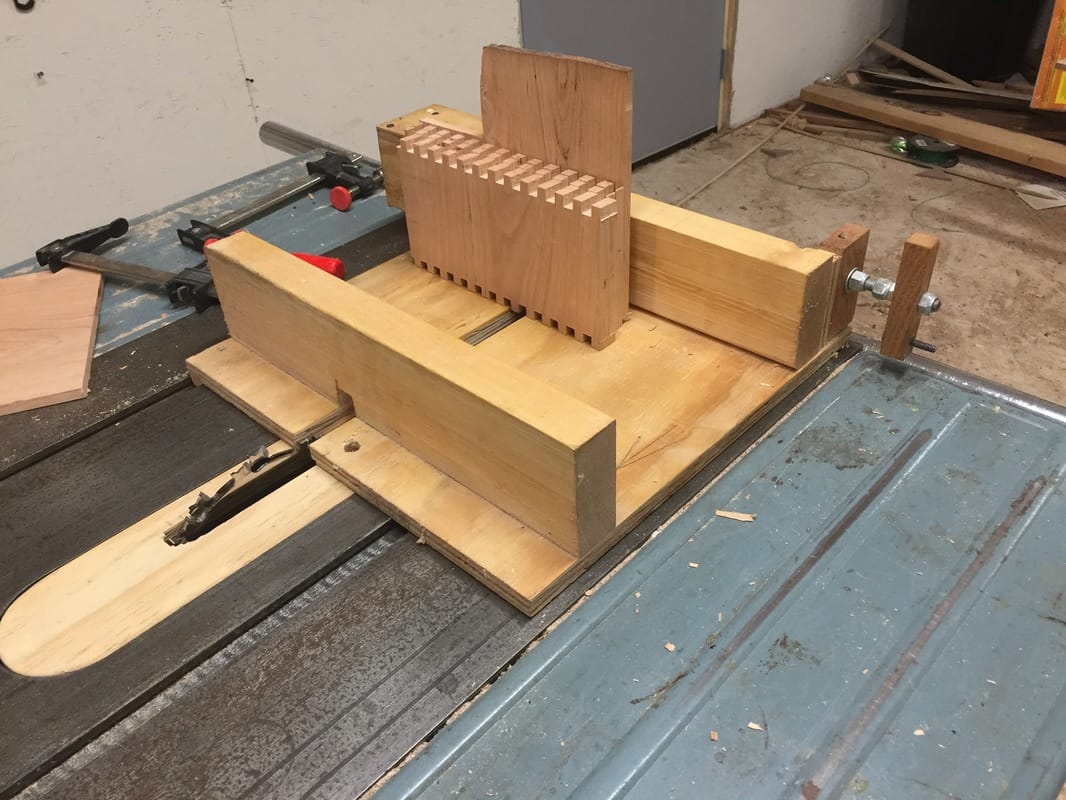
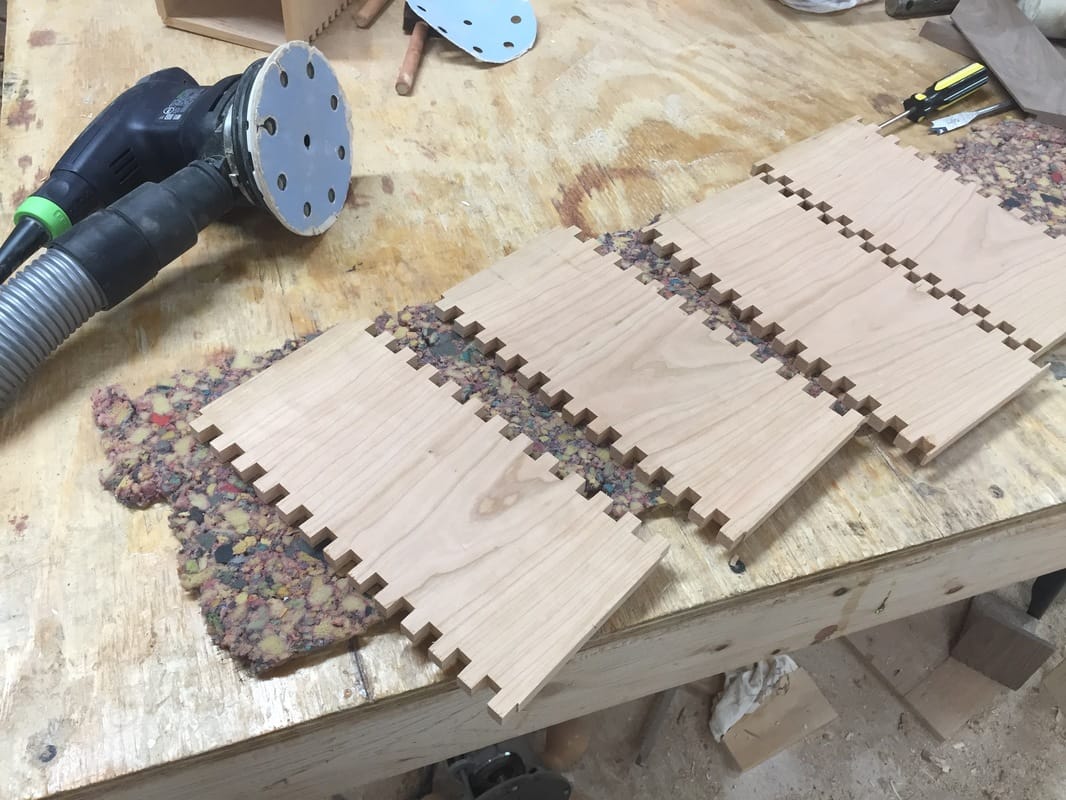
This is my box joint jig. You clamp all 4 pieces in and cut them all at once. The handle gets turned 1 revolution for every 1/16". For 3/8" finger joints you have to count 12 revolutions for each finger. This sounds easy but the chance of messing up at least once on a couple dozen fingers is pretty high. The sides are all cut out in sequence so the grain wraps around the box.
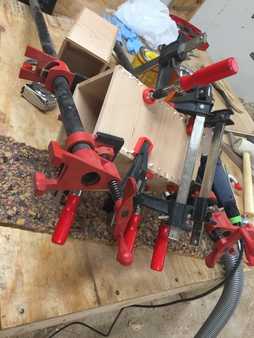
Once again I tried to use all my clamps in as small of area as possible. I cut some squares for tops and bottoms and glued those on as well.
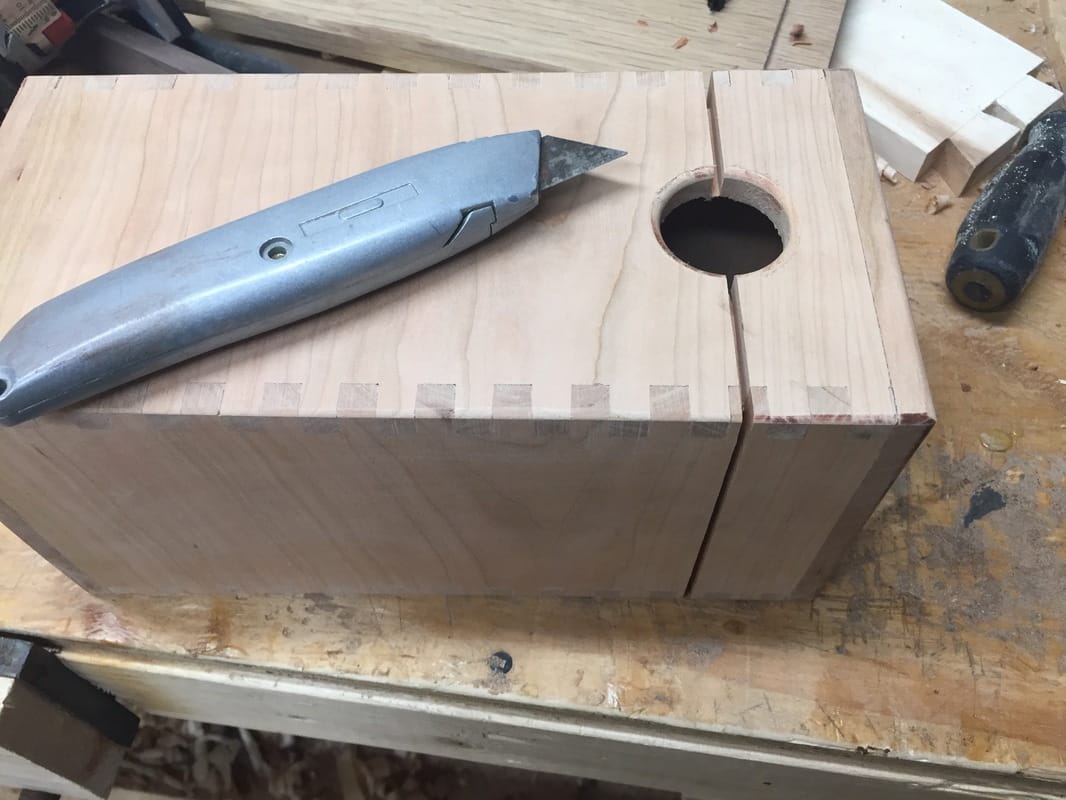
1-3/8" holes sever as the spot hole and a handle for the top. I got ahead of myself and cut the box in half before getting these pictures. The holes were drilled before the box was cut.  A quick pass with the router smooths out the sharp edges.
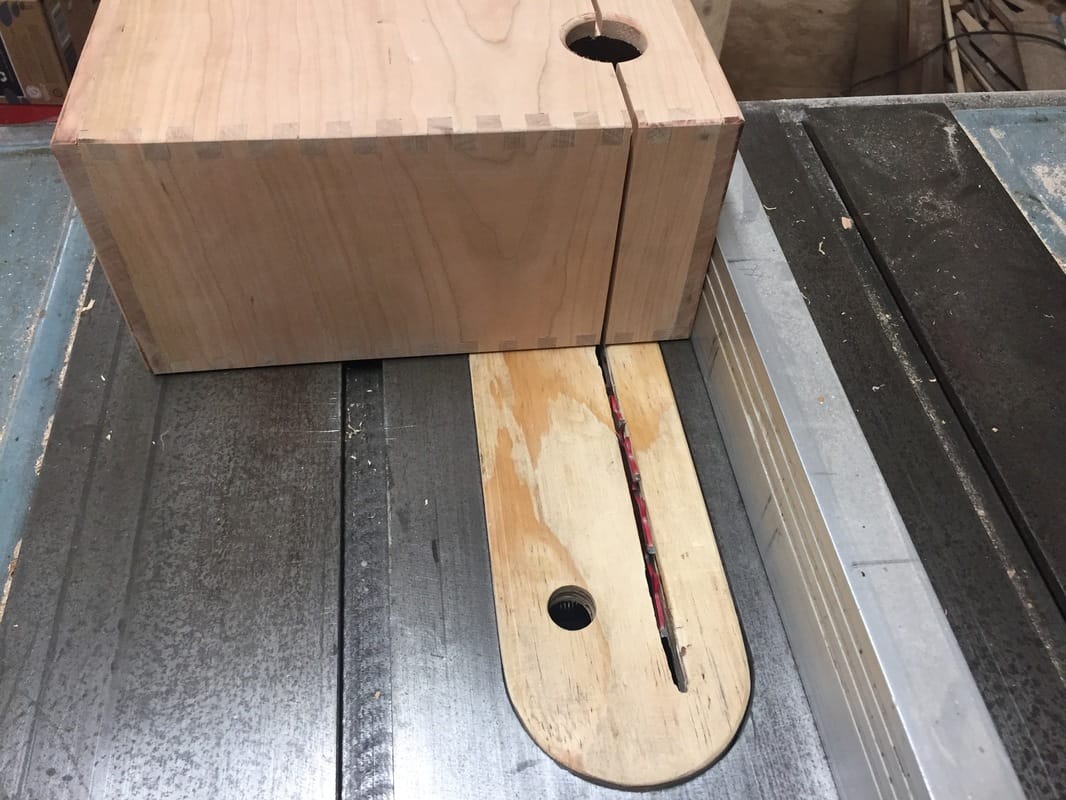
Here's a great tip for cutting boxes apart. Leave a tiny amount of the wood left all the way around on the tablesaw cut. This will support the lid while the rest of the cuts are made. Then go back and finish it with a sharp knife.
I added some oil rubbed bronze hardware and then applied many coats of spray on lacquer. Lacquer is great. In thin layers, it will dry in 15 minutes. Over the course of an evening you can apply 5-6 coats quite easily and build a very nice finish.  Thanks for reading and Happy New Year!
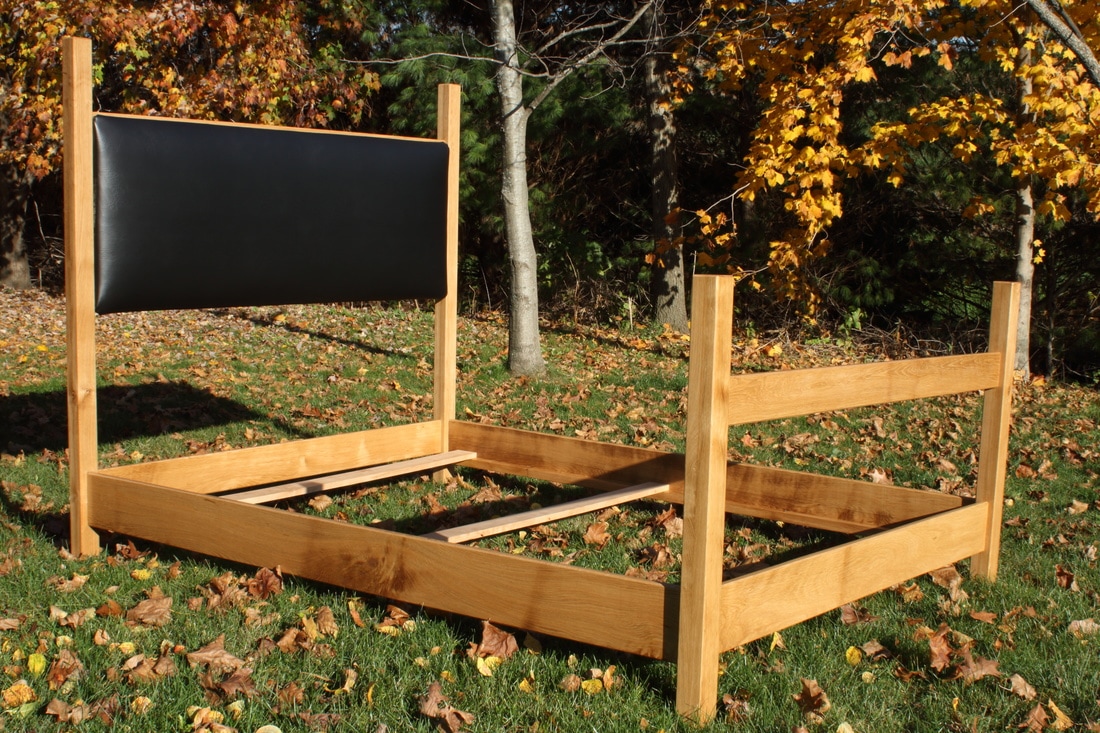
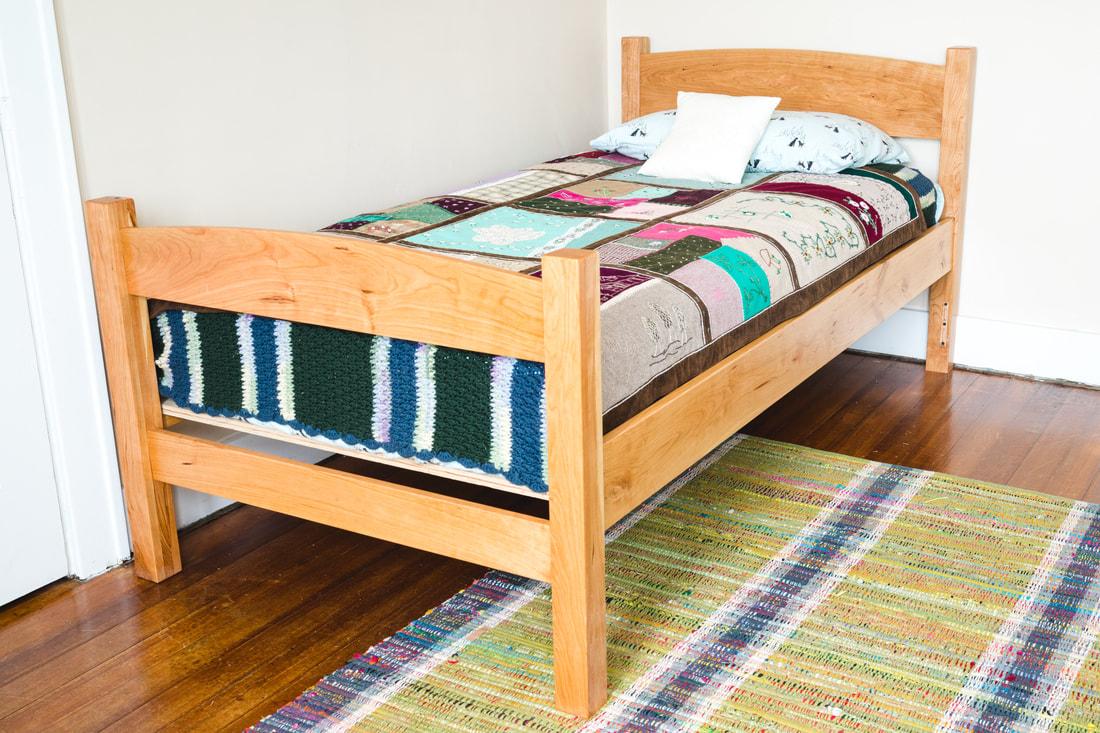
 I was commissioned by my sister in law to build a bed. It had very few requirements but she really wanted an upholstered headboard. "I've never done this before, but I'm pretty sure I'm awesome at it." One of my good friends told me this a few years ago. Ever since, I have applied this thought to hundreds of events in my life. At first, it sounds arrogant but for me its a deep rooted belief that I can do anything I set my mind to. Going into a new situation with this phrase in your head gives you the confidence to be successful. Let's build a bed with an upholstered headboard!
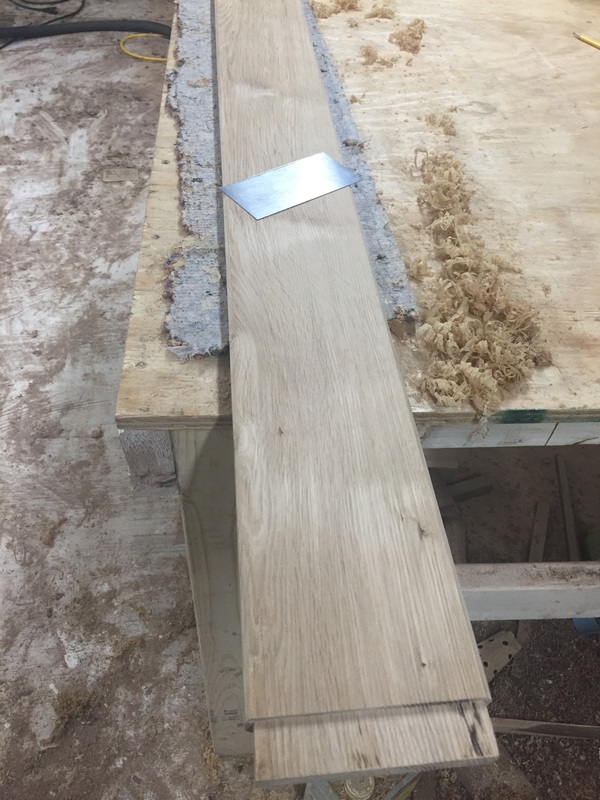
The wood for this build came from the Flood Farm. It is some burr oak from when the Oakfield tornado knocked down a bunch of trees. My father in law had it sawn and was sitting in their barn for almost 20 years. I'm not going to spend a whole lot of time on the joinery. It's a pretty simple mortise and tenon construction. I used a chamfer bit in the router table on all the edges. It leaves an edge thats sharp to the eyes but once sanded is soft to the touch. 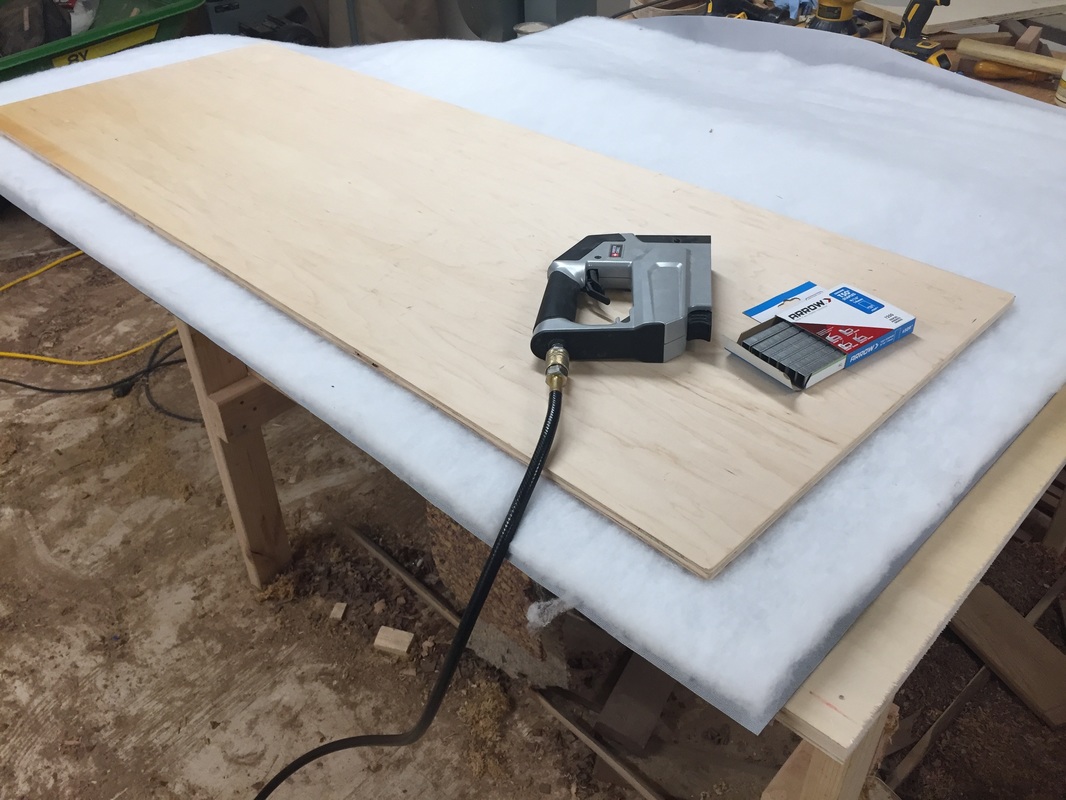 Let's learn something new! I researched upholstery a little bit on the internet. I'm probably doing something wrong here but I think it turned out pretty nice. If you know upholstery and you know a better way to do it, let me know. I used a pneumatic stapler with 9/16" T50 staples. This stapler came in a compressor kit I bought a few years ago or I probably wouldn't have a pneumatic one. A regular stapler could be used instead if you don't have a gun. The material is a very thick upholstery pleather I got from Joann Fabrics. They were pretty helpful in helping me get what I needed. This was the first time I intentionally went into a fabric store. I have to say, it wasn't as scary as I thought it would be.
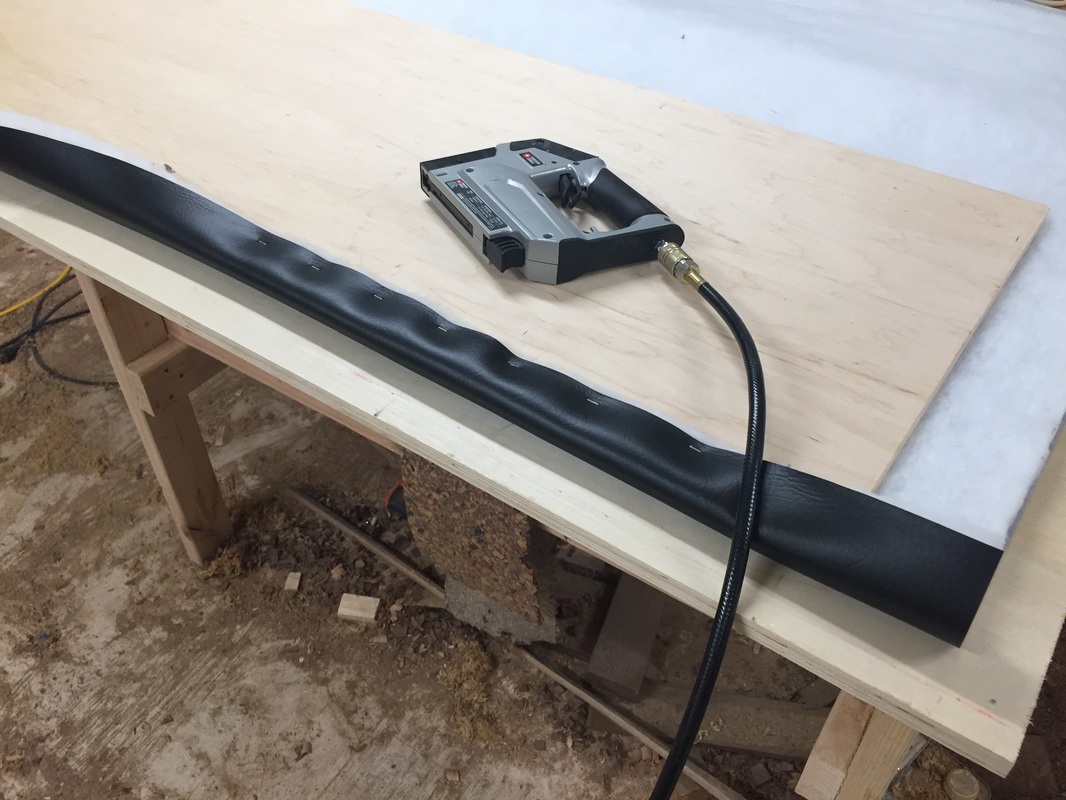
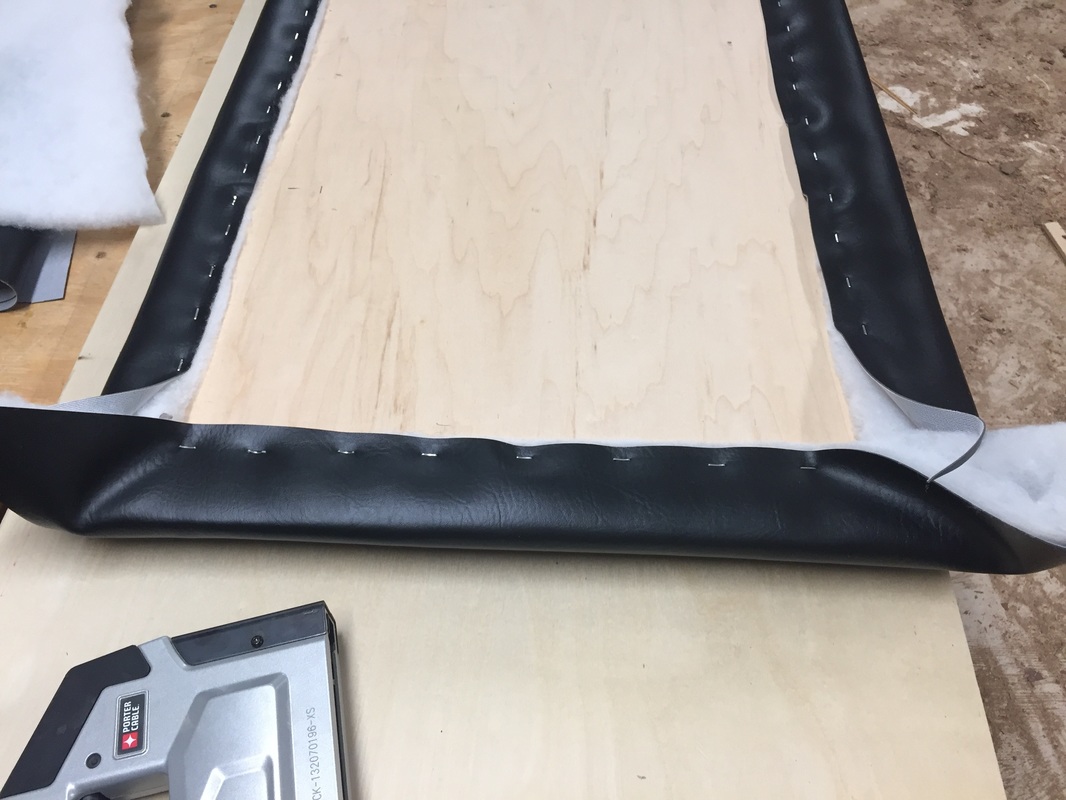
I start by going along one long edge and working end to end stapling every few inches. When the first side is done, I transitions to he other. It's important to pull the fabric tight enough to take the wrinkles out, but not so tight that the staples cause ripples in the front. It took a little practice but I got the hang of it.
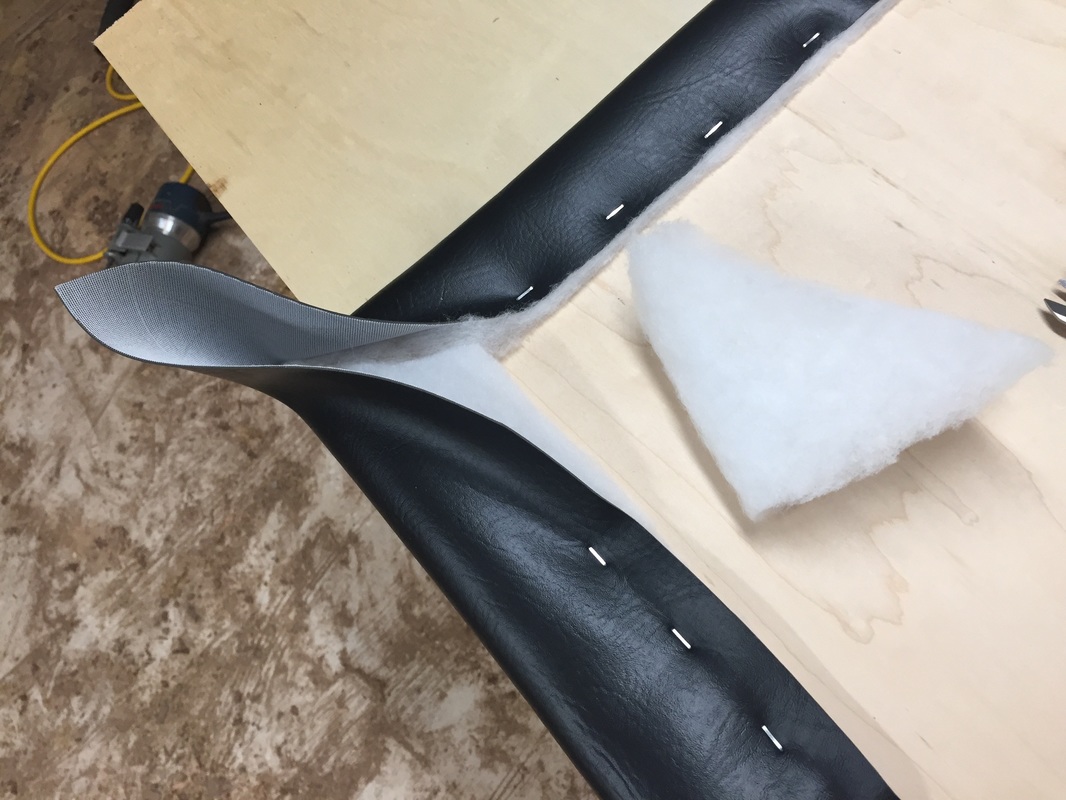
The short ends are stapled next and then it's on to the corners. The extra batting was removed to make shaping the corners go better. 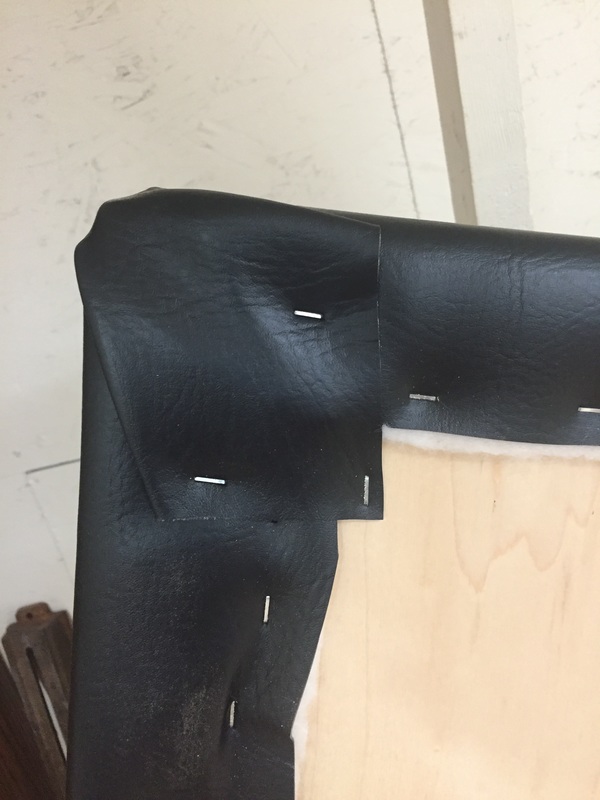 For the corners, I made sure the outside was smooth and stapled the very corner first. Then added two more staples to hold down the remaining material.
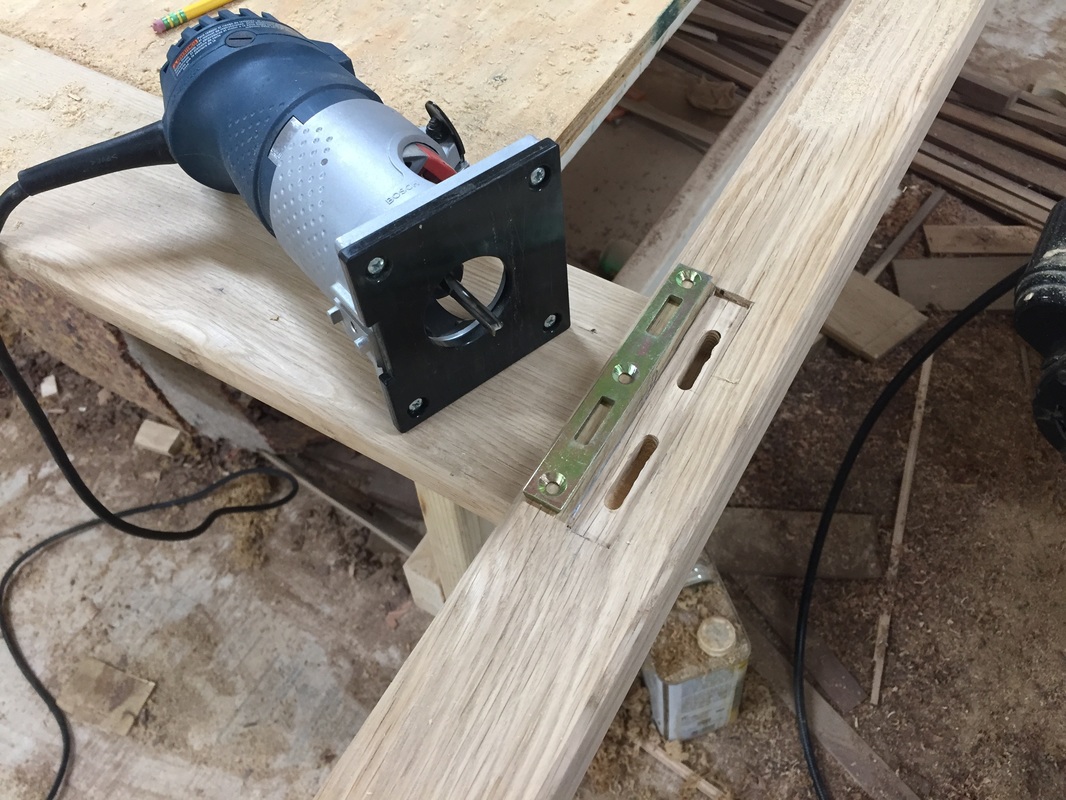 The rail hardware was cut in with a rabbeting bit and the end hardware was cut with the trim router and a 1/4" straight bit. 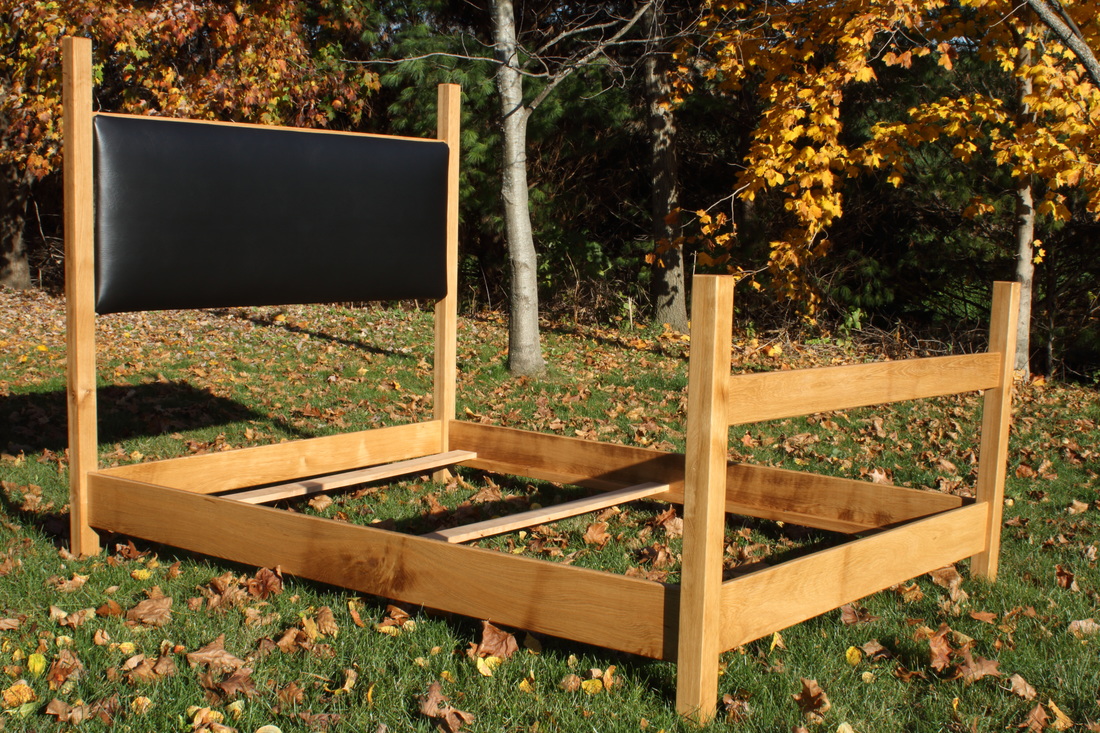 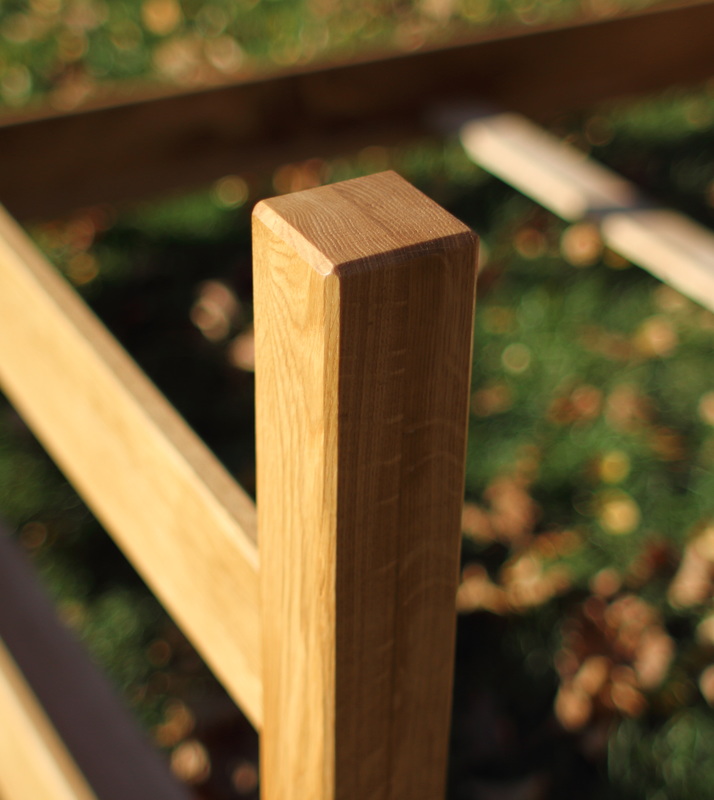 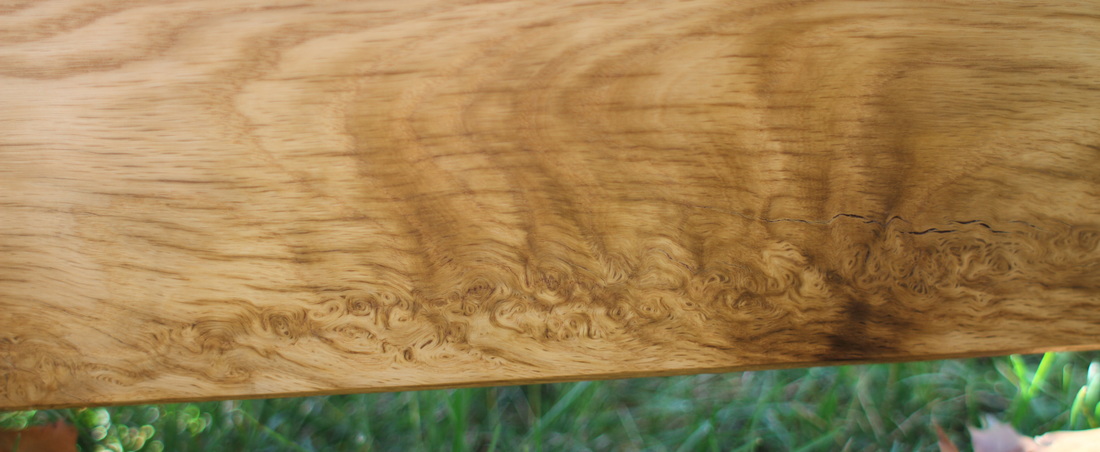 I am very happy with how this turned out and I think my sister in law was as well. My favorite detail on this bed is the chamfered corners. They keep the edges looking very sharp but they are all extremely soft to the touch.
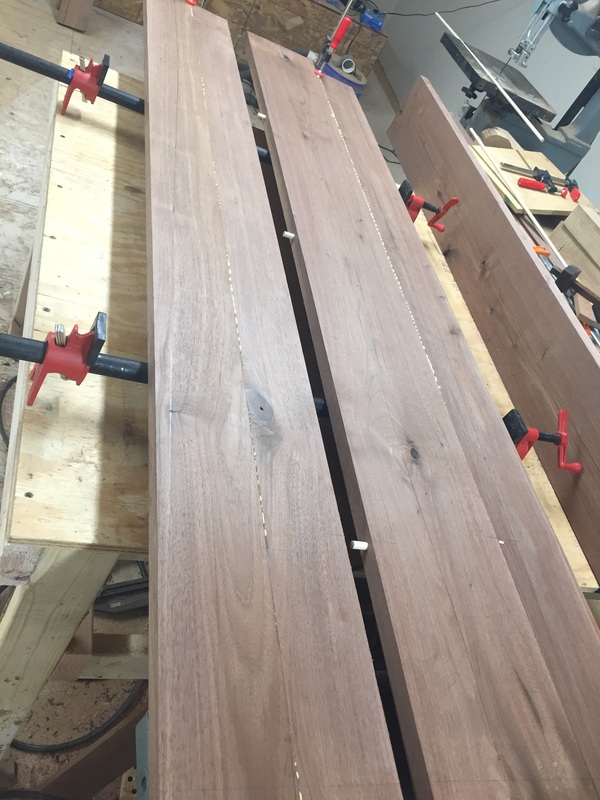
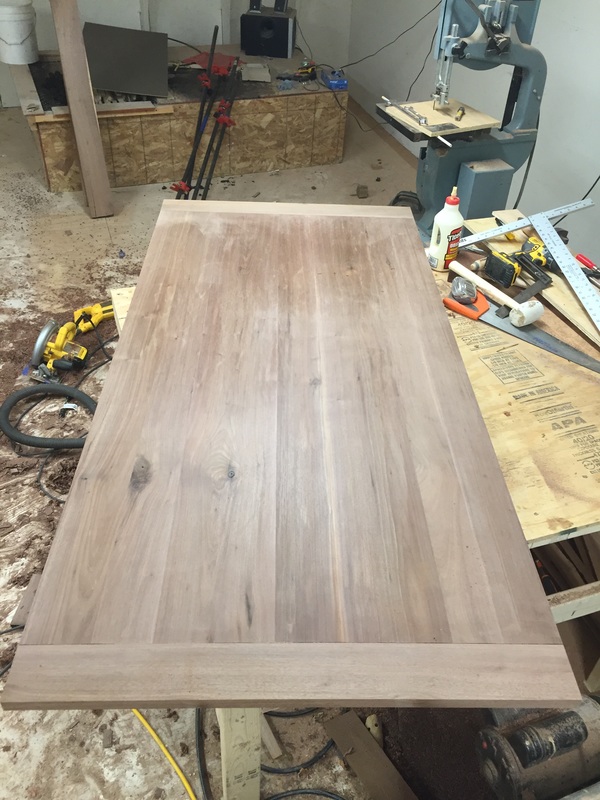
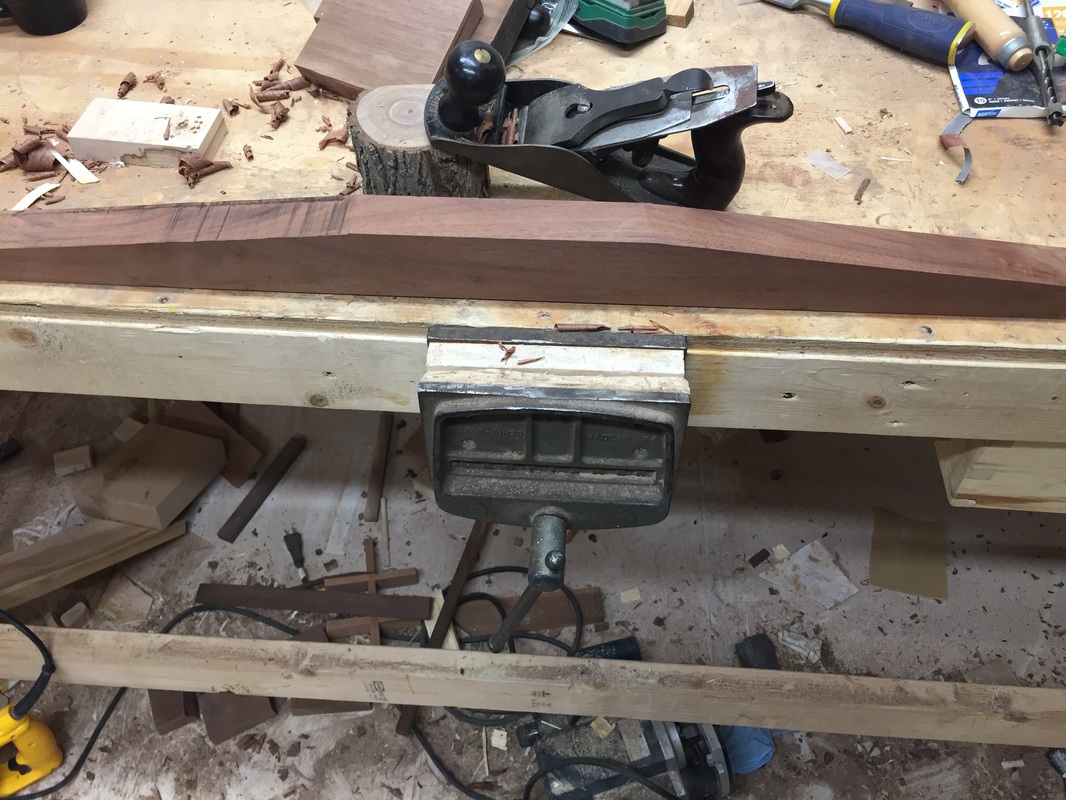
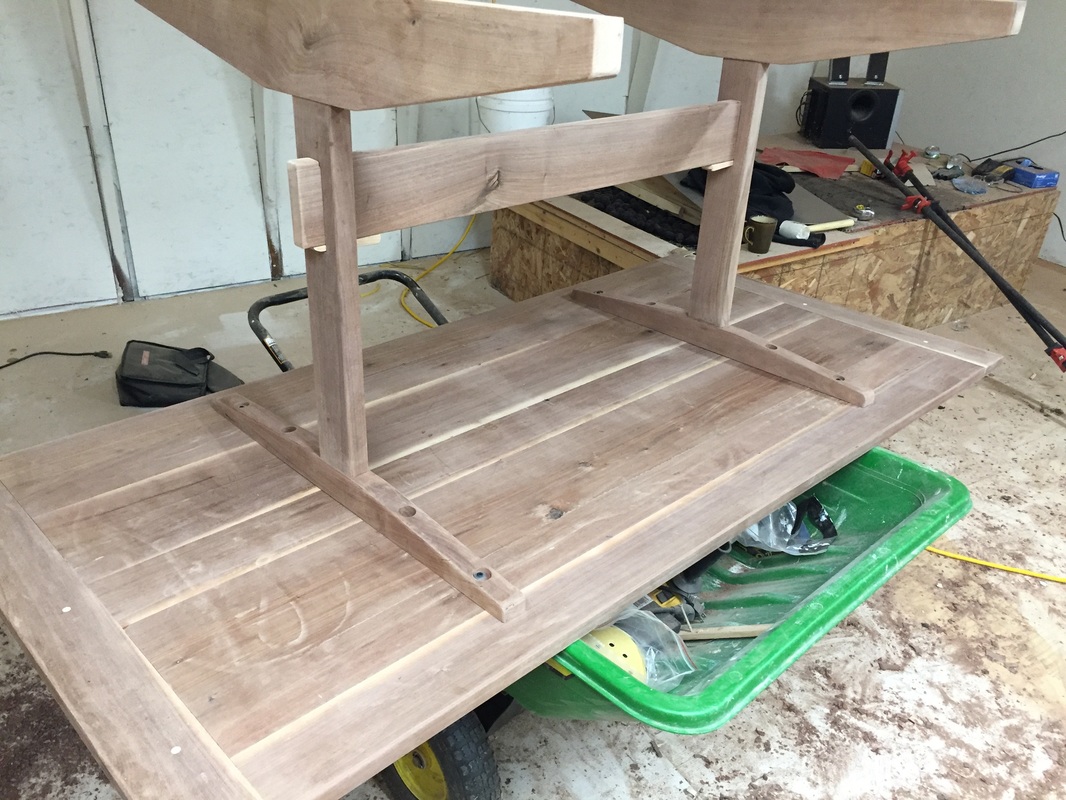
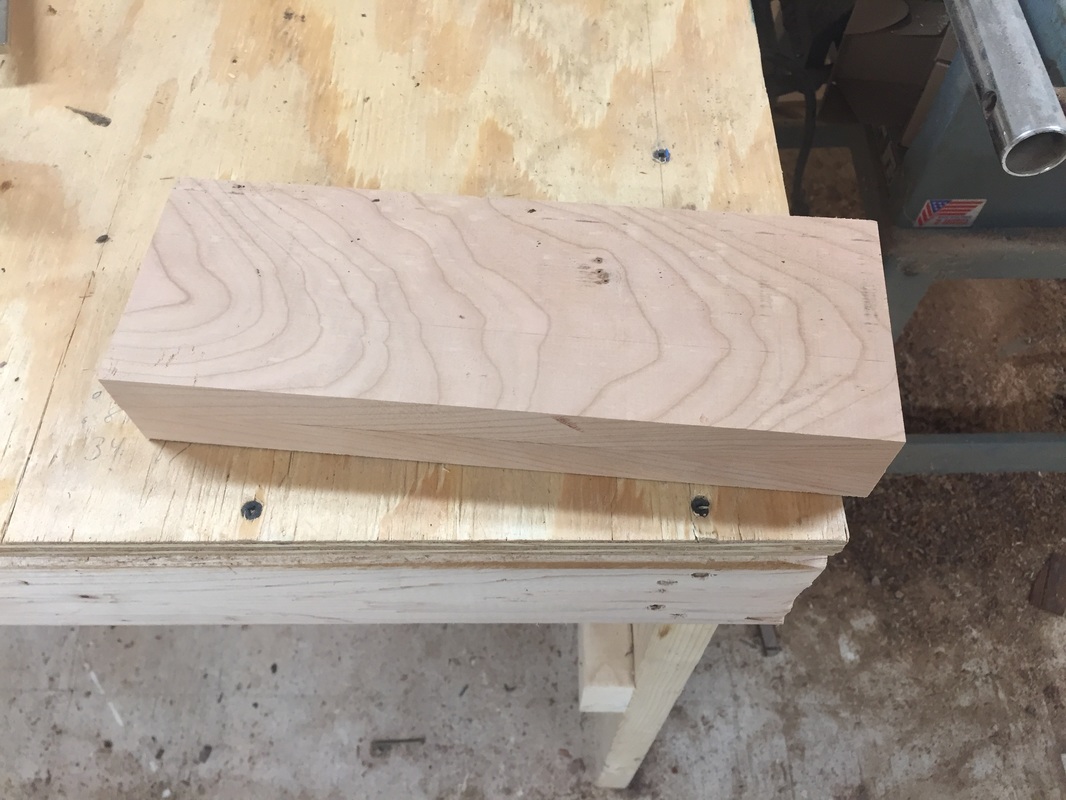
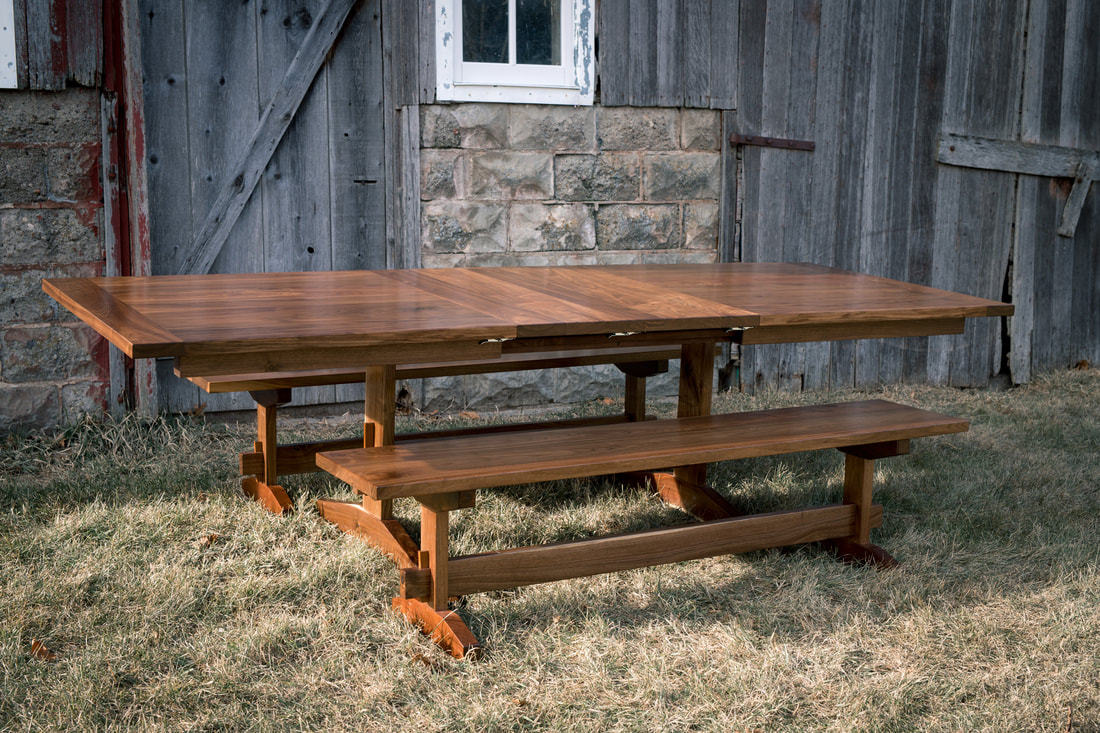
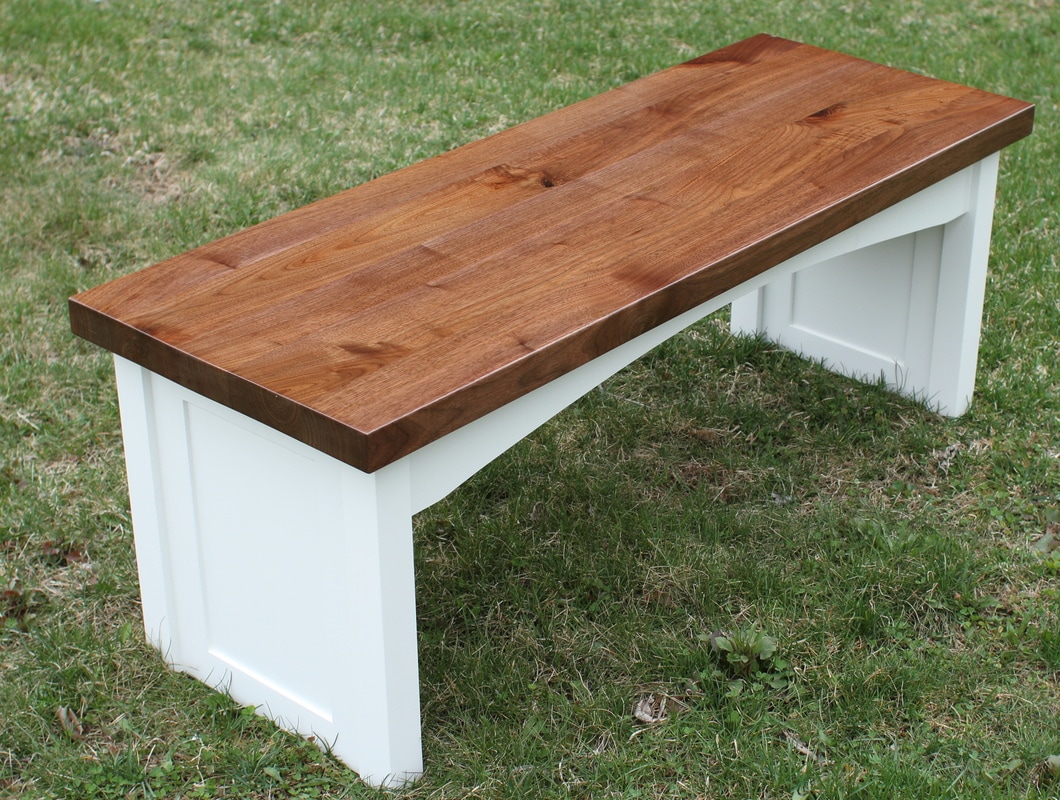
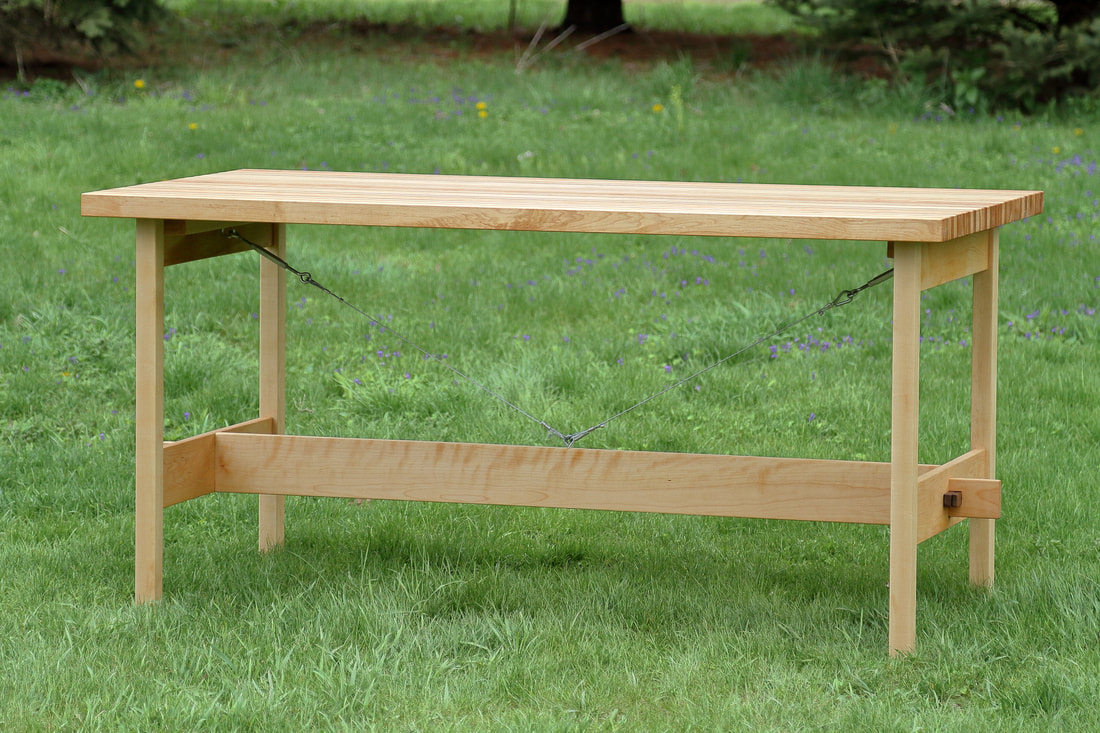
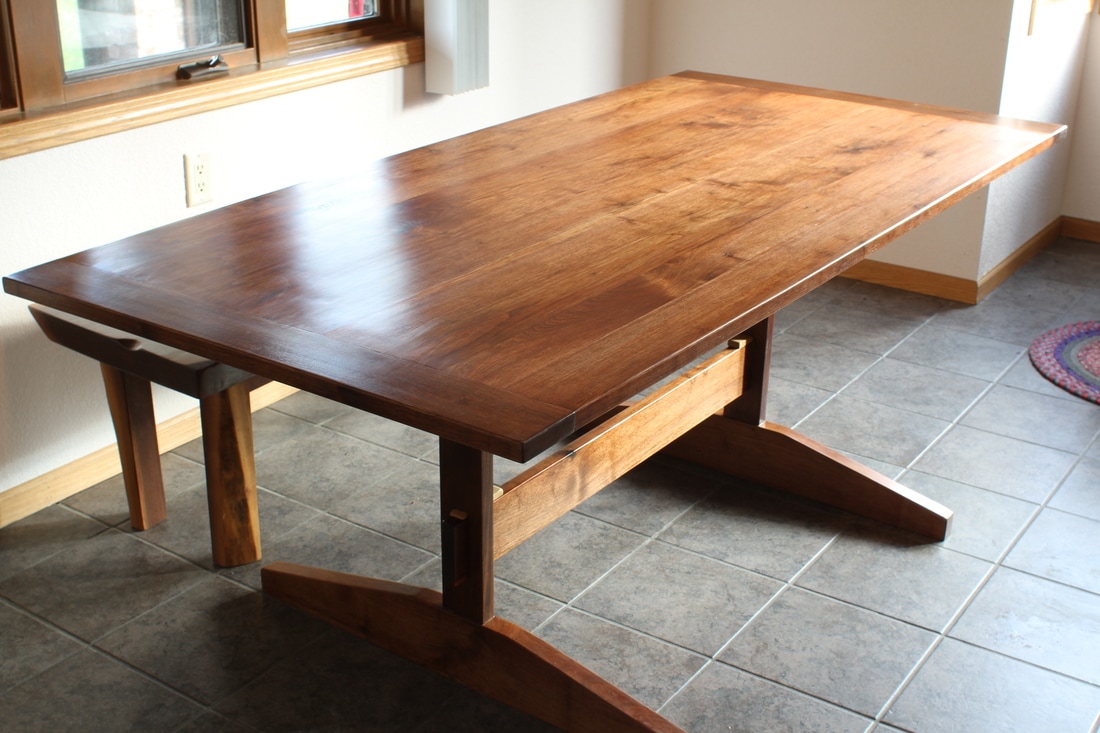
The upholstery turned out pretty nice and I think I'll be using more of it in future designs. One of the rails had this curly grain that was pretty neat. 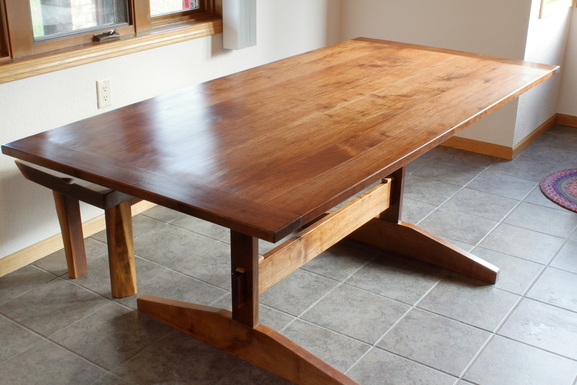 Finished table - 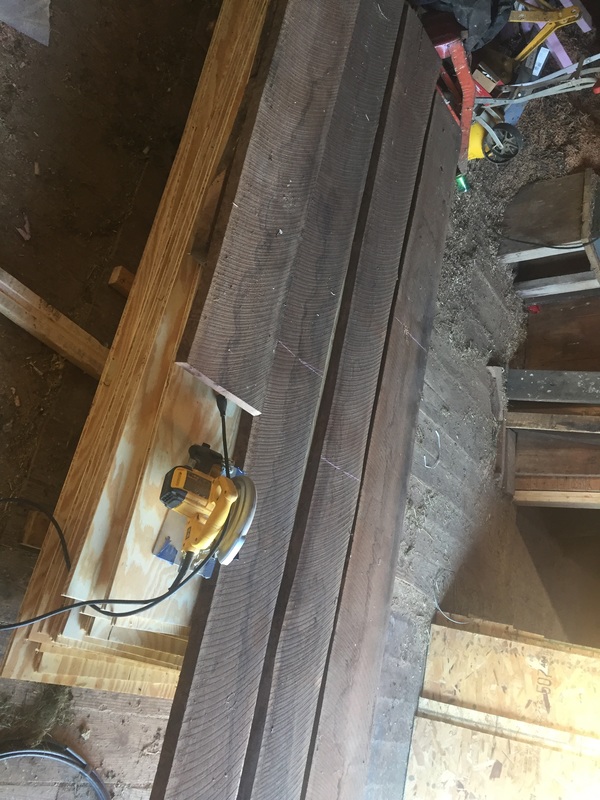 Circle sawn walnut - rough sawn walnut isn't very attractive. I bought these off Craigslist. The guy had found them in his garage when he moved in. The previous owner was lifelong woodworker who had repaired different churches all over the country. 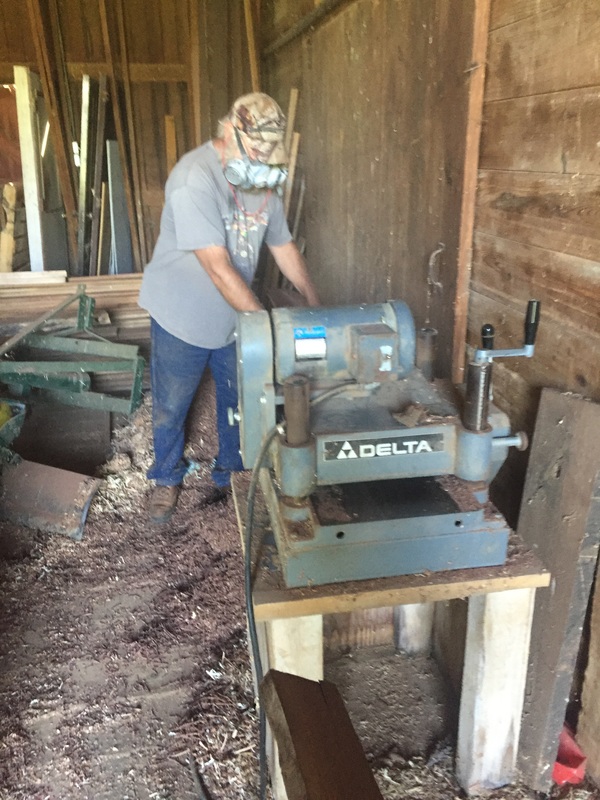 Grandpa Whalen! My parents came down to visit a few weekends ago when I was starting this project. We planed all the boards for table top. It was nice to have an some extra help surfacing the lumber. 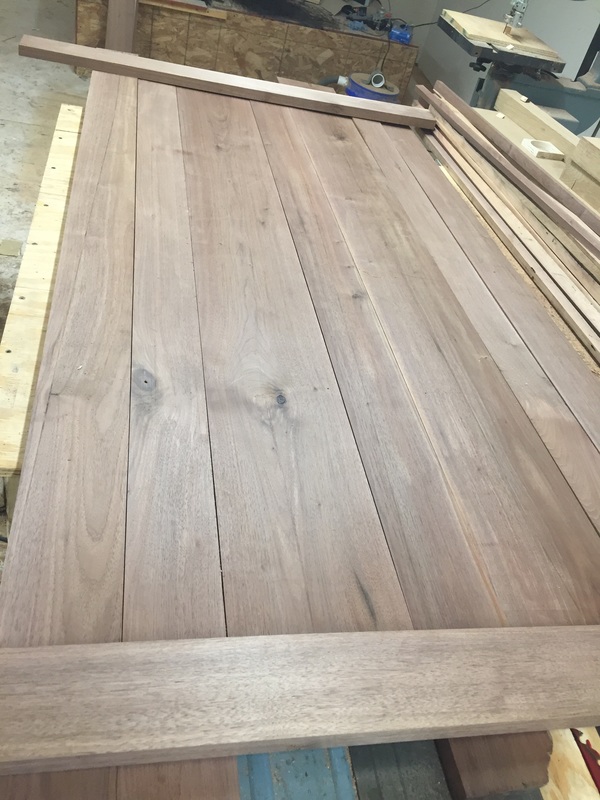 This was the plan for the top. It's a pretty typical breadboard end tabletop. I always try to do something new on each project. This project focused on how to do proper breadboard ends.
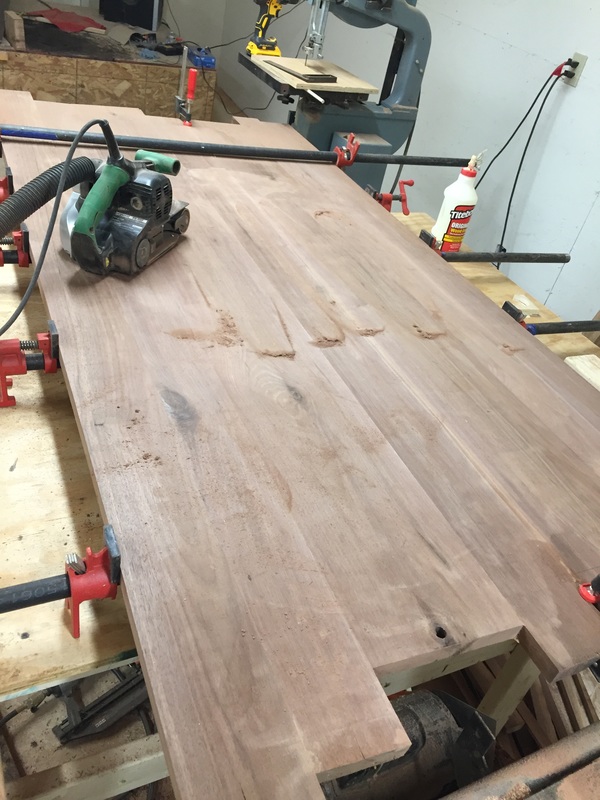
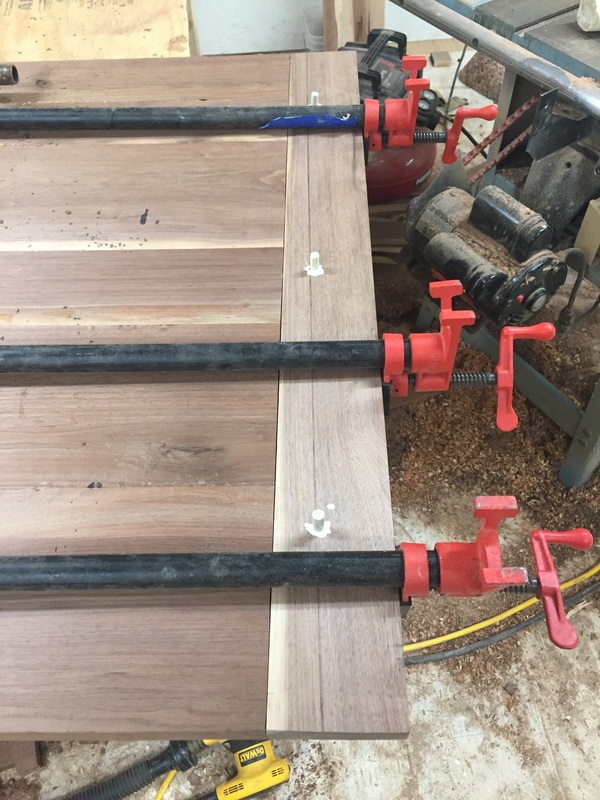
The top is doweled together. Dowels do not add anything for strength to edge grain glue joints. Their sole purpose is to align the boards to minimize flattening after all the boards are glued up. After some quick cleanup it's time to start the breadboard ends!
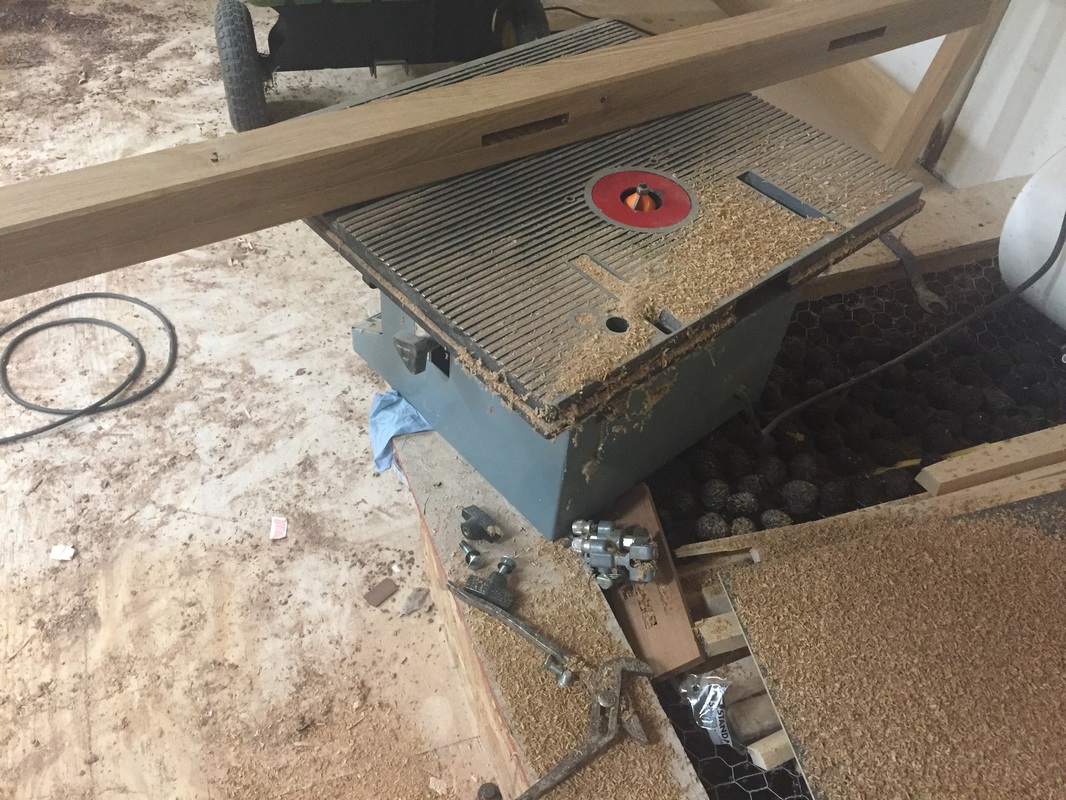
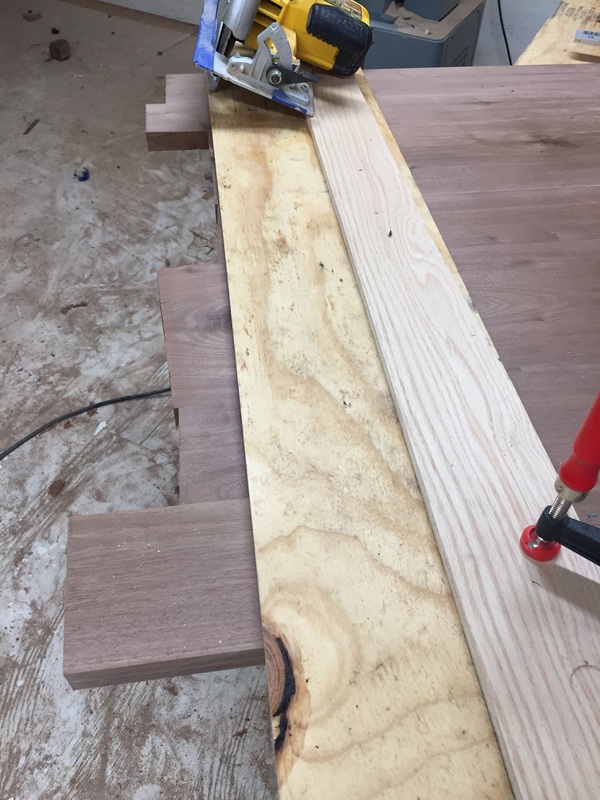
I start by trimming the end flush with the circular saw followed by a shallow cut 2" in from the end of table top. This will set the depth for the tenons.
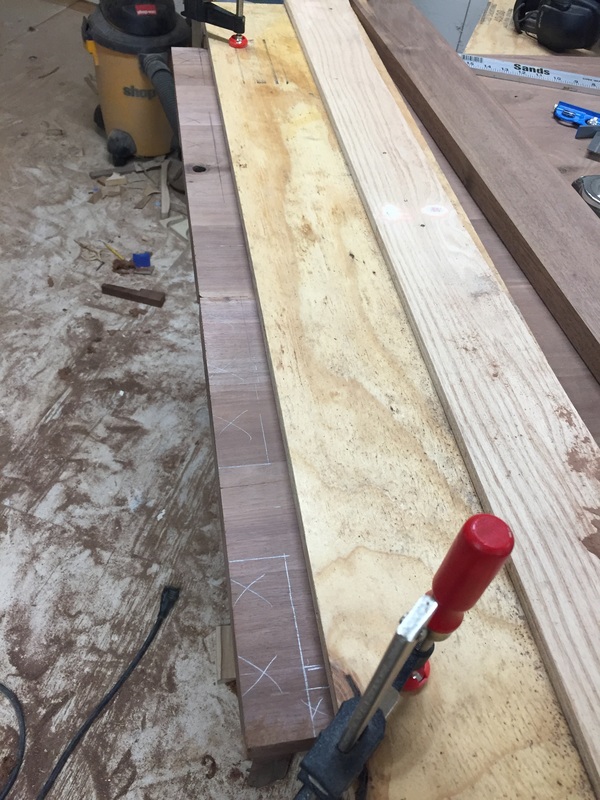
Next I rough cut the tenon shape with a hand saw and cleaned it up with a flush trim bit in the router. 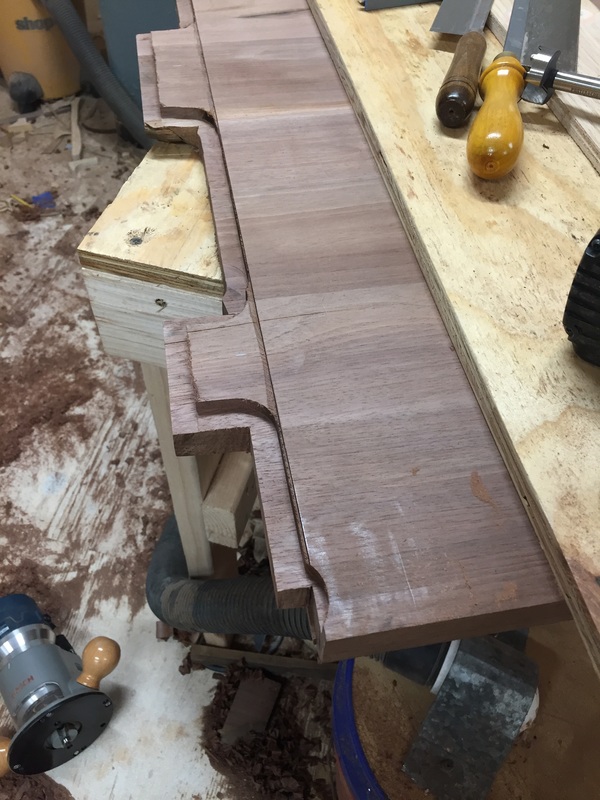 Ah crap. I was cutting the tenon depth with with a router bit and it slipped off the end into the table top. Time to improvise. 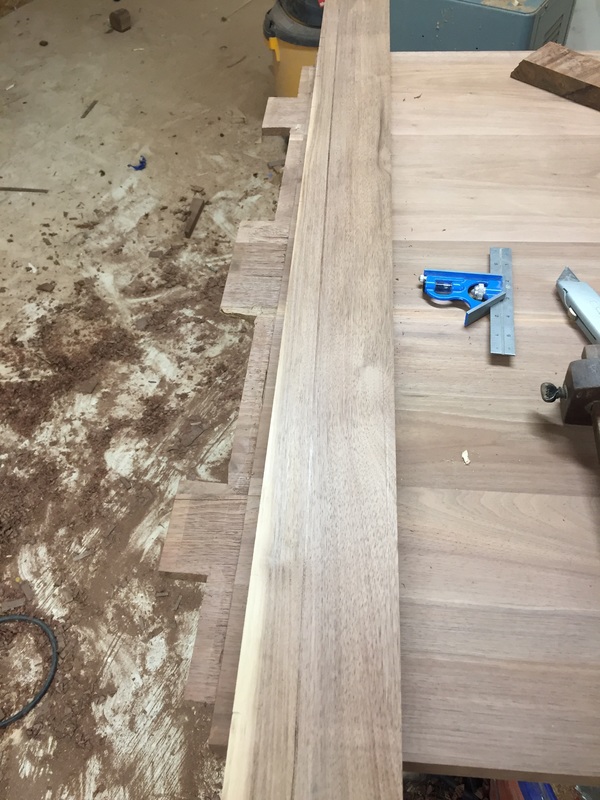 This mistake was easily fixed by trimming the edge of the tenon back slightly.
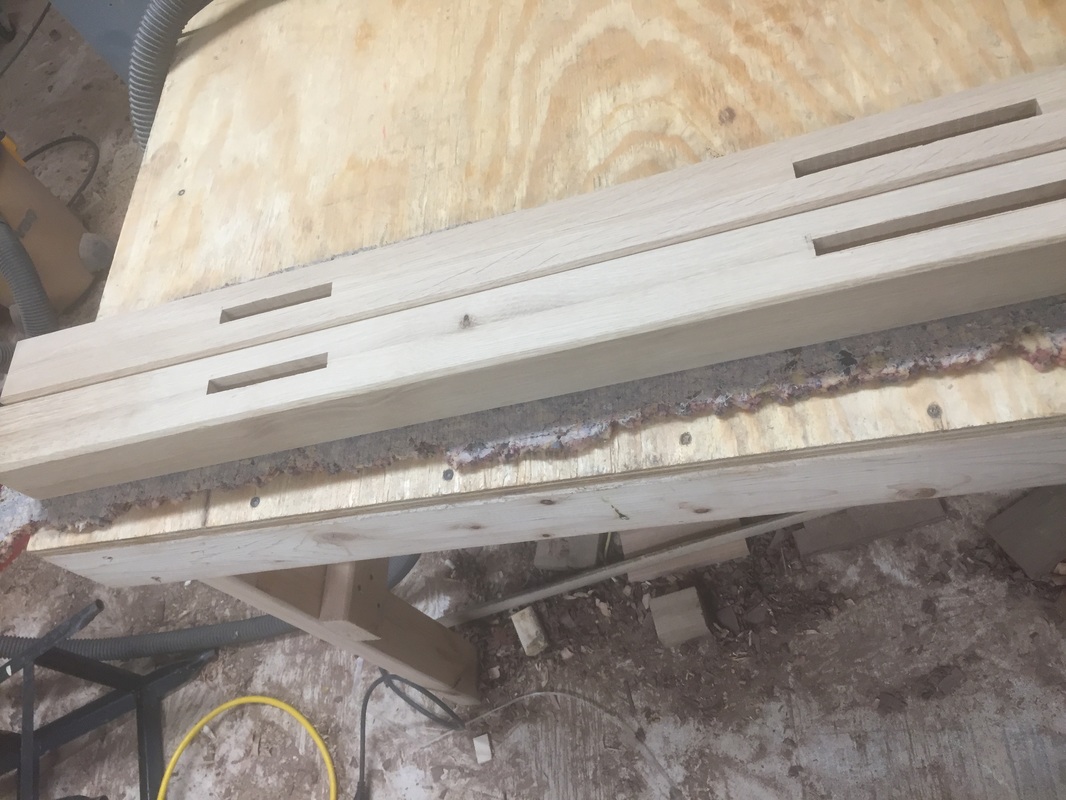
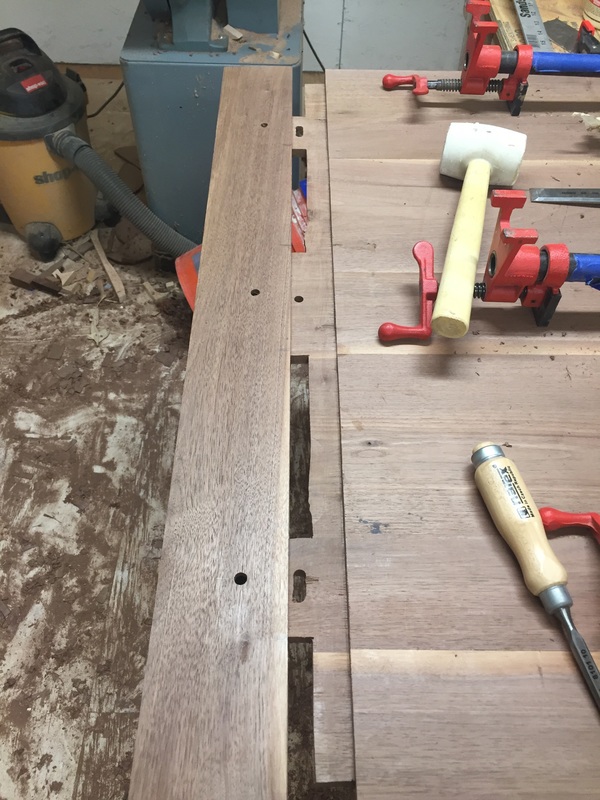
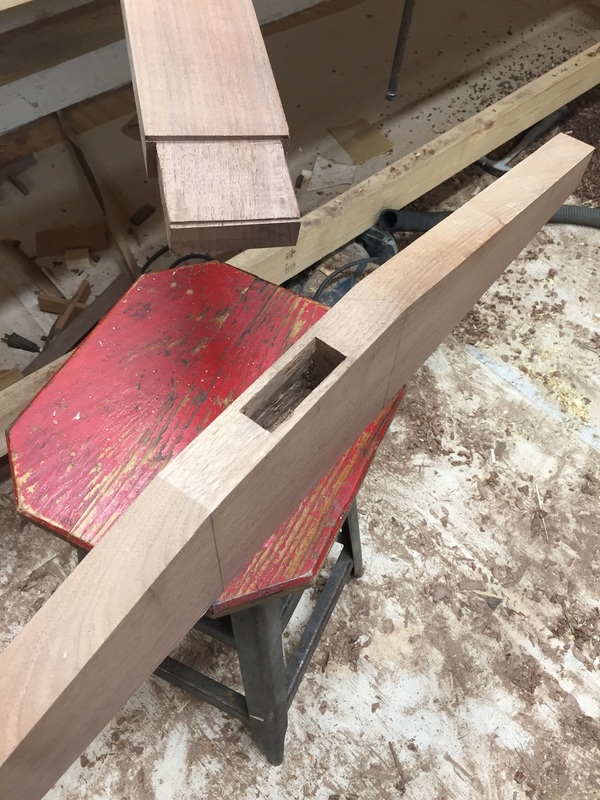
Next the breadboard is cut. First the deep mortise for the large tenons and then then a shallow mortise most of the length.
Repeat everything for the other side. All of this work will never be seen by anyone.
On the bottom side of the table, holes are drilled in the breadboard and center tenon. The outside tenons get slots. Dowels go through the holes to hold the end on. The whole reason for all of this is wood movement. The tabletop will expand and contract with the changing humidity throughout the year. Because the grain of the breadboard is perpendicular to the rest of the top, it will not expand the same. If it were glued on tight, it would eventually crack and possibly even tear itself apart.
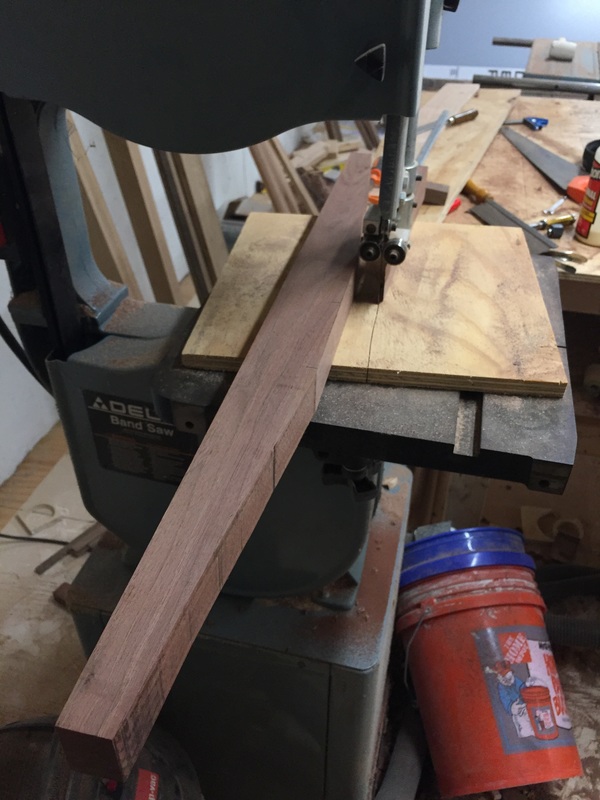
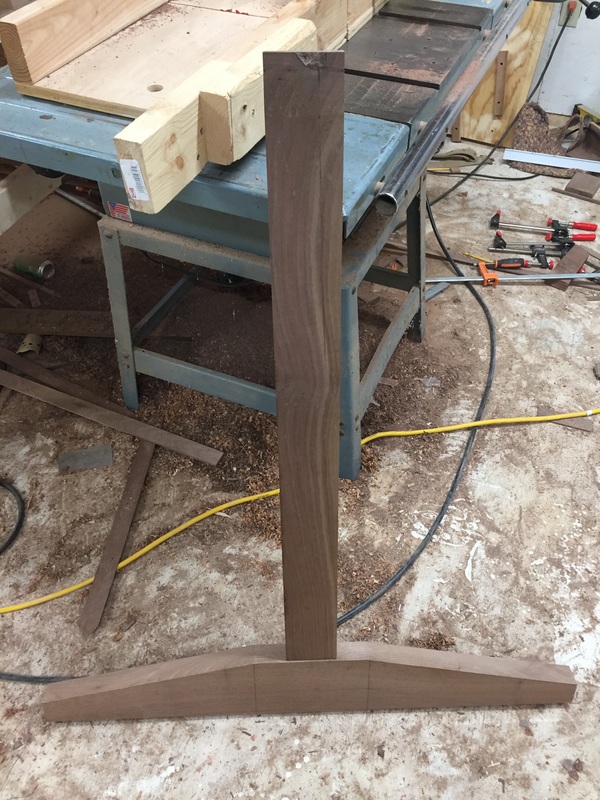
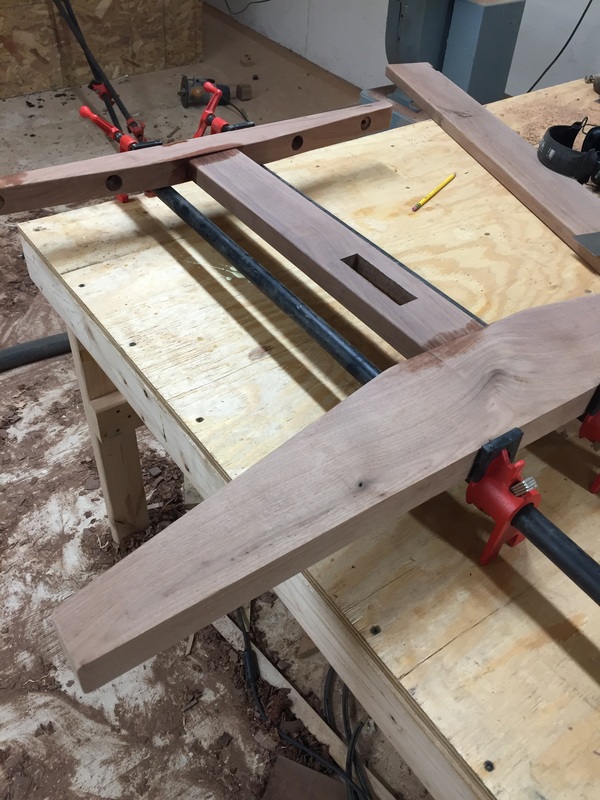
These are the supports for under the table to connect the legs to the top. They were cut out on the band saw and smoothed with a hand plane. 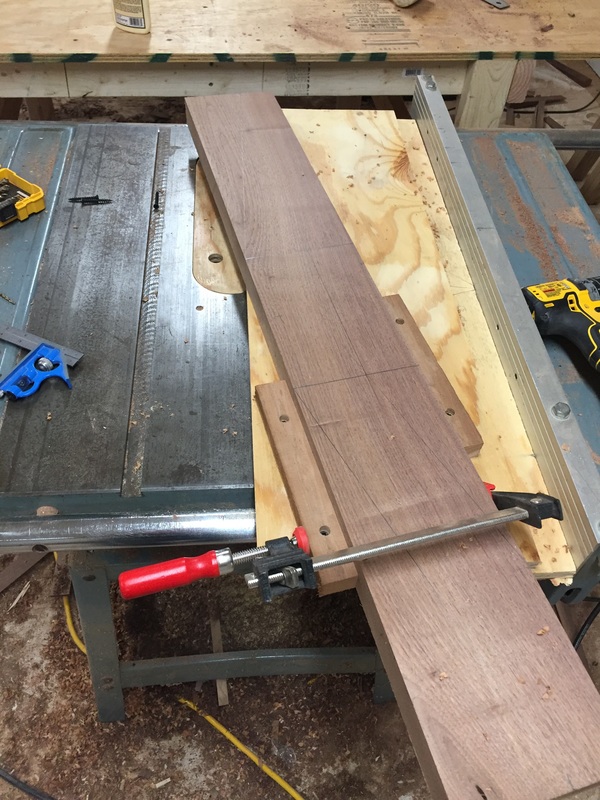 I wasn't happy with how rough the band saw left them so I made a new sled for the table saw for the bottom part of the legs.
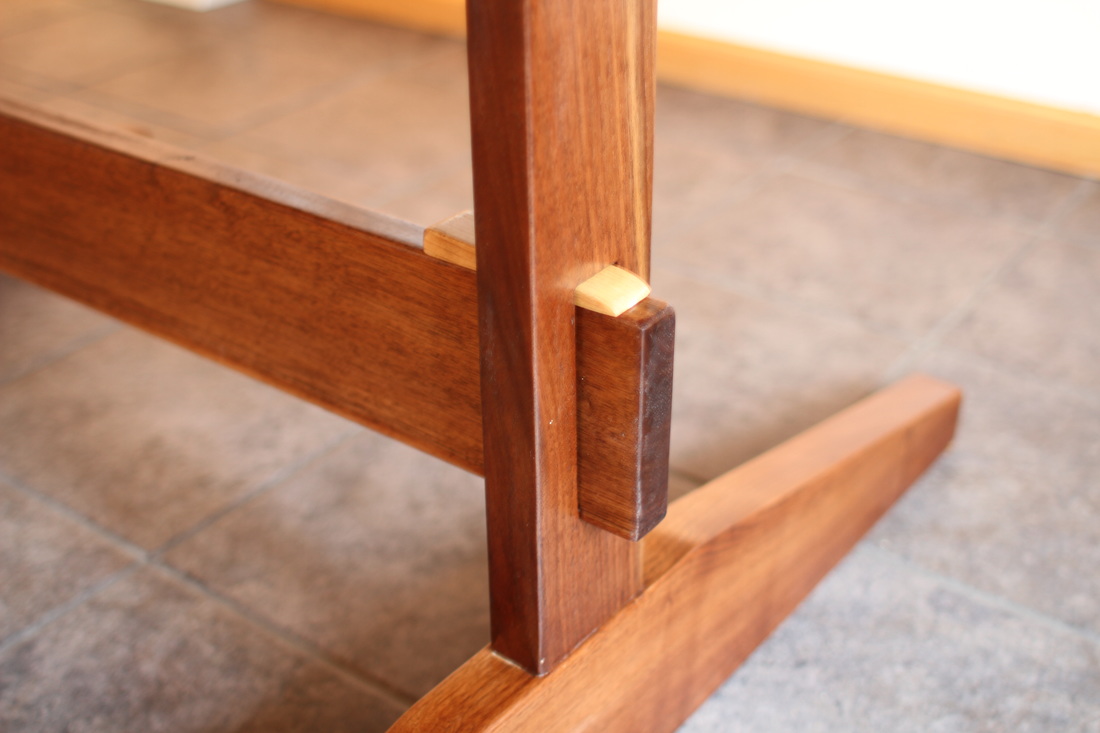
The legs have through mortise and tenons connection the base to the upright and the upright to the top pieces.  To connect the legs to the top I drilled oversize holes to allow for wood movement and countersunk holes to hide the hardware a little bit.
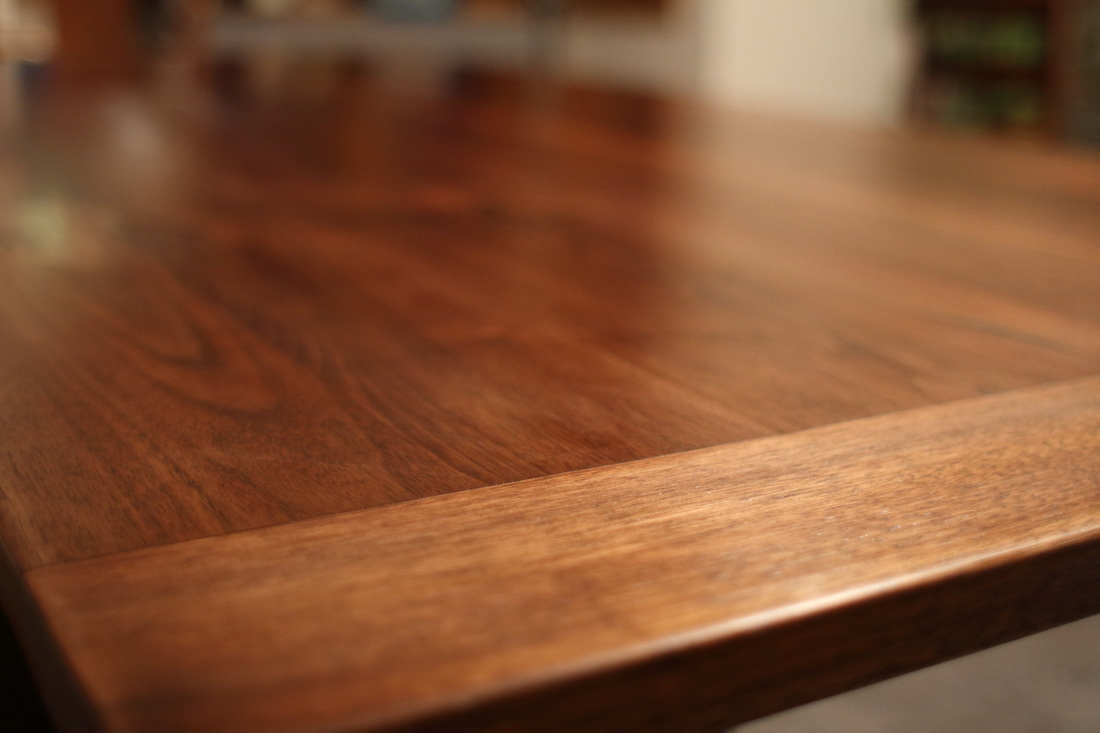
A through tenon was added for a support piece to go from leg to leg. This adds lateral support and prevents racking. This is one of the best parts of the process. It's the first time you can see the true beauty of the wood. The finish for this table is one coat of boiled linseed oil and 6 or 7 very light coats of polyurethane.
 This was another great project. I love how all the little details came together and the breadboard ends were fun to learn. It was also awesome to have my dad help out at the start of the project.
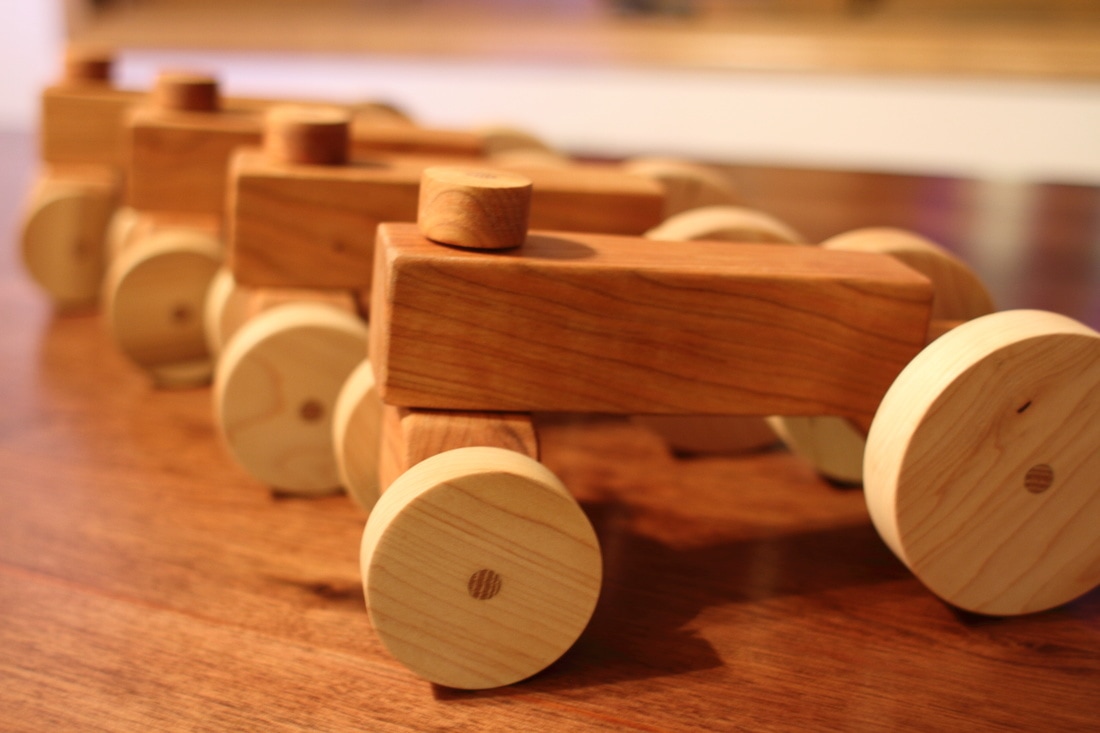
The table is solid and should last forever. This week I built something fun, made some mistakes and learned some things. 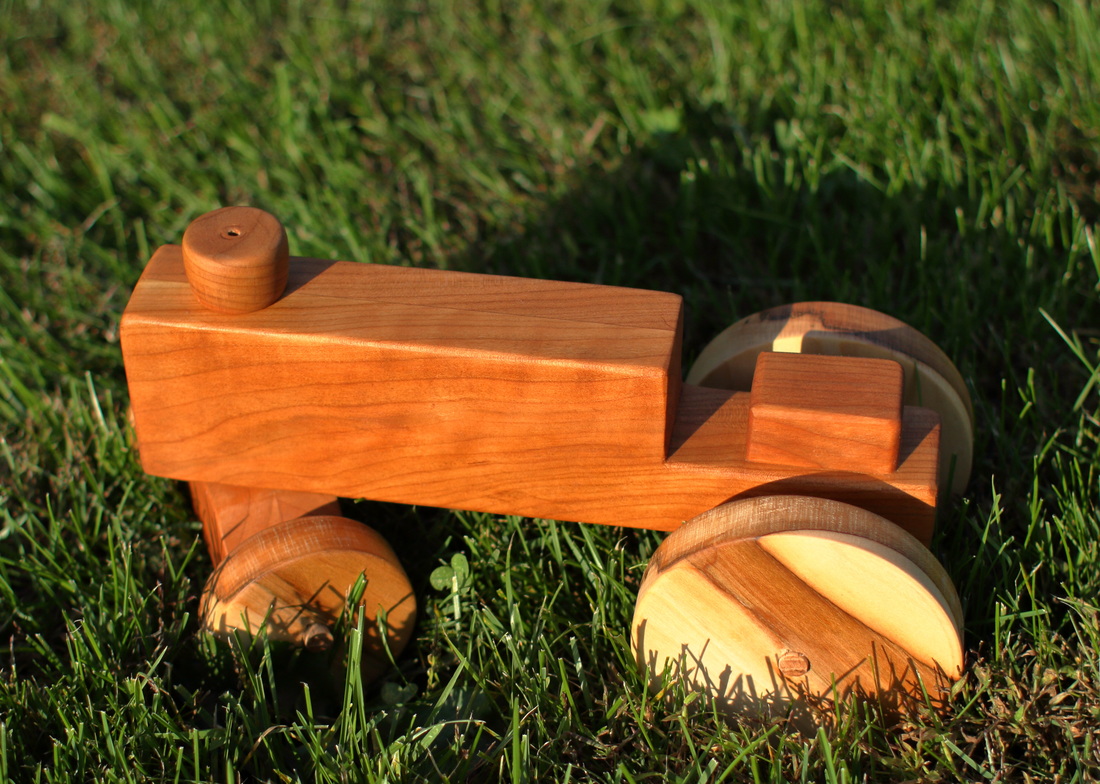 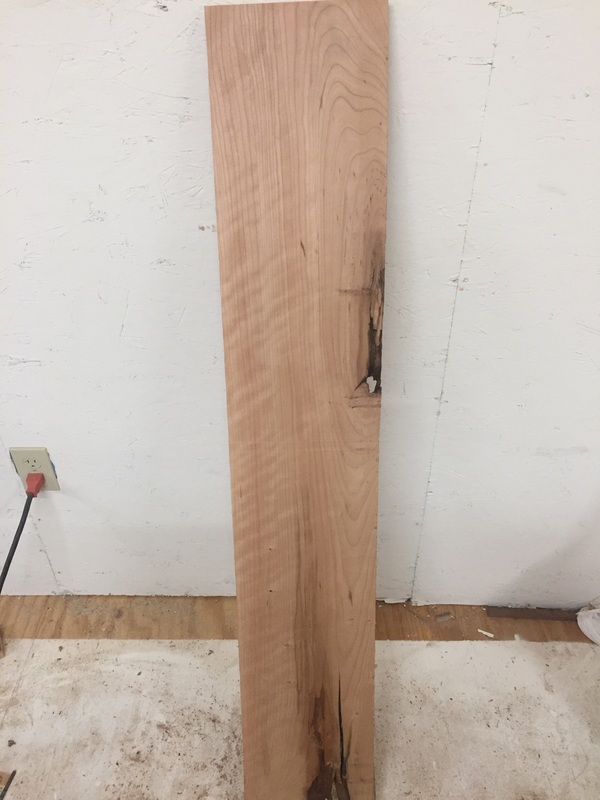 This is some cherry planned over from the chest of drawers project. I have tons of this left but I'm always finding little projects for it. Cherry is probably my second favorite wood. It is a little harder to work than walnut and not as pretty, but it's a little more durable.
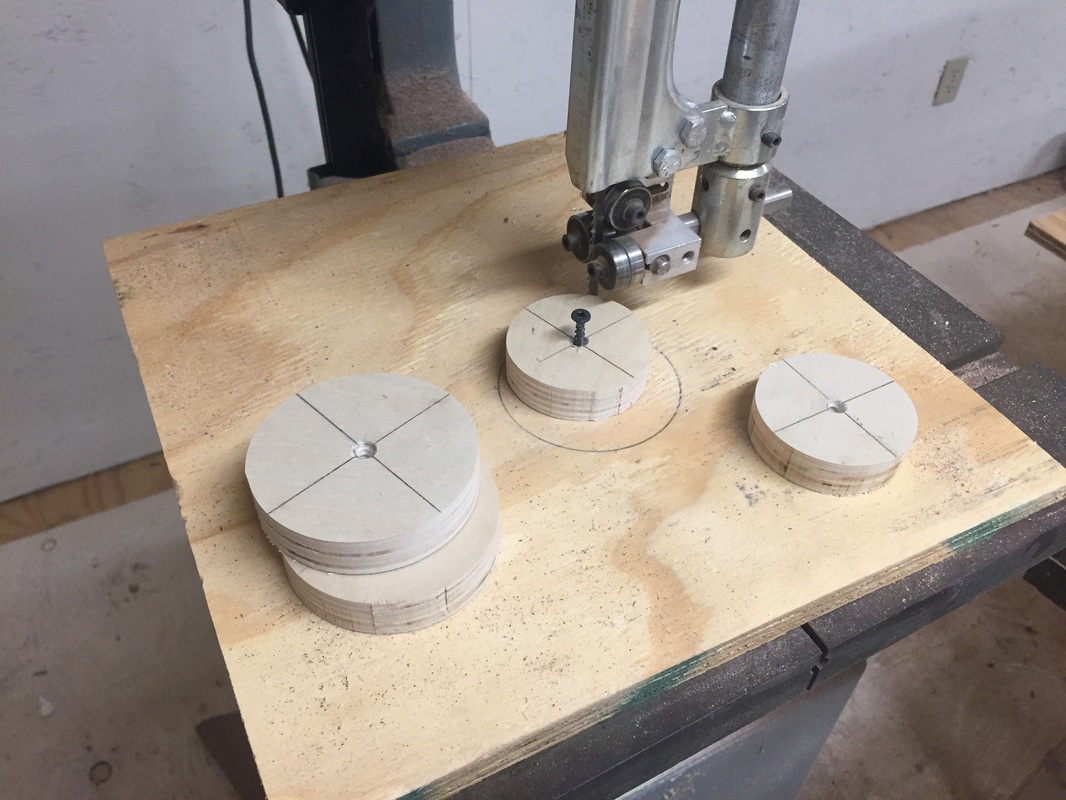
For the body I just cut out two pieces and glued them together to get the width that was needed. The wheels were cut on the band saw by screwing the center to a piece of plywood and turning the wheels.
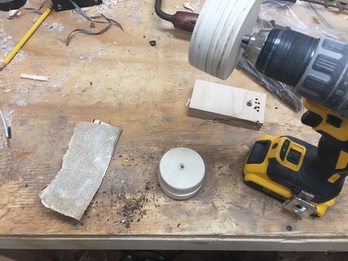
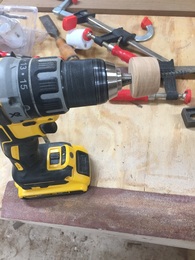
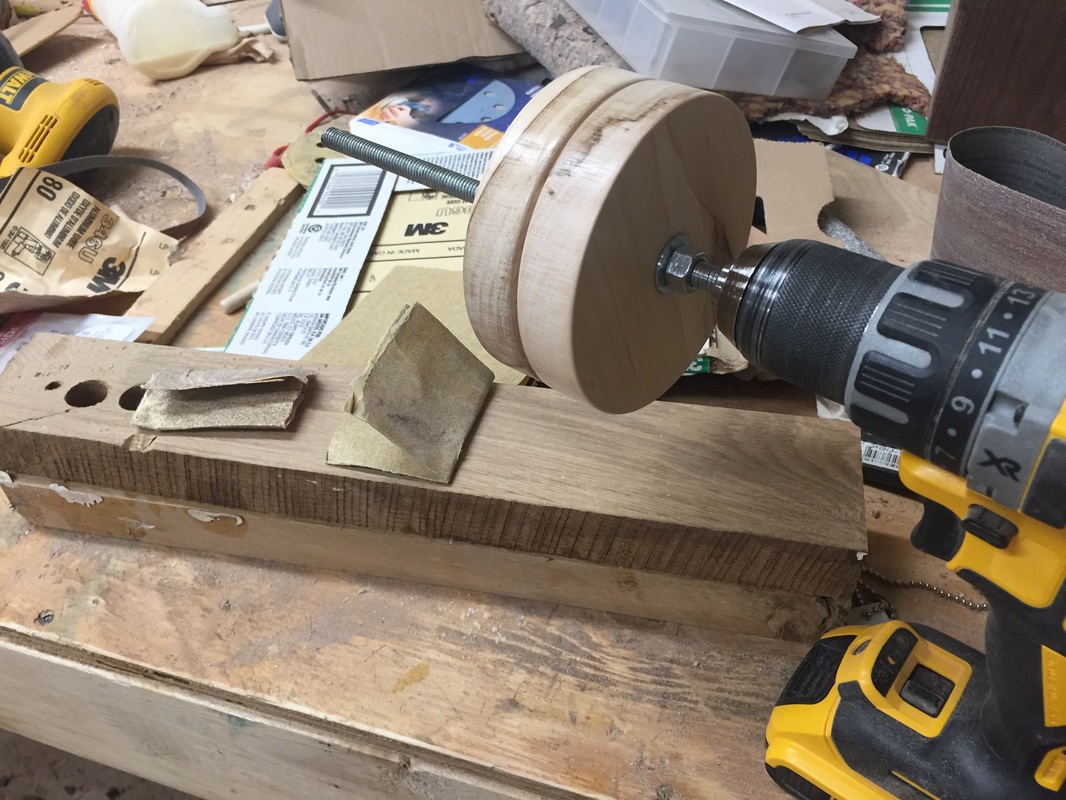
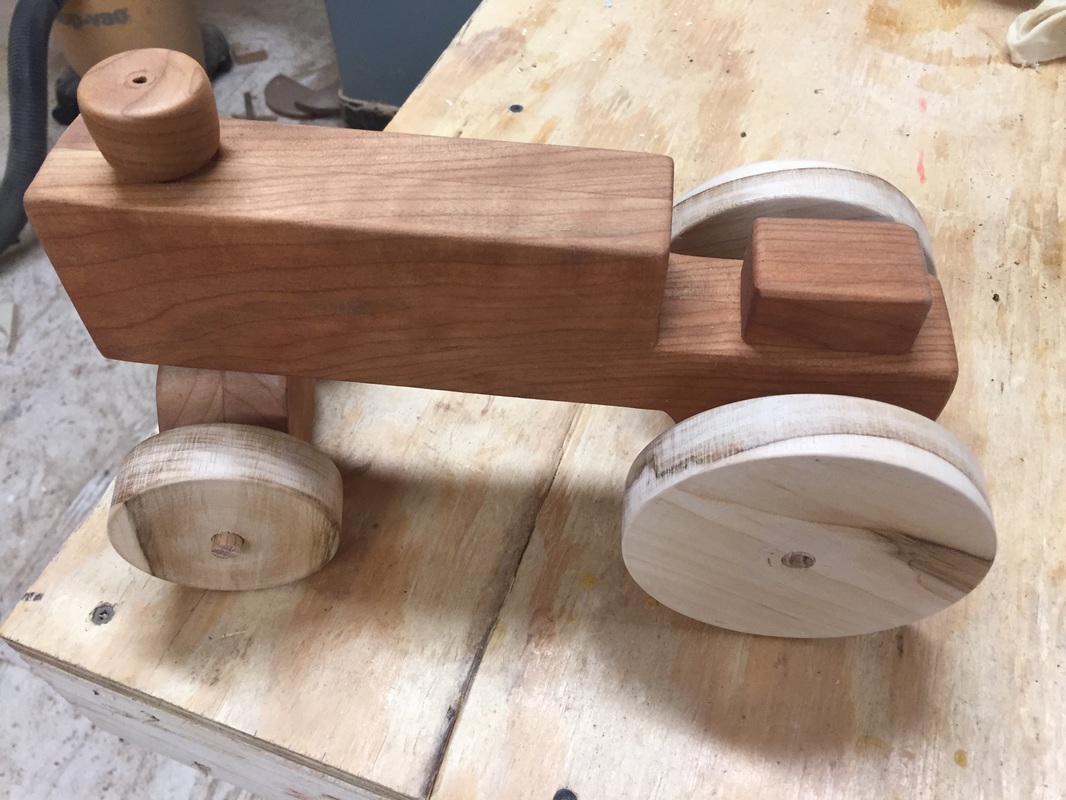
"Do you have a lathe?" - No. People always ask if I have a lathe. I do not. I find other ways to achieve the same results. The wheels were chucked in the drill and sanded smooth. It worked. 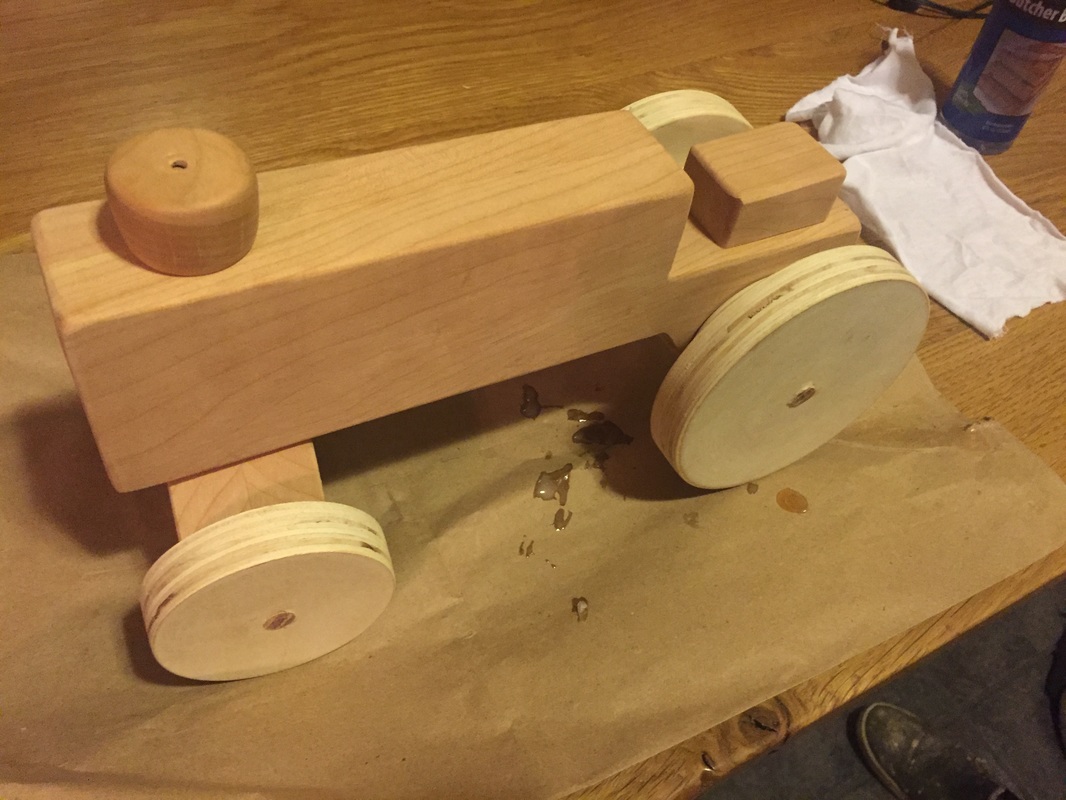 The body shape was cut out in a few quick cuts on the tablesaw and after some light sanding it was ready for some finish! 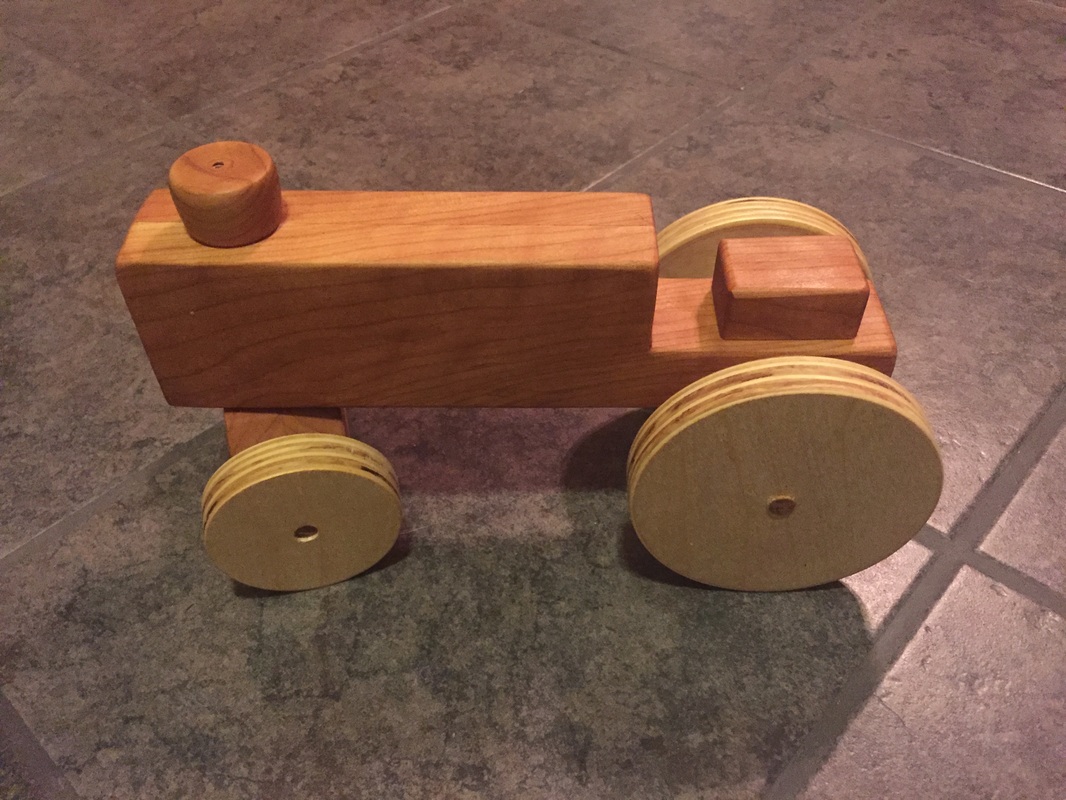 Done? I hate these wheels. I used birch plywood for the first set of wheels. They will resist warping with changing humidity levels. Too bad they are super ugly. Perfect for the campfire pile. 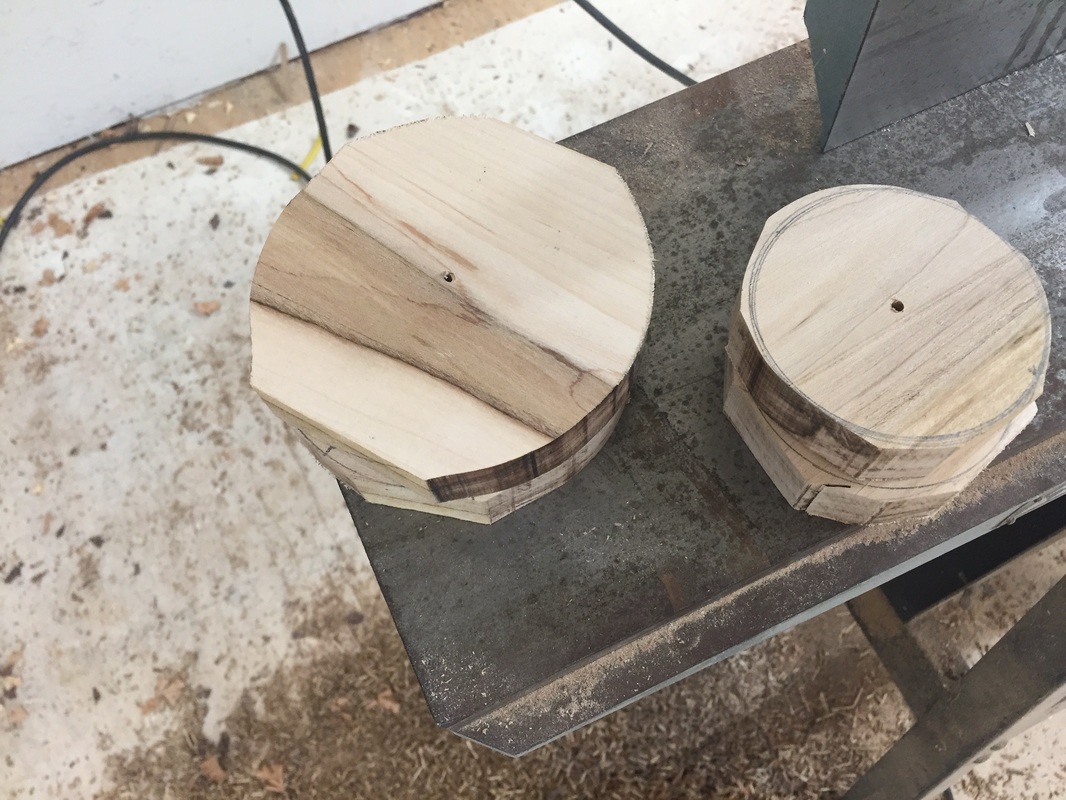 Hard maple wheels roughed out on the band saw. The maple was too hard for the bandsaw to cut the tight radii. Time to learn something new and make a new jig. 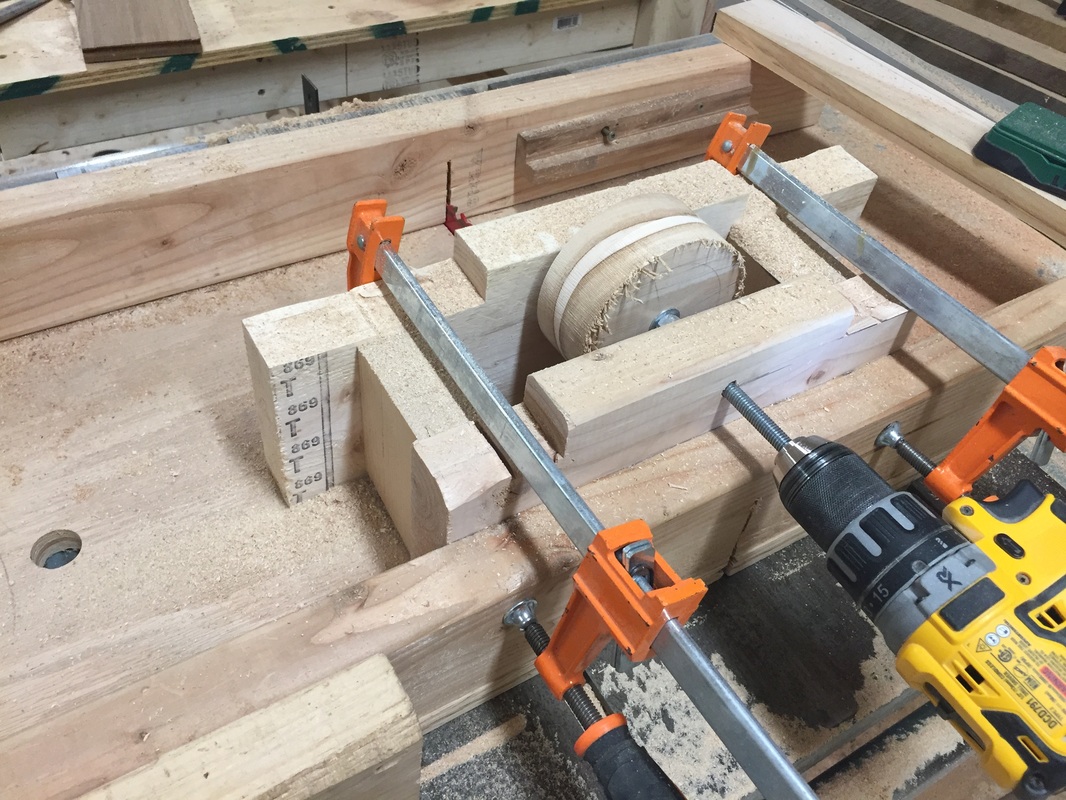 This took about 15 minutes to throw together. It is an attachment for my crosscut sled for making wheels on the table saw. The blade is raised little by little while the drill spins the wood. Perfect circles every time.
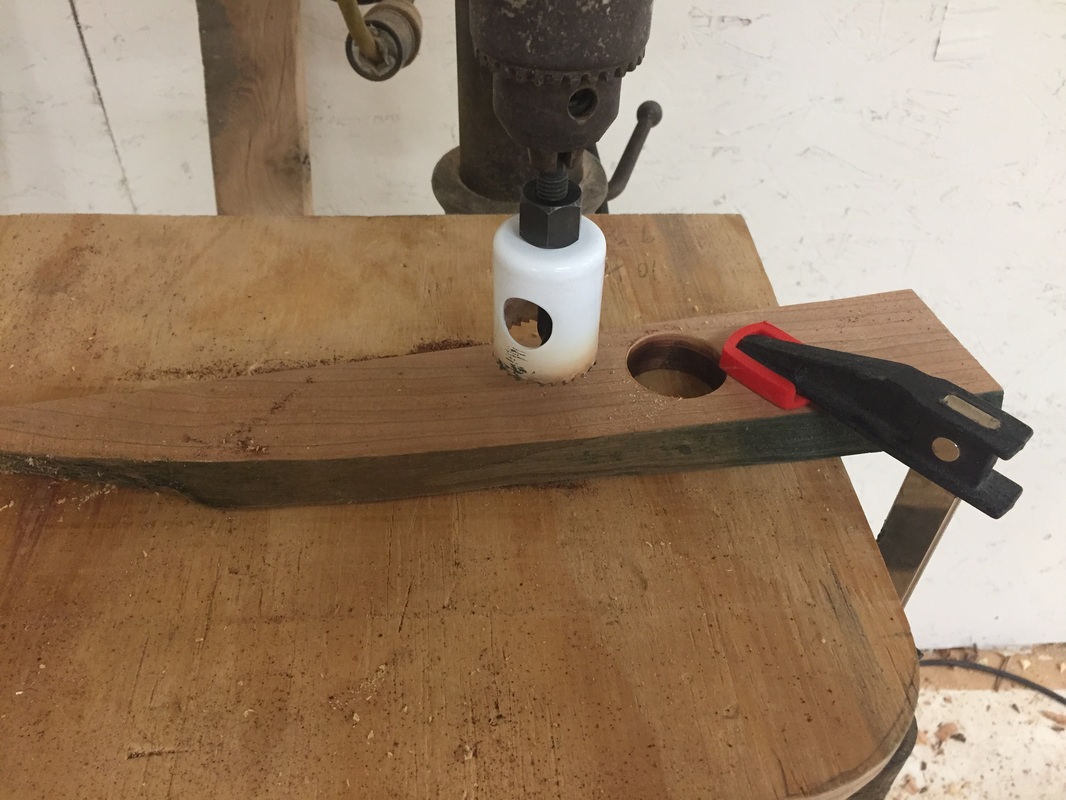
Back to the drill for some sanding and then over to the drill press to make some spaces for the rear wheels. My hole saws only go up to 2" so I couldn't use one of those for the wheels.
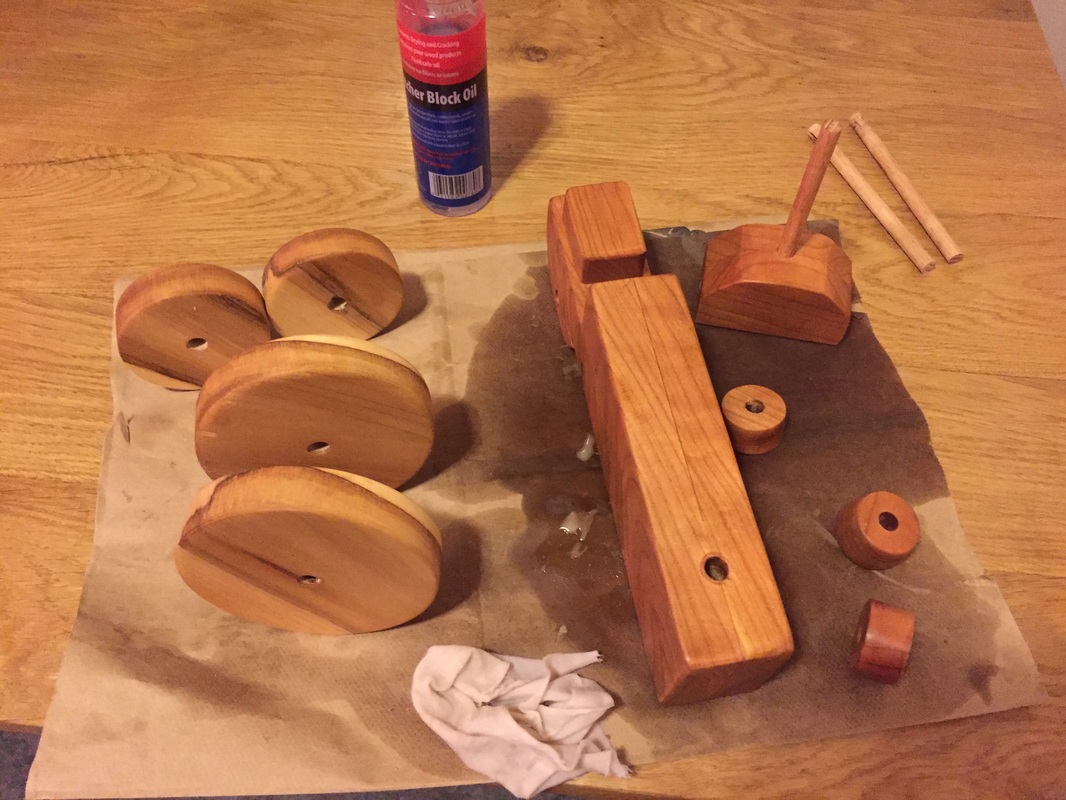
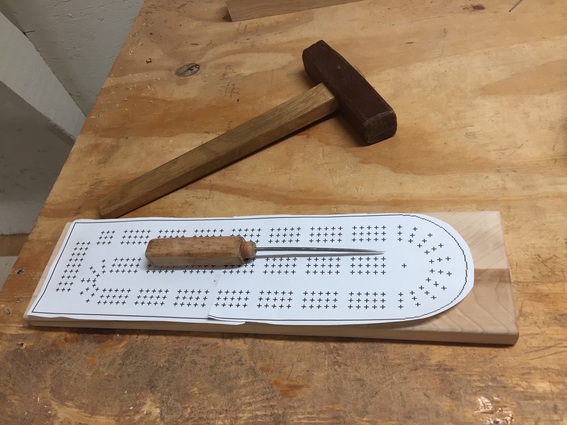
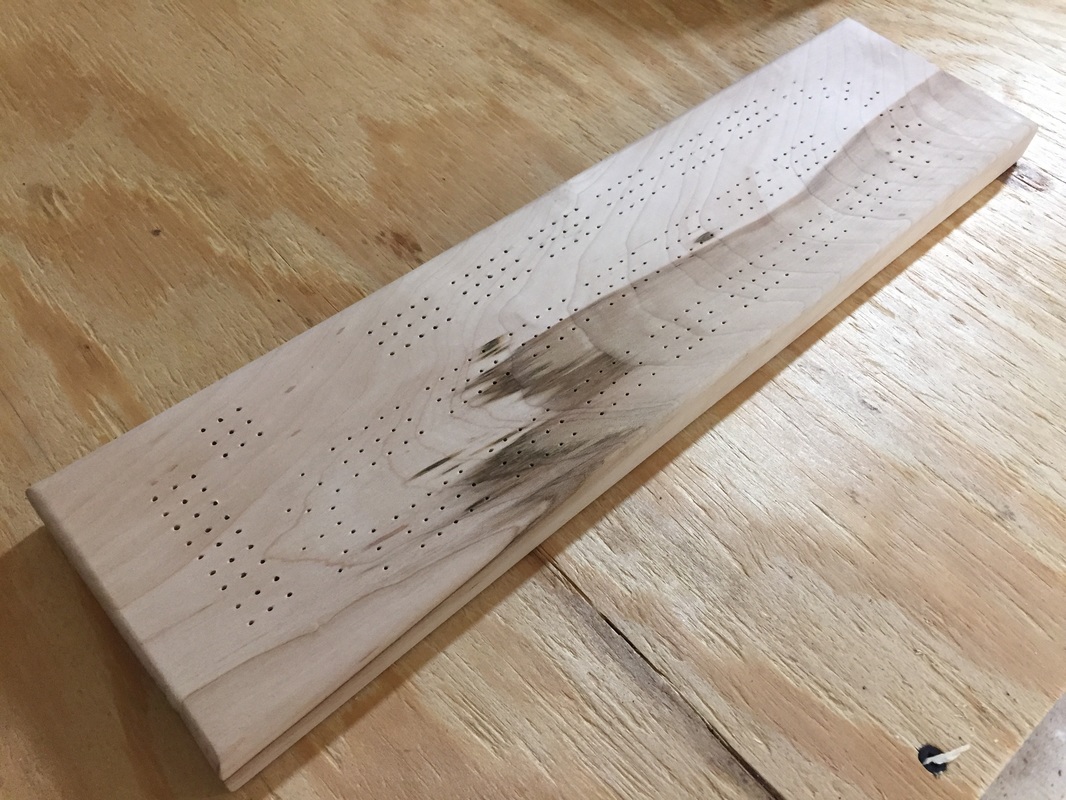
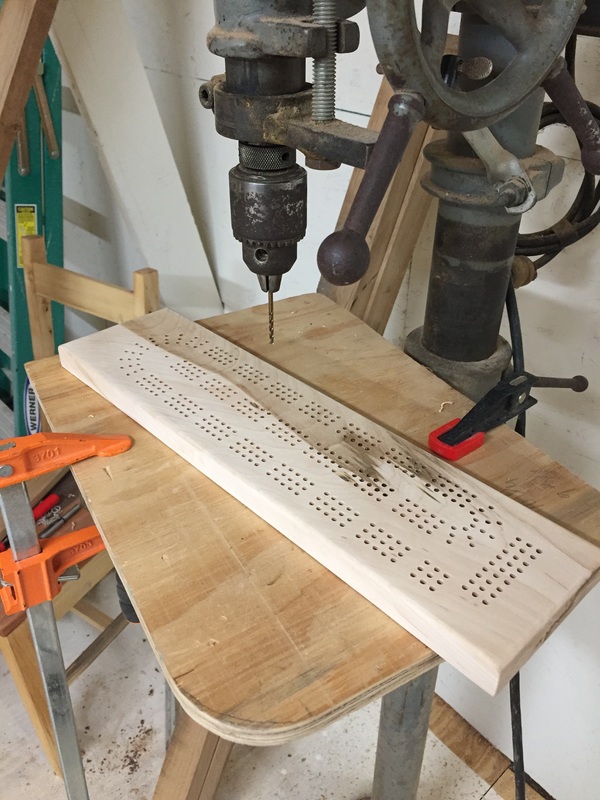
Butcher block oil makes a great kid safe finish. 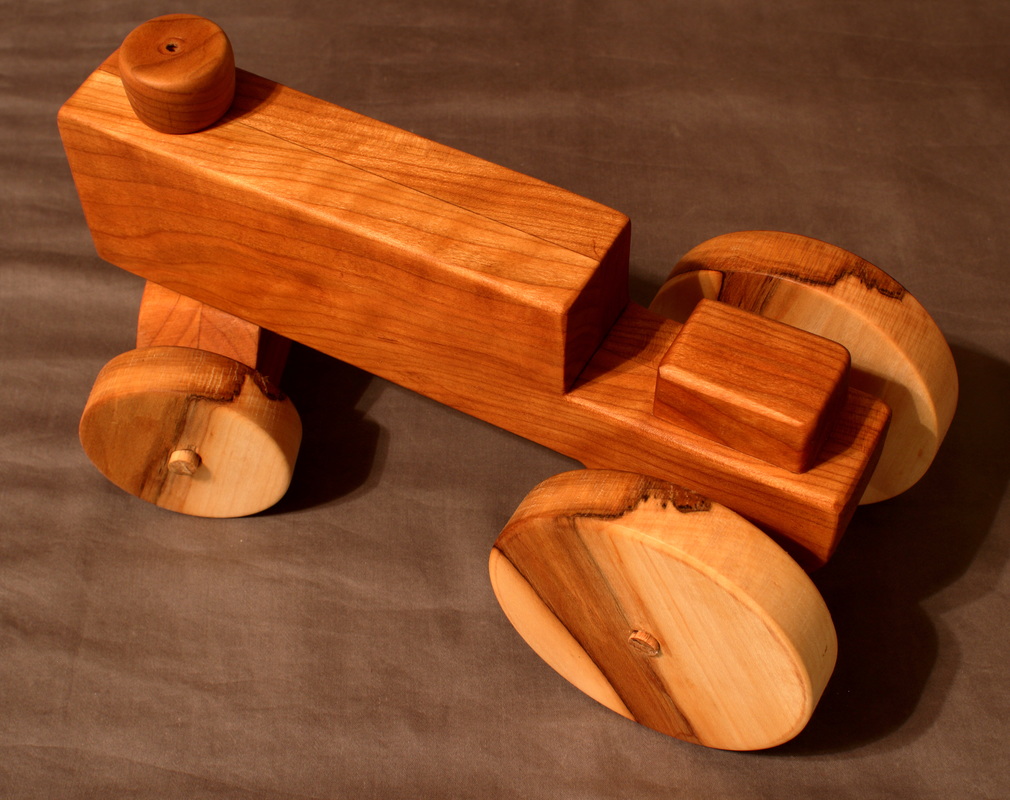  Let's bale hay! 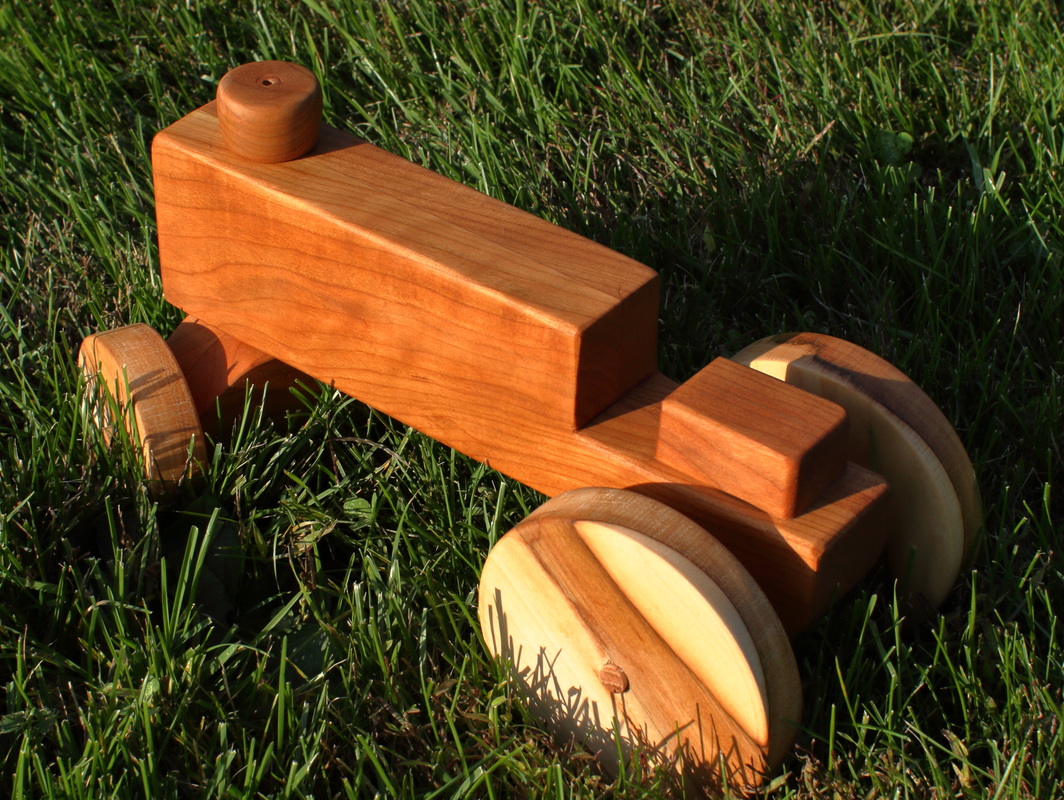 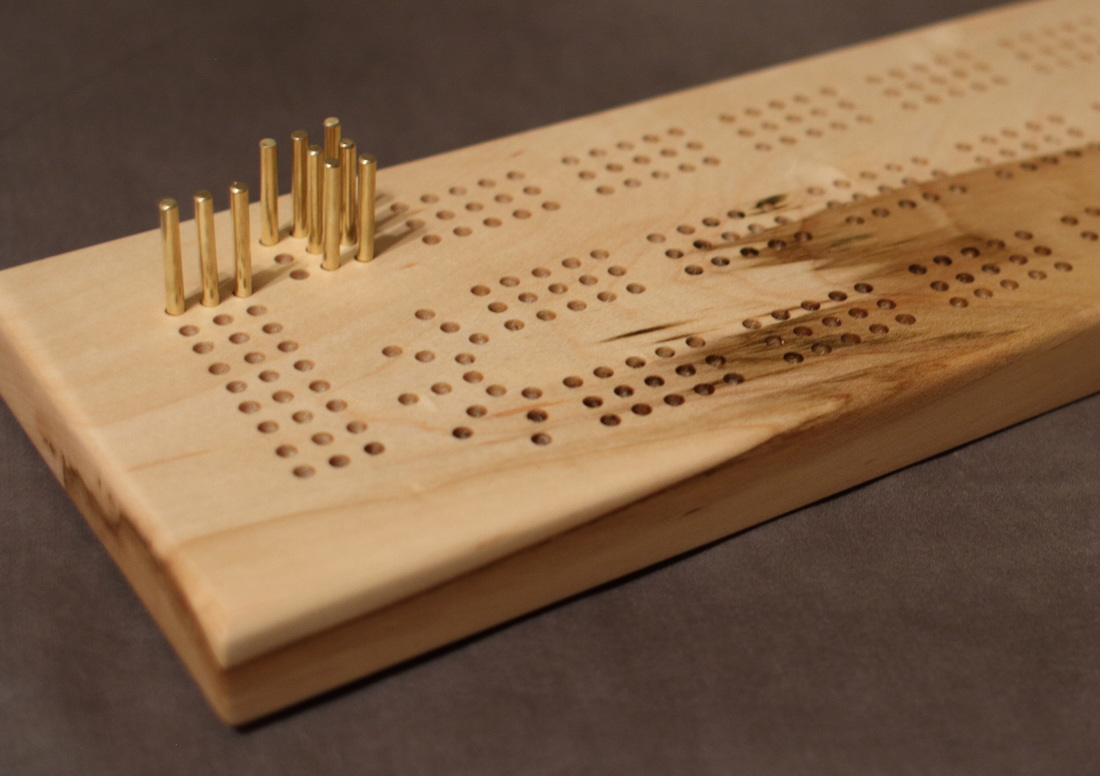 If you grew up in Wisconsin or Minnesota, there is a good chance you played one of two different card games. You either played a game in the Skat family such as Euchre, Sheepshead or Pinochle (depending on your specific geographic location of course), or you played cribbage. In Northern Wisconsin my family played cribbage. My very first real woodworking project was actually a cribbage board. I took woodworking in high school despite having access to full shop and a fairly good instructor right at home. The main project for the semester was to make a cribbage board. I asked my dad if I could use some scraps of wood from his shop. We came up with a design for a diamond pattern and by the end of the night we had cut up two whole 8' boards of maple and cherry to make the pattern we had come up with. It seemed wasteful at the time but it's just what you have to do sometimes. This is the cribbage board my dad and I built. 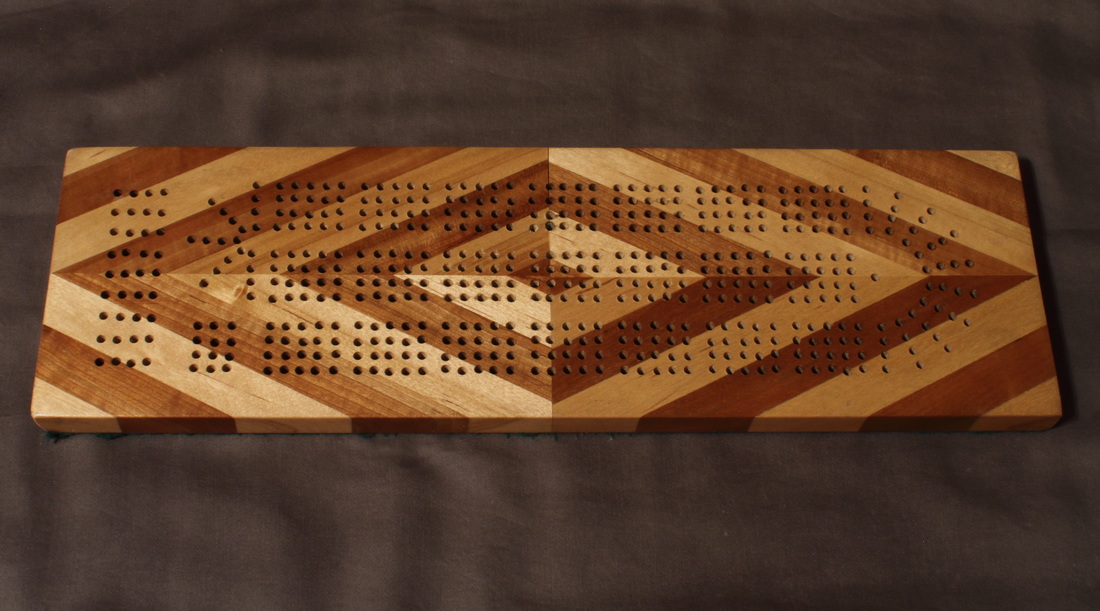 I had this piece of maple with some pretty cool heartwood. I thought it would make a great cribbage board so I went to work. 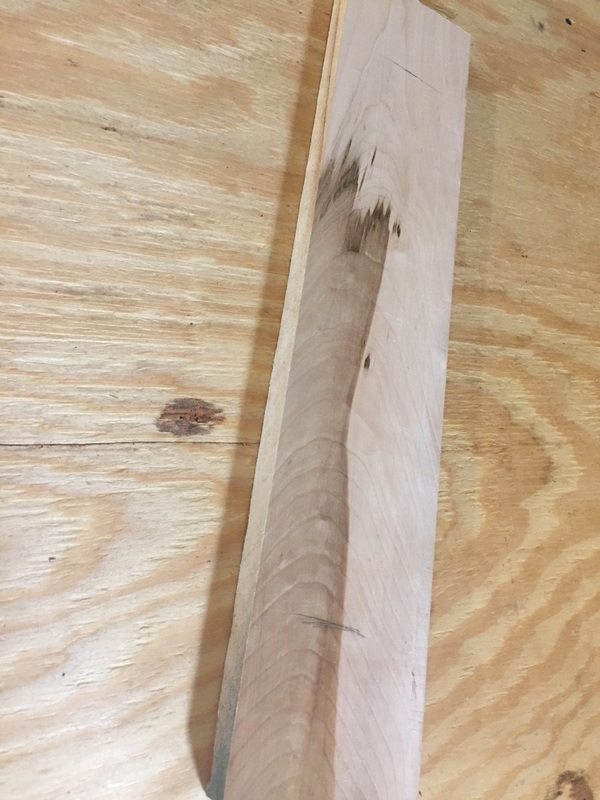 Cut to the right dimensions, edges rounded over and all the surface lightly sanded out, it was time to mark some holes. Each player's track has 120 holes. There are 9 game counter holes and an additional 3 starter spots for each player. The winning hole on a 3 player board makes a total of 397 holes to mark, drill and cleanup.
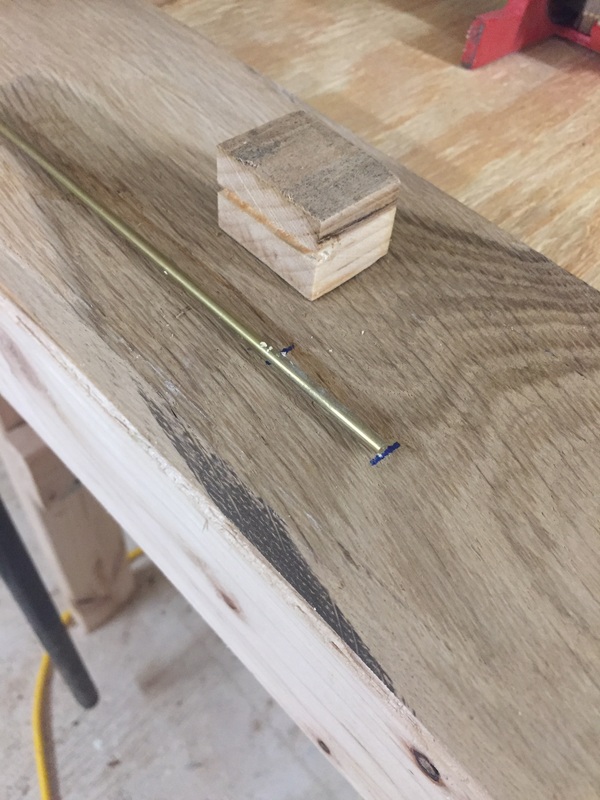
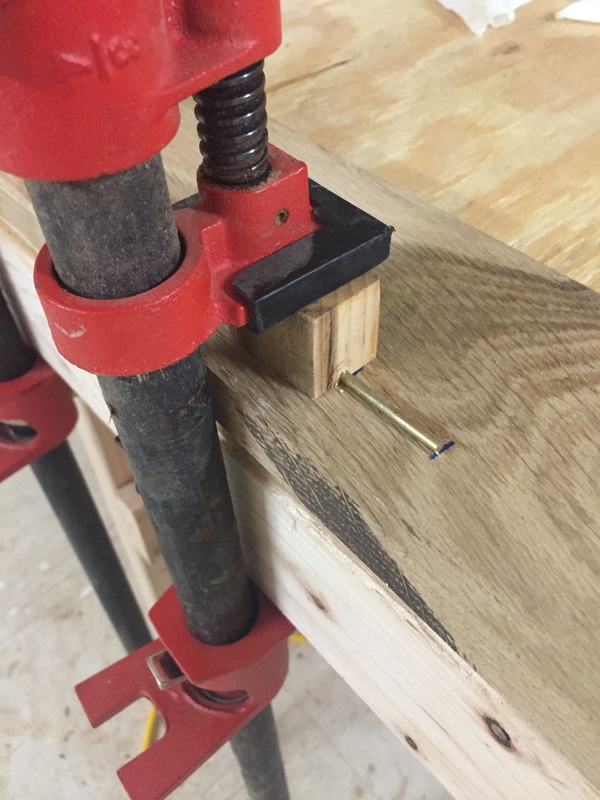
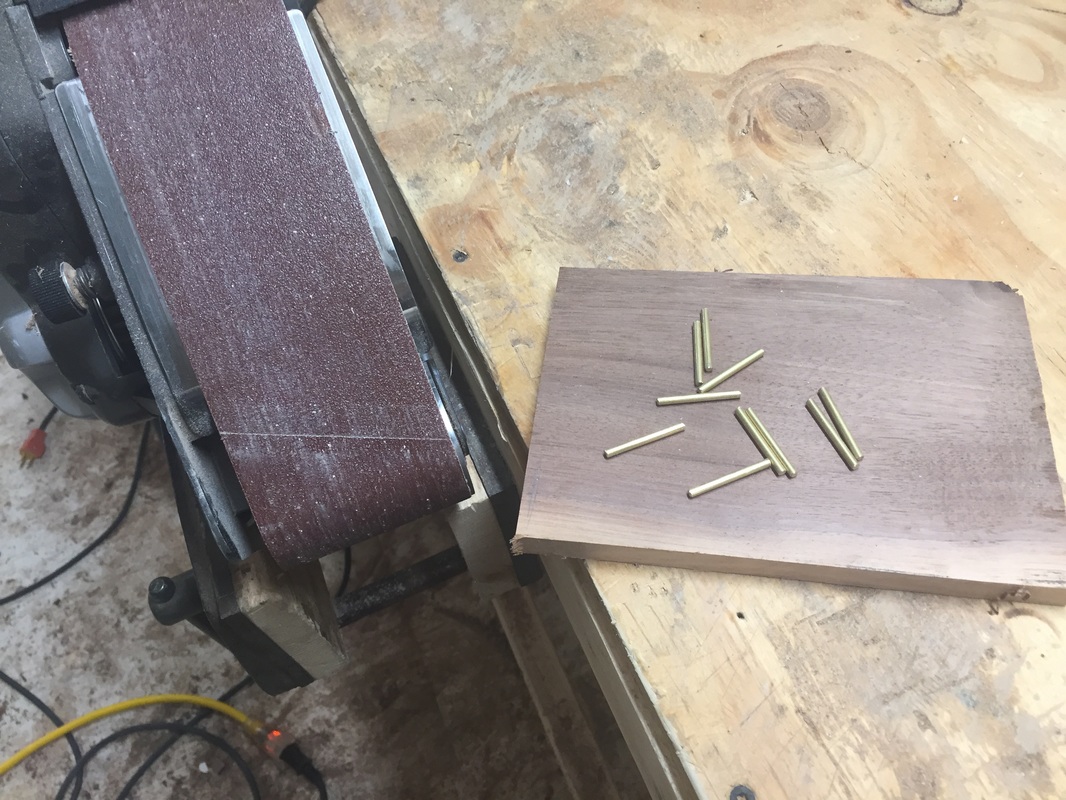
 After all the holes were drilled it was time to make some pegs. I made clamp block that held some 1/8" brass rod. It clamps firmly but just barely allows the rod to slide so I didn't have to remove the clamp each time I wanted to make a cut. The cuts were made with a reciprocating saw and then cleaned up on the belt sander.
 Sometimes you have to get creative. I slid a piece of steel wool over the ice pick and stuck it in the drill press. It made a very nice polishing tool. 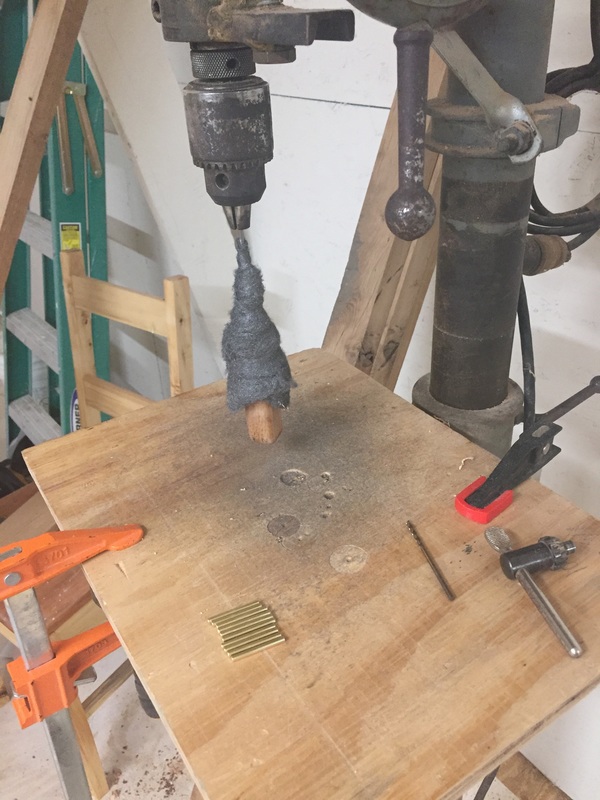 Finished product - I don't really need a third cribbage board so I put this one up for sale on Etsy. It would make a great gift that is sure to last a lifetime. Check it out on Etsy. Thanks for viewing! 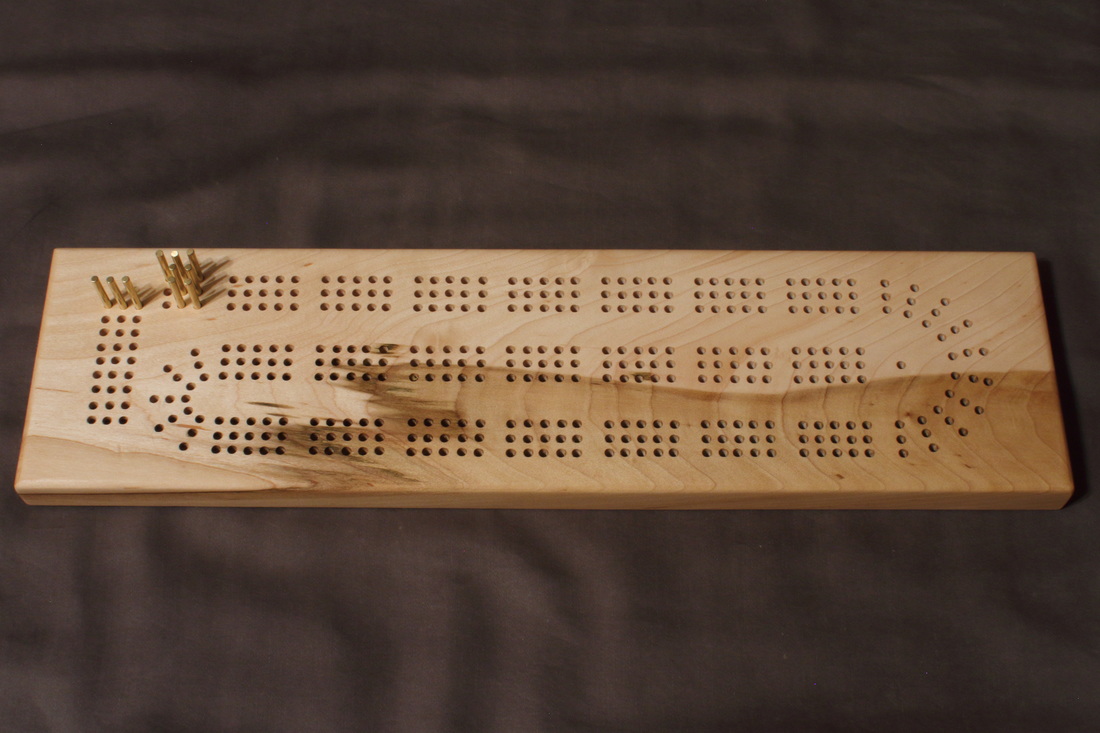 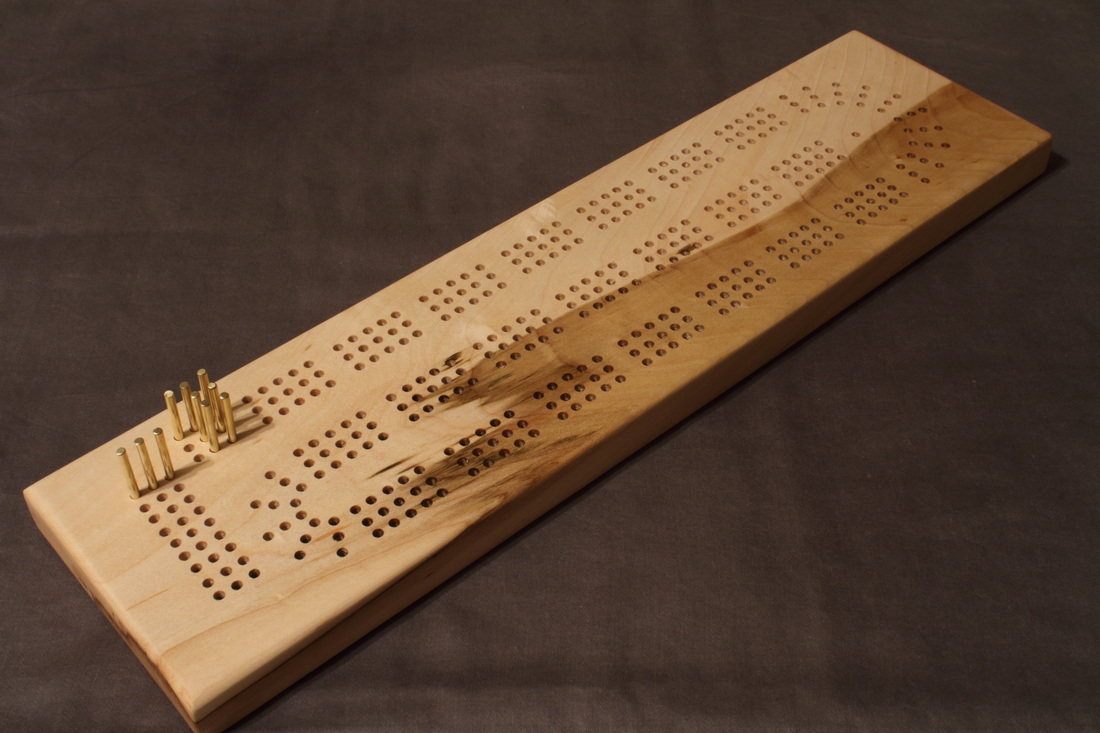 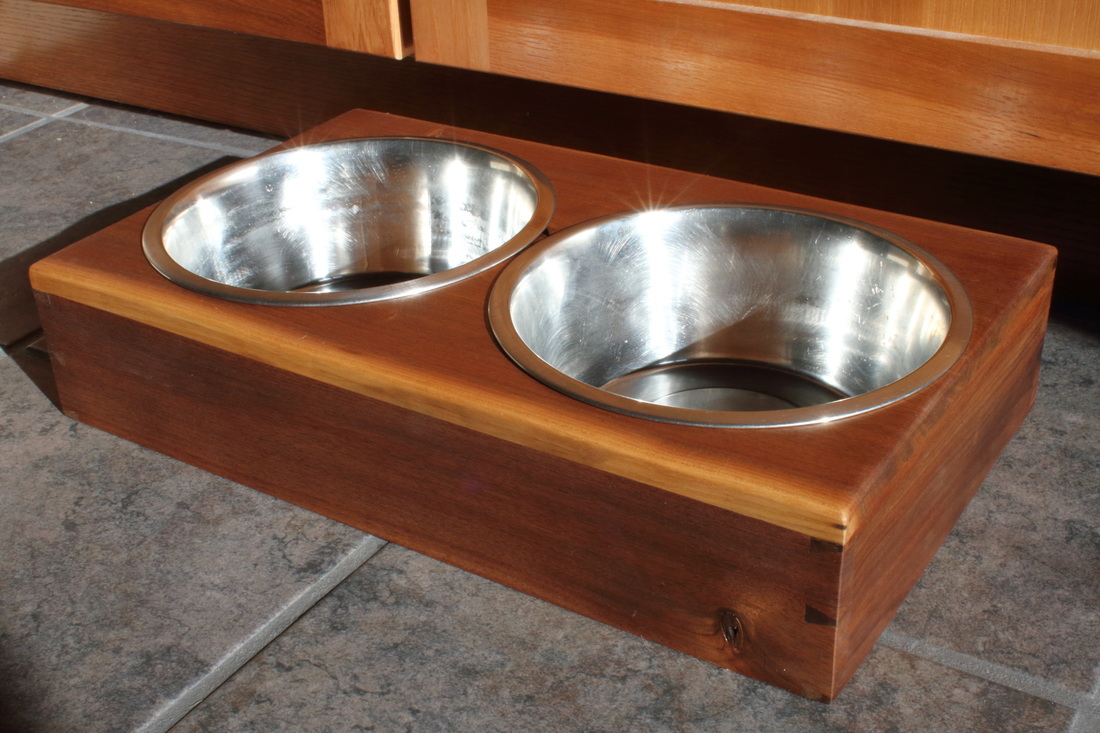
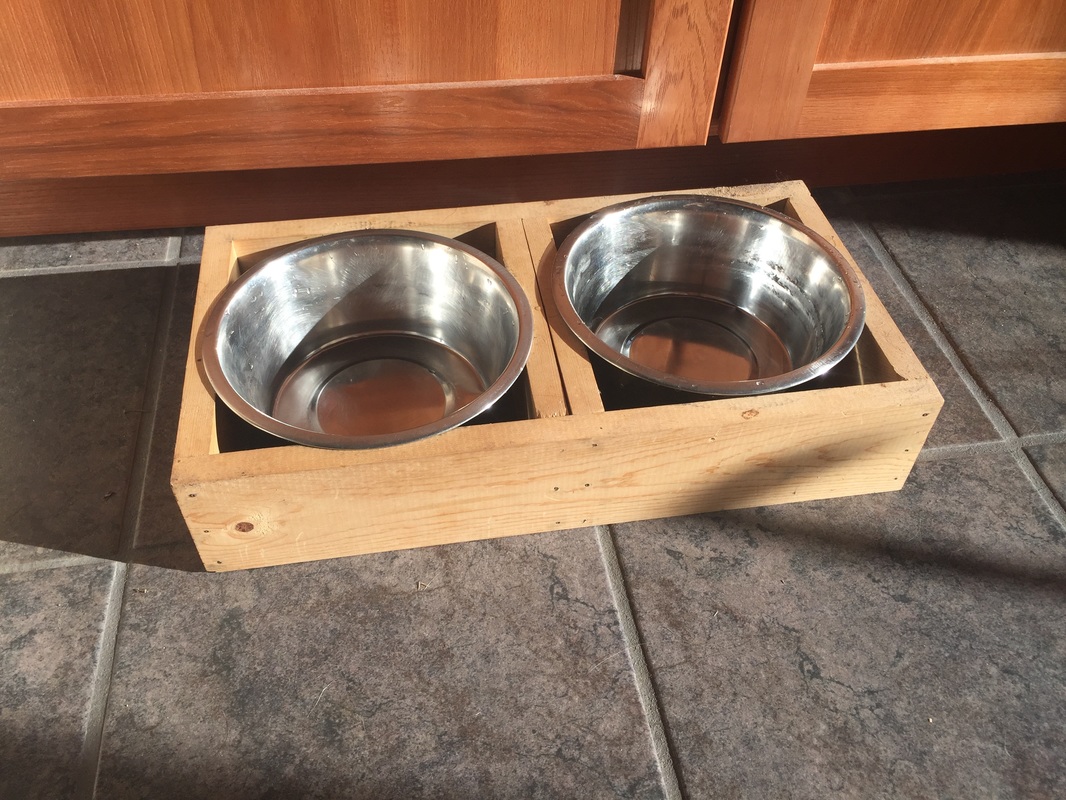
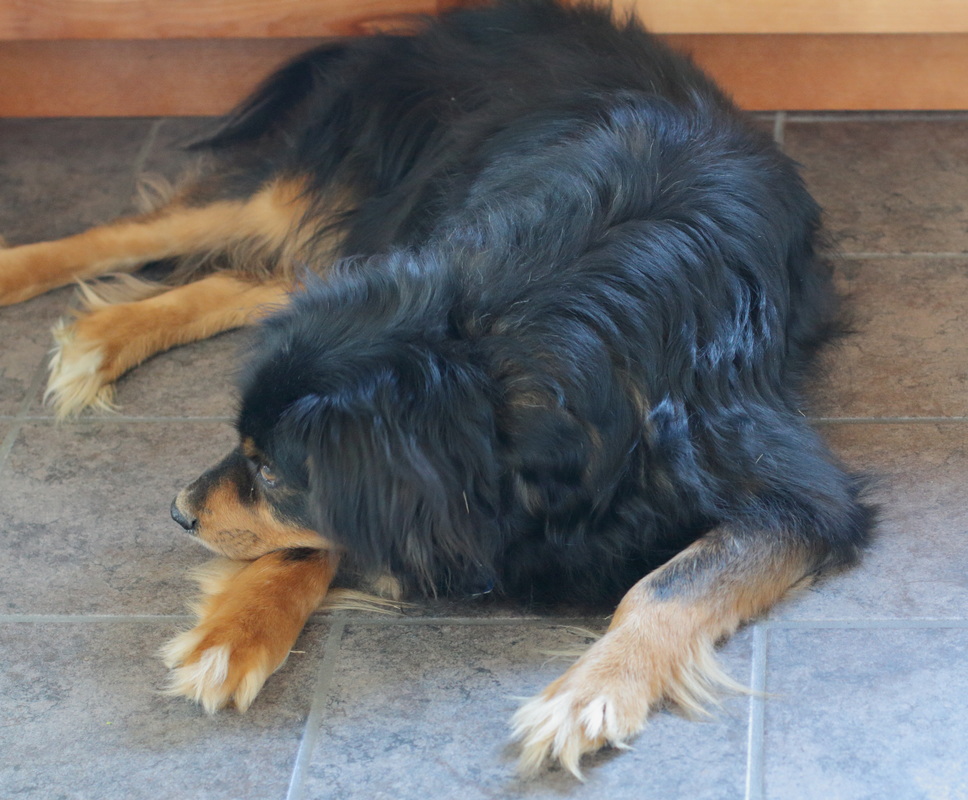
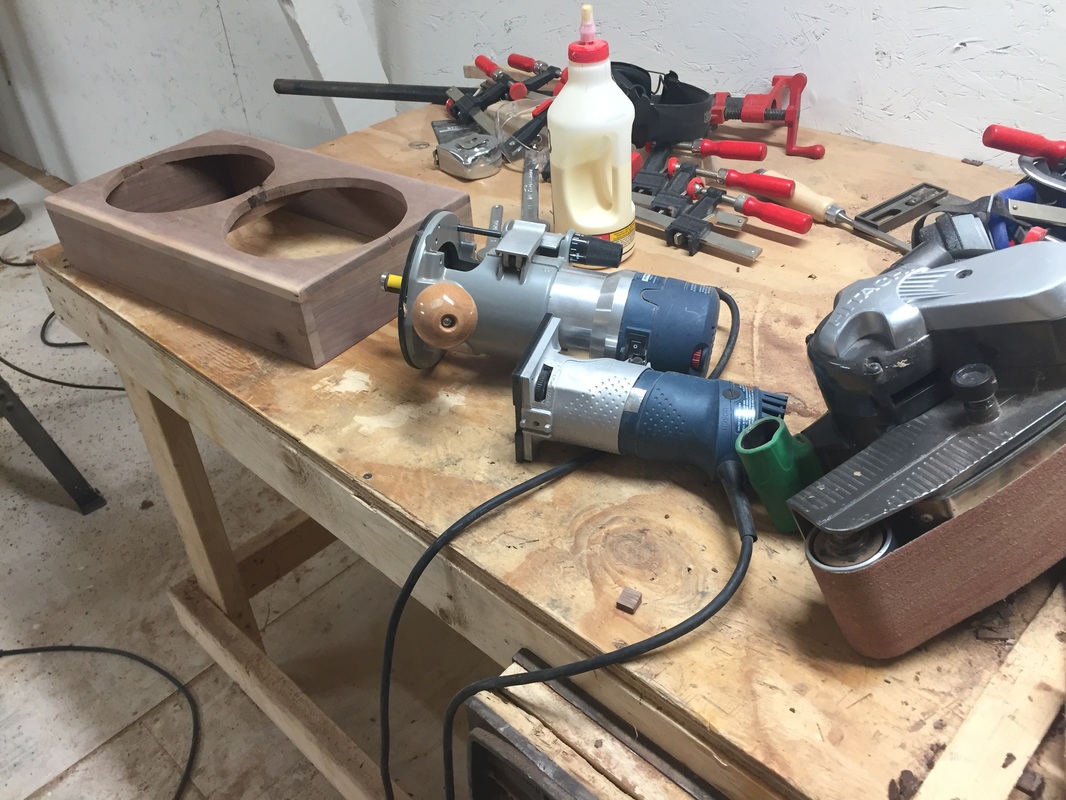
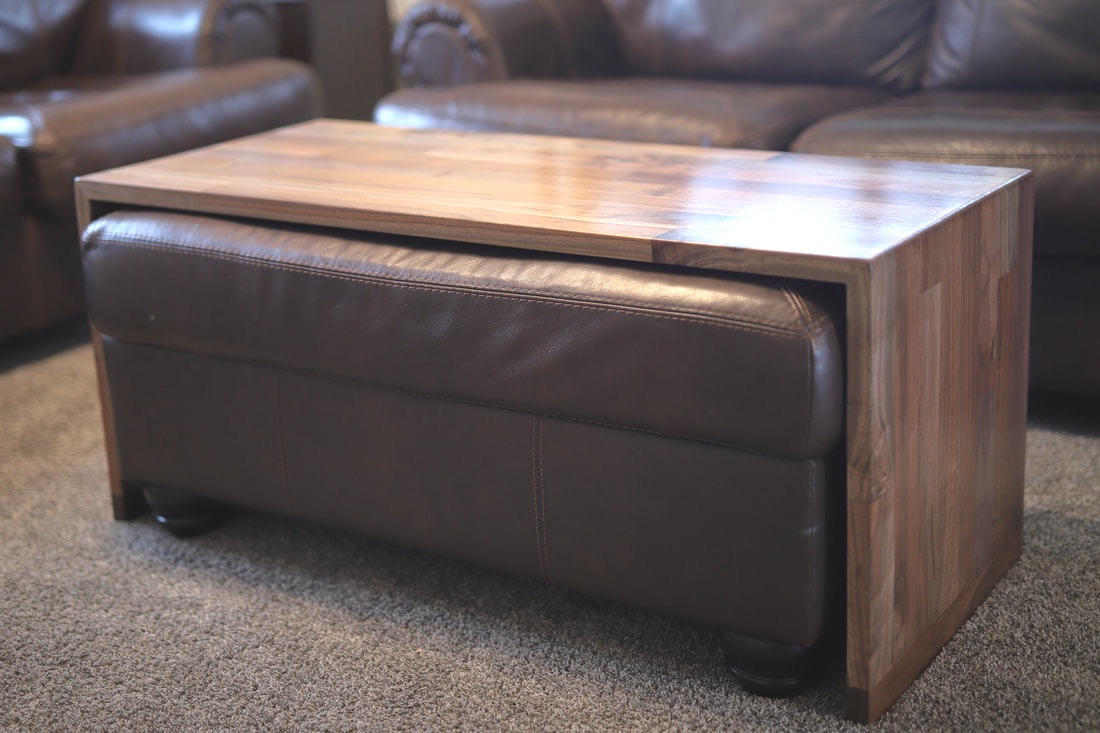
This is Isaac. He is sad. His human has made tons of beautiful human furniture around the house but he still has to eat his dry dog food from his ugly food dish holder. Things are about to change though...
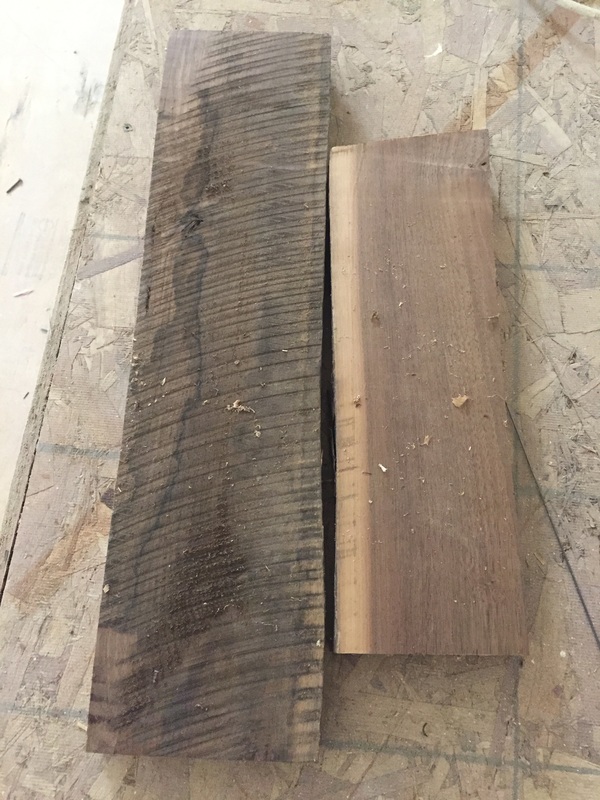
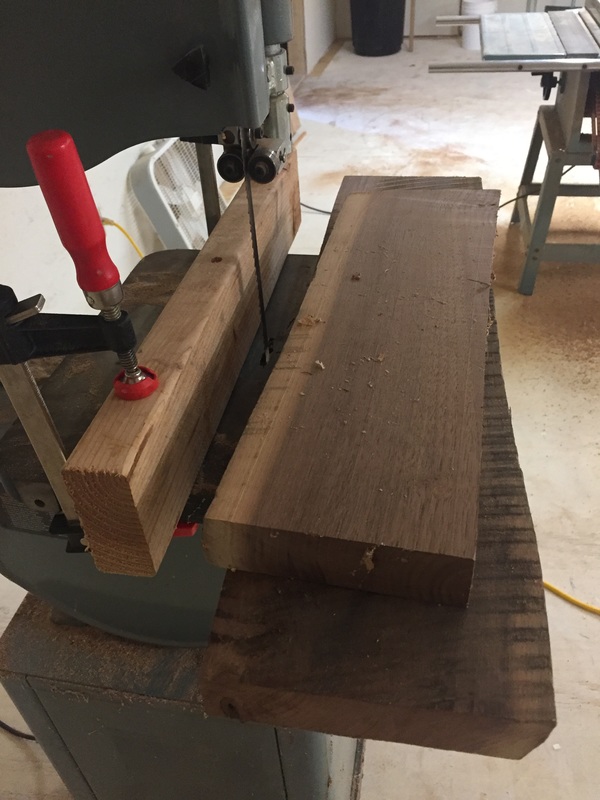
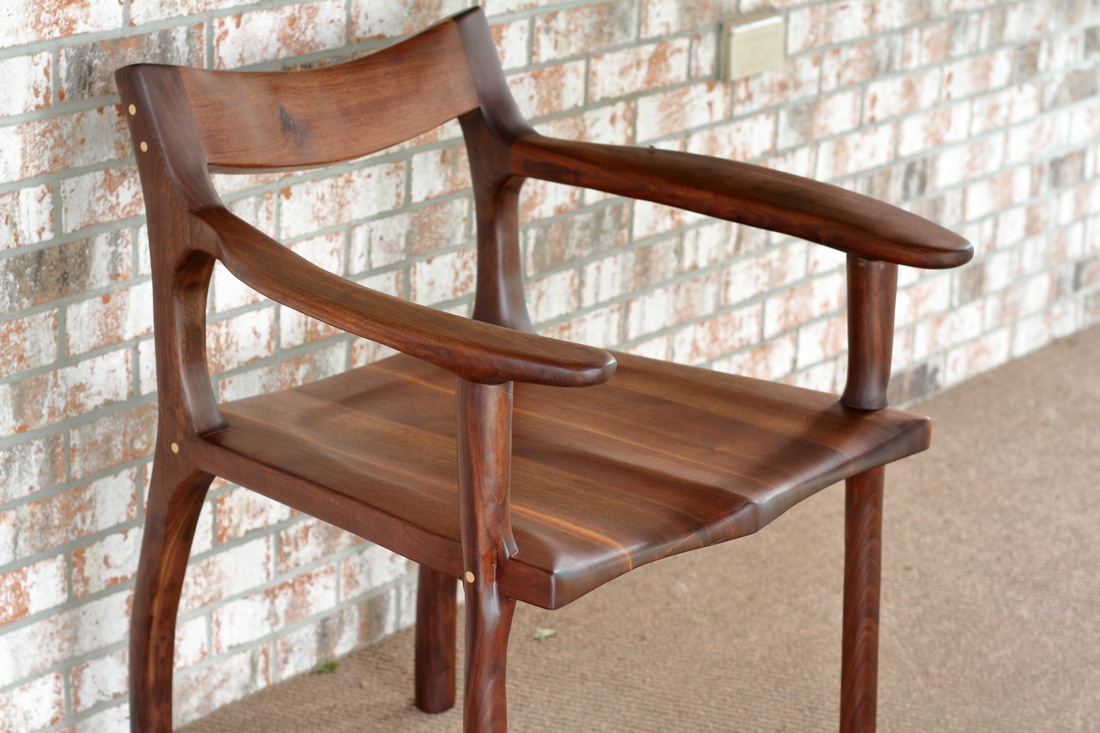
This build starts with some 6/4" scrap walnut left over from the Maloof chair build. It was thick enough to re-saw and mill to a final thickness of about 5/8" and book match for the top.
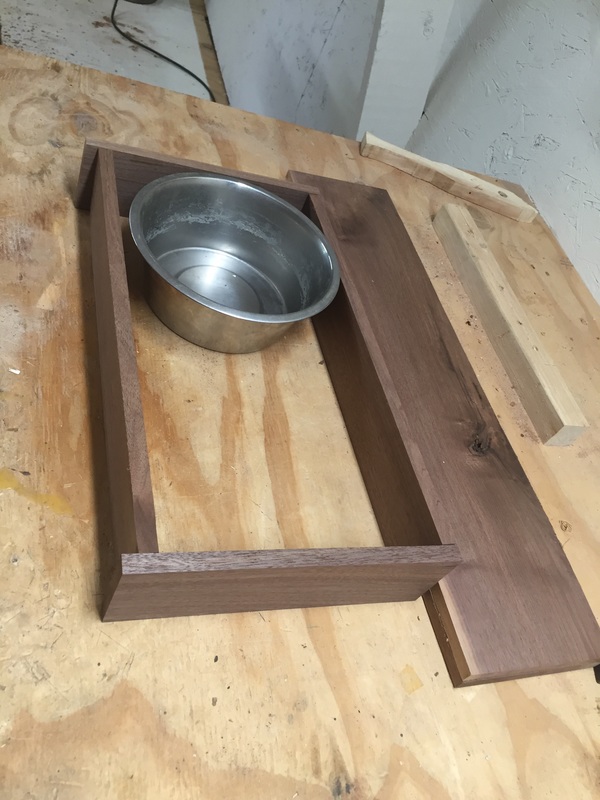
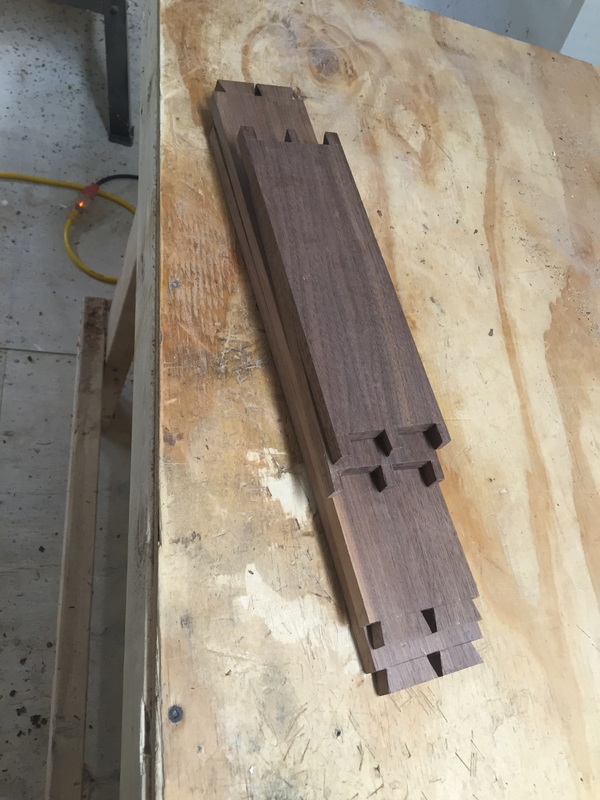
The bowl was used to size the sides and hand cut dovetails joined it all together. These weren't my best dovetails ever, but it's been a while since I've made any.
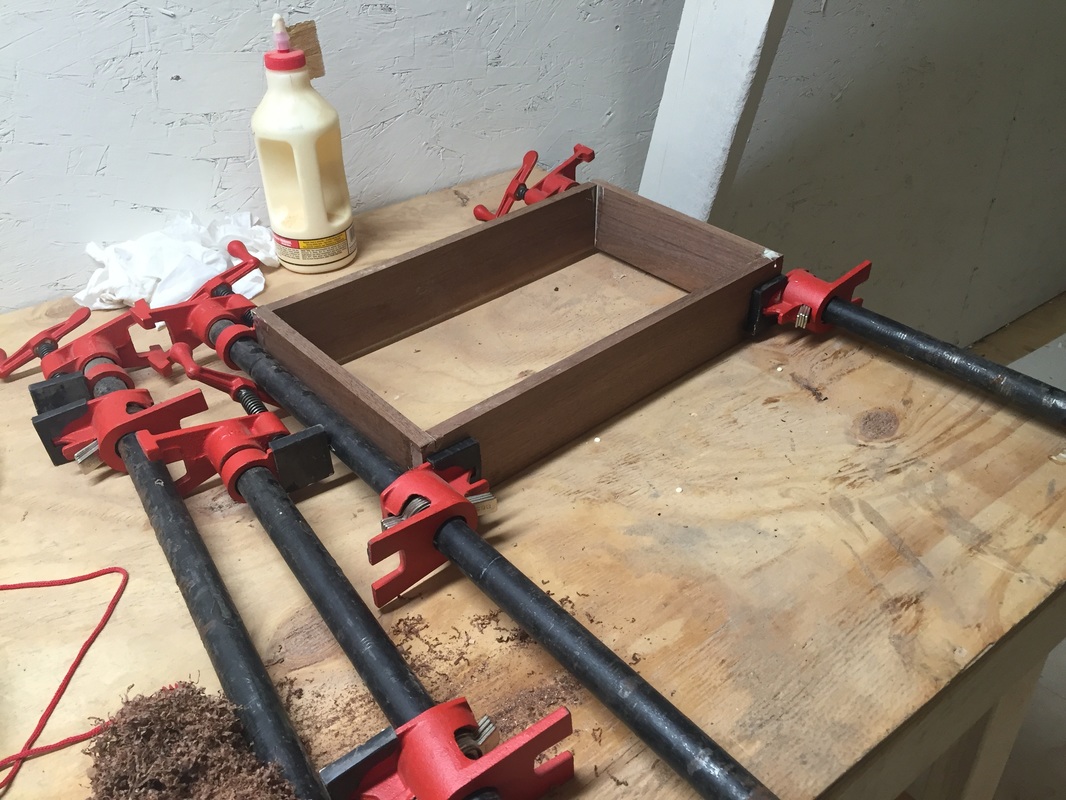
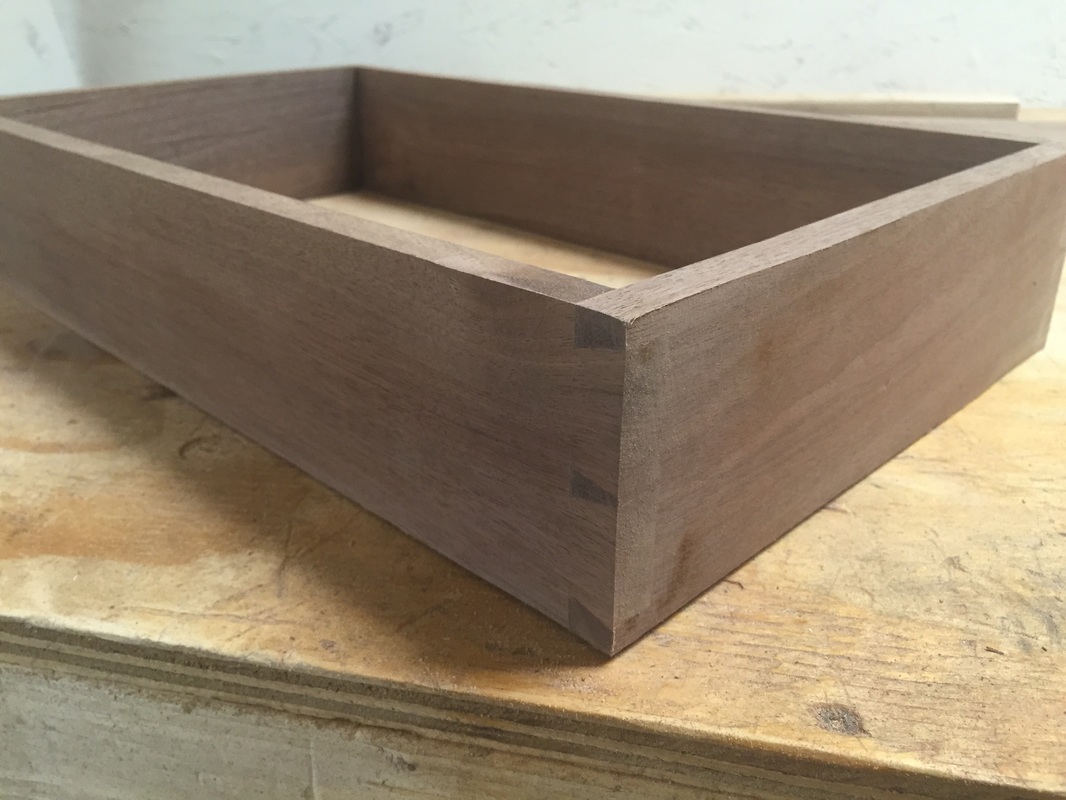
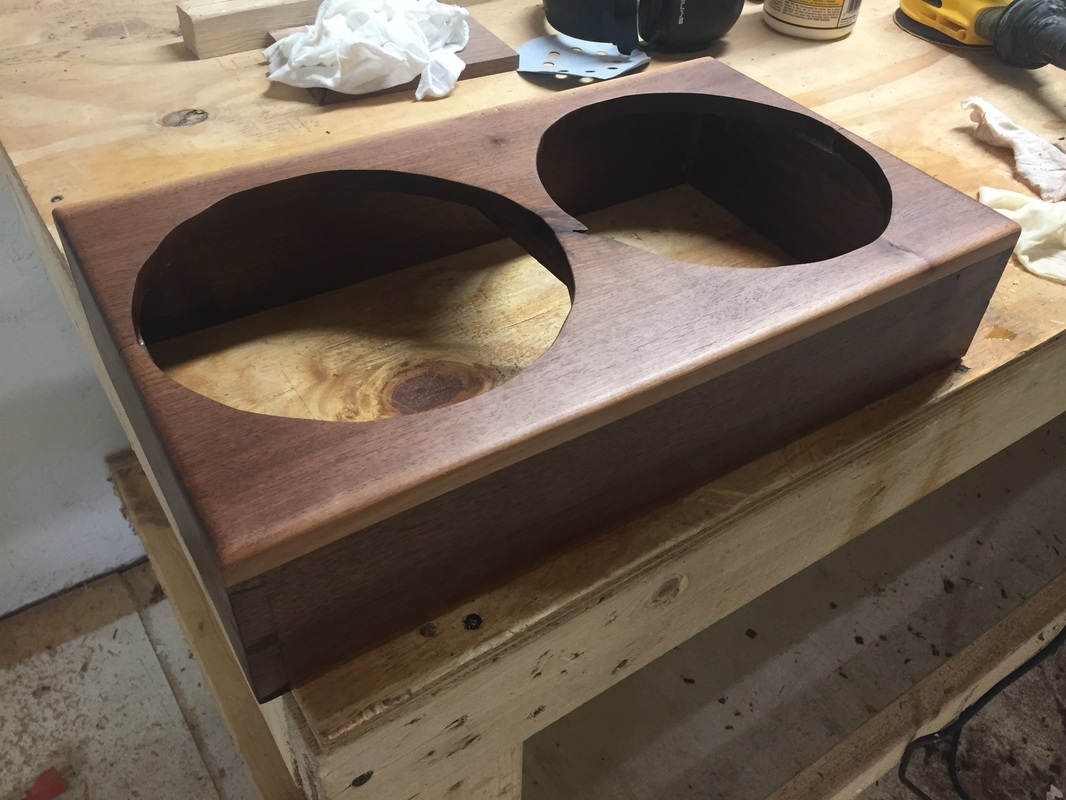
Glued up and sanded out. They ended up much nicer than I thought they were going to be.
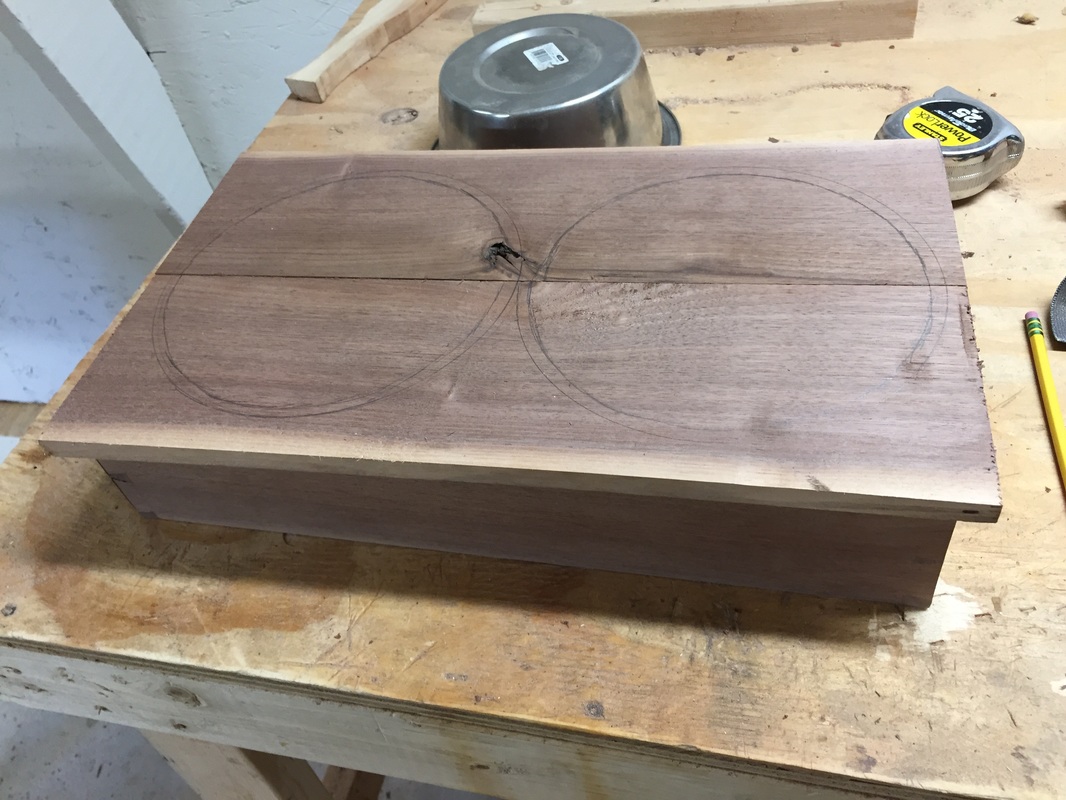
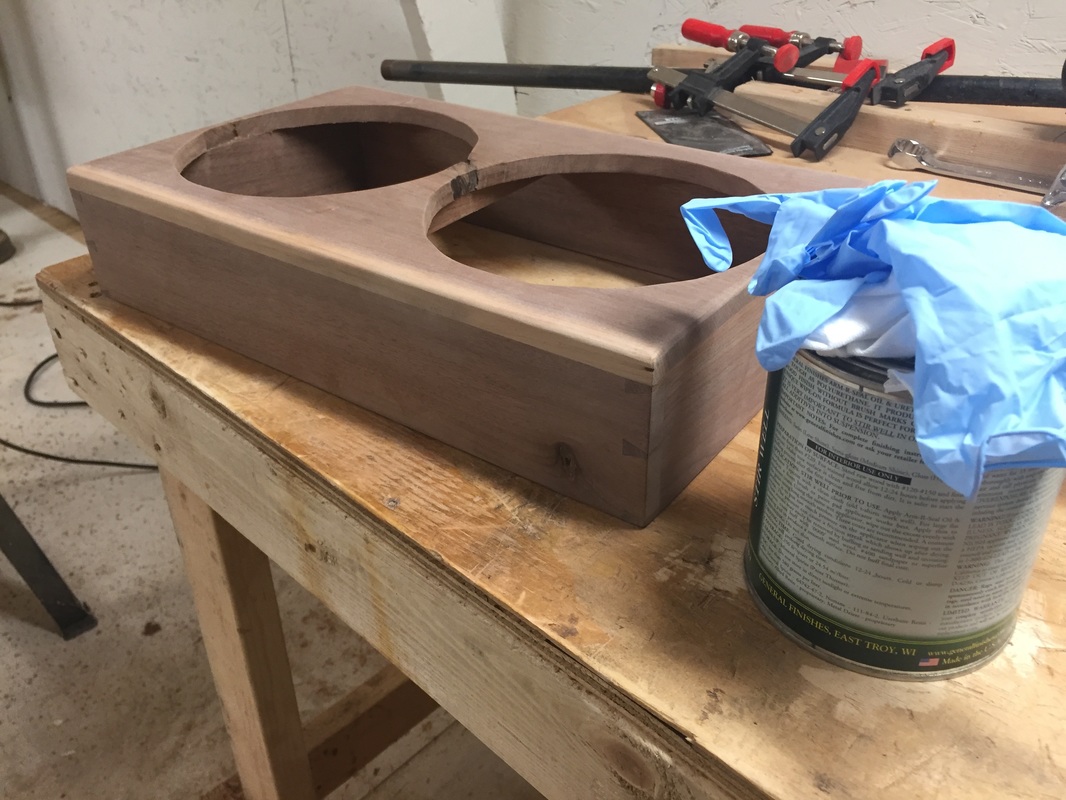
The book matched top is just wide enough for the two bowls. The holes were cut out on the band saw, the top was glued to the base and the outside was trimmed with the router and a trim bit. Edges were rounded with a 1/4" round over bit.
After sanding out to 220 grit, it was given 2 coats of Arm R Seal semi gloss poly. While finishing a piece is usually the most difficult part of the project, it also is the most rewarding. It's amazing how a light coat of poly will bring out all of the detail in the wood.
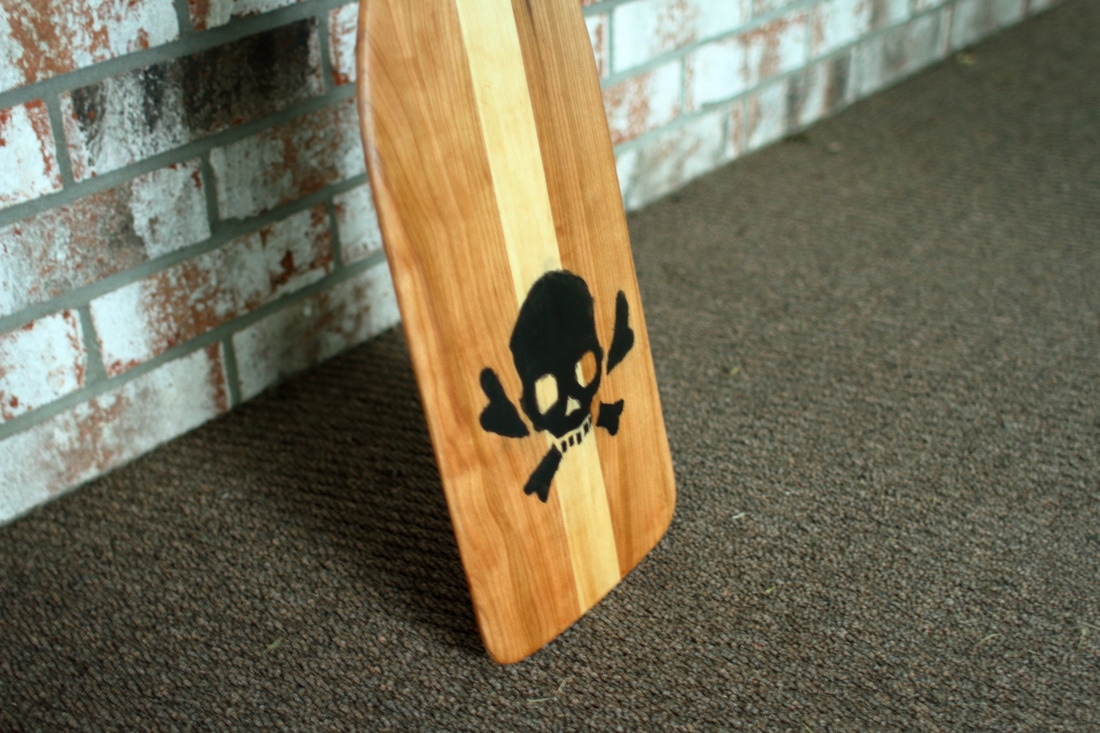
With the new dish holder complete, Isaac is once again a happy dog. He sure is proud of his new eating arrangements. 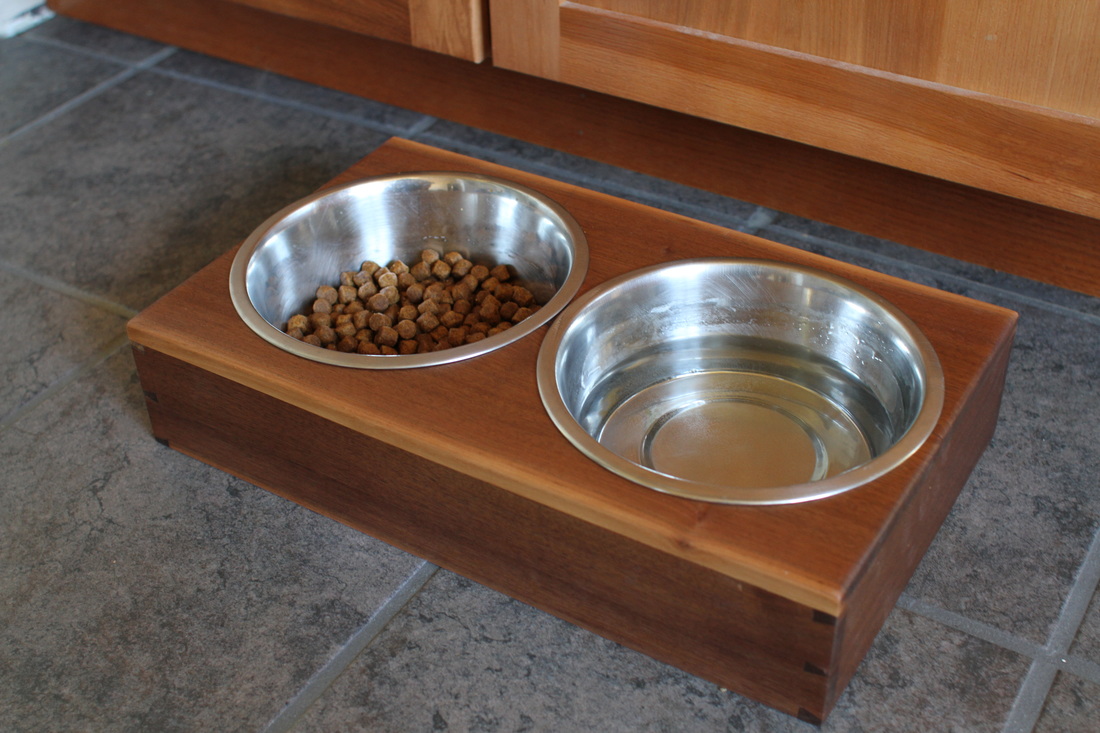 A good friend of mine (Ben) broke his canoe paddle a couple weekends ago. He asked if we could build a new one in the shop. I'm not one to turn down a good shop project so we built 4 canoe paddles. I sent Ben home with two of the paddles and kept two for myself. There's just one problem. I don't have a canoe. Idea. Every year Madison does an event called the Paddle and Portage. Basically a bunch of crazy people in super light kevlar canoes with carbon fiber paddles paddle around some buoys on Lake Mendota, run across the Isthmus while carrying their super light vessel and then paddle across Monona to the finish at Olbrich Park. Two of my friends (not Ben) have been doing this race every year. They talk about it with so much passion. Last year they took 20th overall and beat second fastest team in the portage by 46 seconds. They've recently upgraded their canoe to a newer boat, but in the first few years, they used a vessel named "Bondo Boat". If my memory serves me right, it was found on the curb on Platteville's move out day. It had some "light damage" that was easily repaired by several coats of Bondo. If I had to guess, It was pushing 70 pounds. I thought they deserved a personalized paddle. If you are in the Madison area this weekend, check out the race and say high to team Bondo.
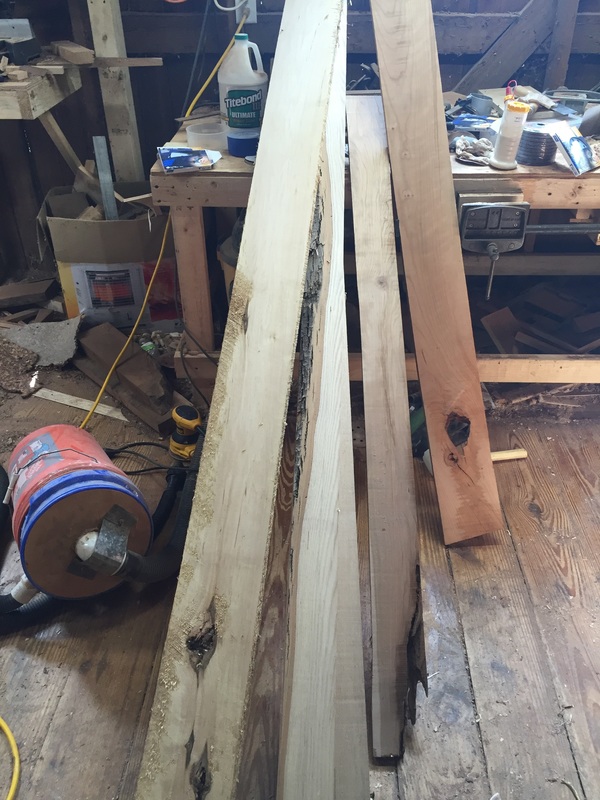
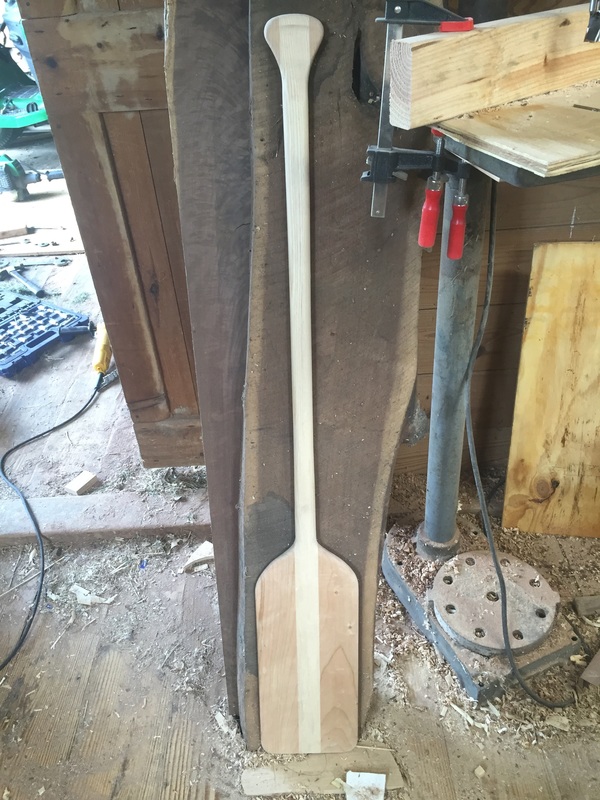
Building paddles is a simple idea. Slap some short and wide boards onto a long and skinny board and remove everything that doesn't look like a paddle. This is my general strategy for most of the things i build. There are as many paddle styles as there are 90's boy bands so I wasn't super concerned about getting the shape exactly perfect.
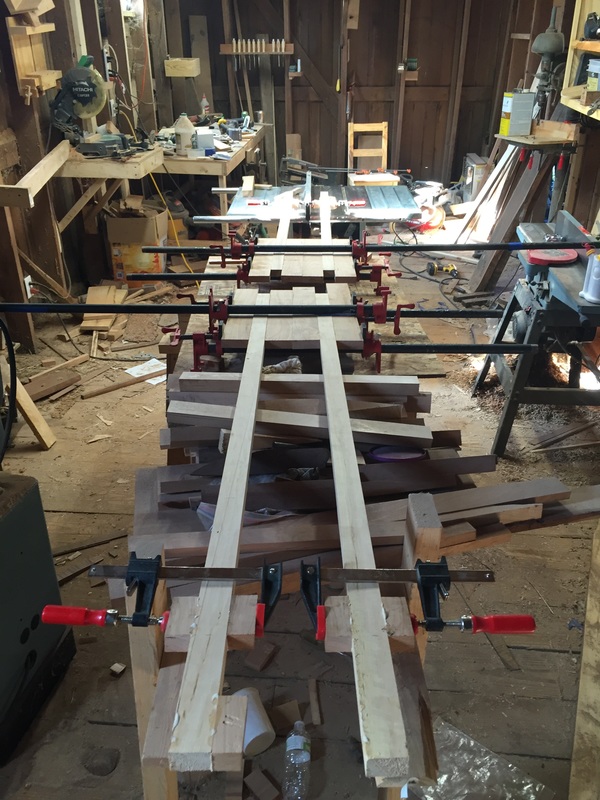
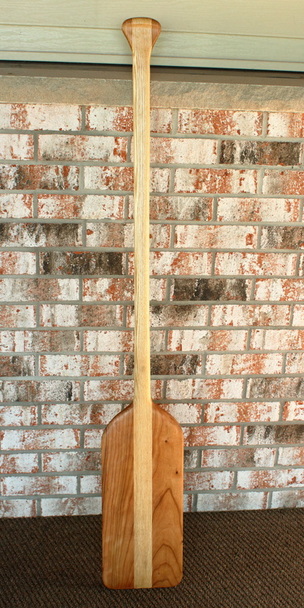
I found some wood I thought would make good paddles. A chunk of cherry, bit of basswood, and some ash. All are common paddle woods. At this point I didn't have any use for any paddles, but I always find it's just as easy to make several small objects compared to just one. I made 4 paddle blanks.
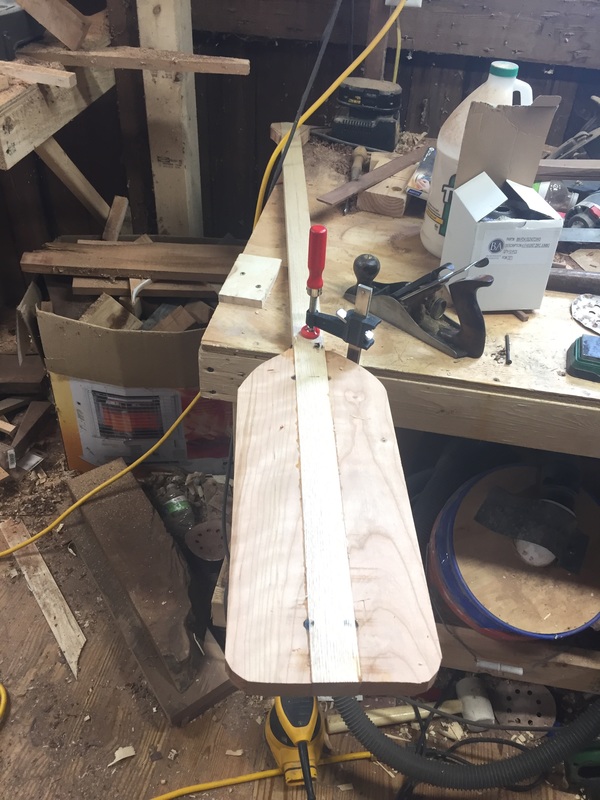
After the blanks are dried, its a few easy cuts with on the band saw or coping saw and then 15 minutes at the sharpening stone with the hand plane. The rest of the shaping is done by hand with a No 4 Stanley and a tiny block plane. This really is a neat little project that anyone could do in their garage over a long weekend. The only tools you really need are a saw, glue, clamps, a hand plane and some sand paper. Power tools help make things go a little faster, but on small projects, set up time often is greater than it takes to do the task.
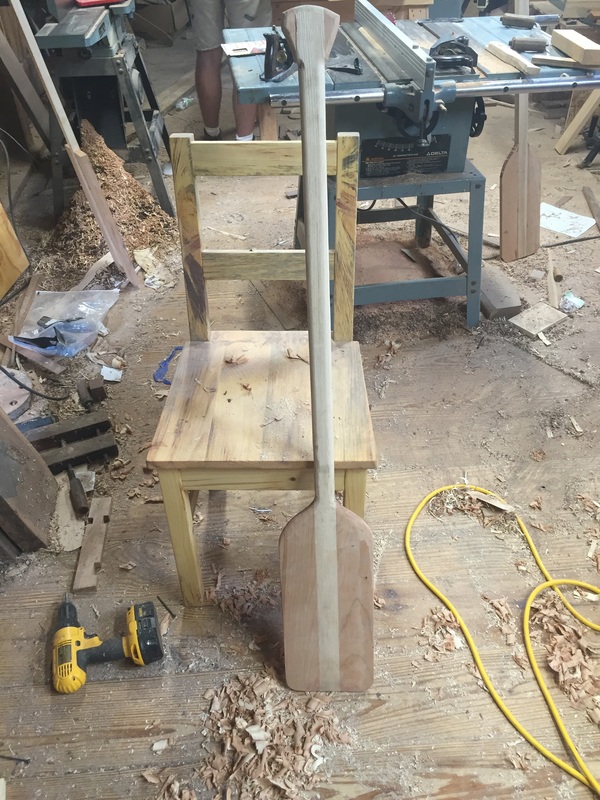
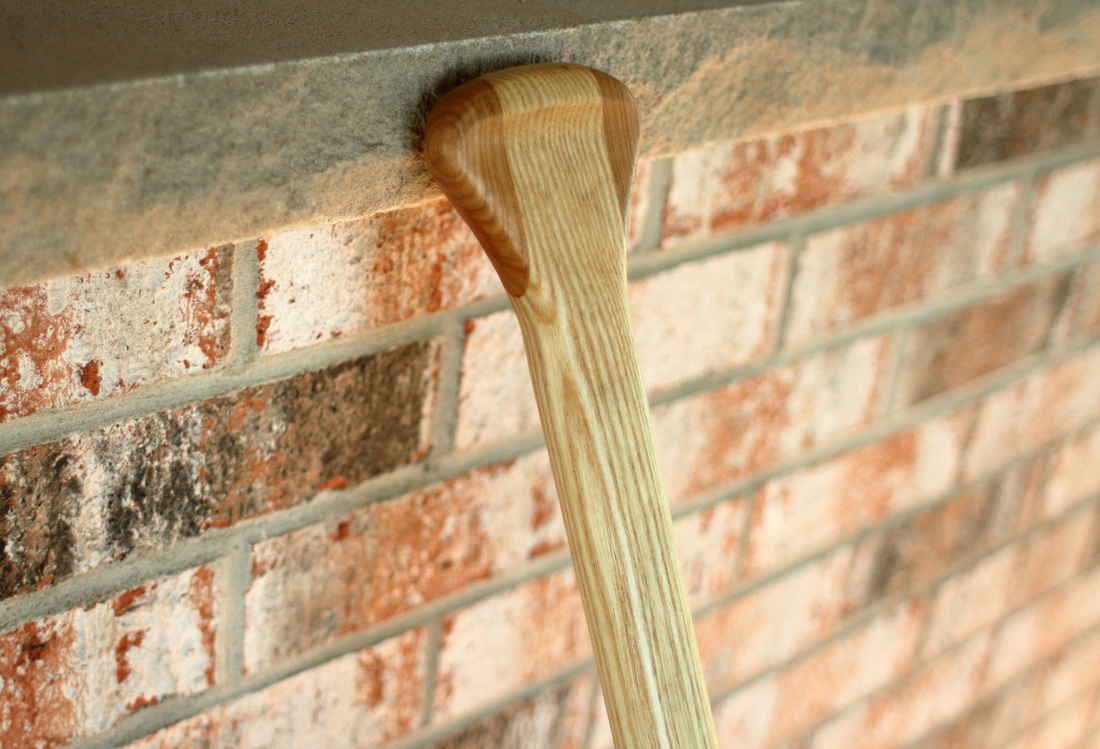
I'm really glad I built that chair. I've used it hundreds of times already to set things on in my shop. After shaping it with the hand plane, I sanded out all of the planer marks and did some final shaping on the handle. Everything was done till it felt right. I didn't worry too much about dimensions.
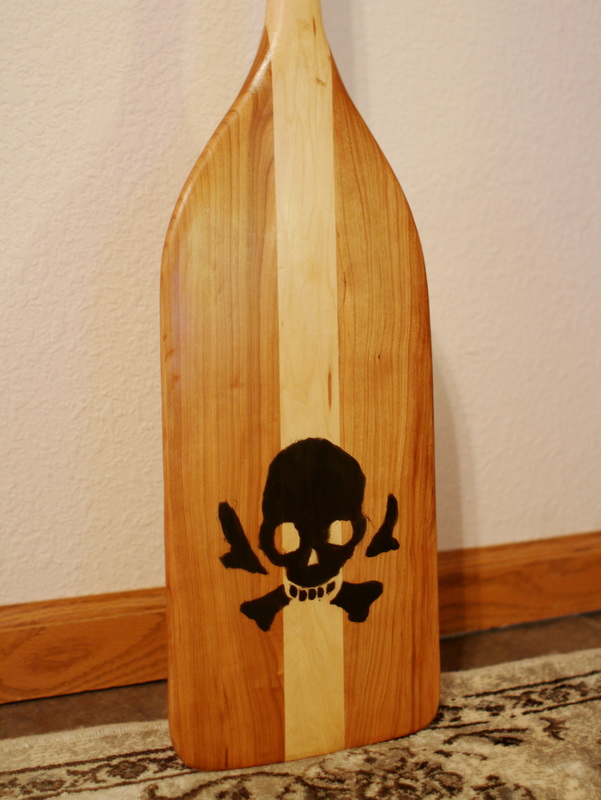
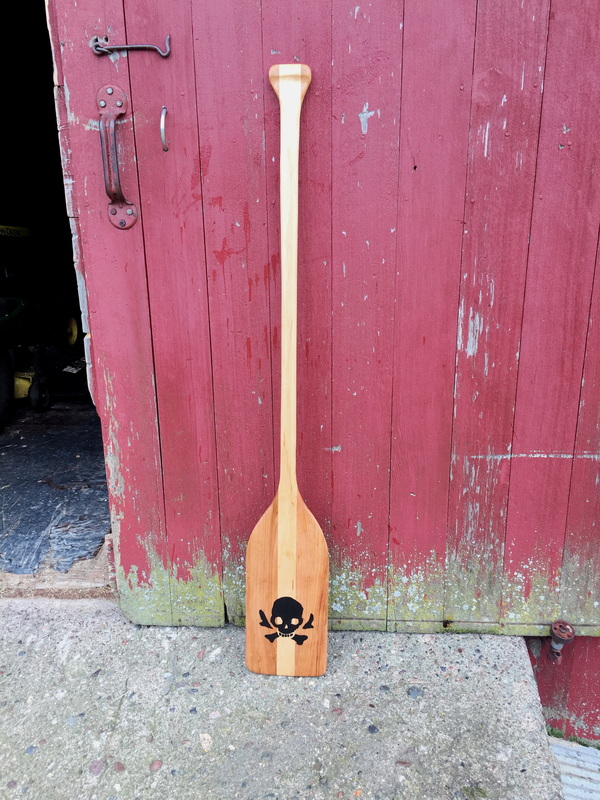
I added the personalized Team Bondo logo followed by 4 coats of poly. The basswood shaft (left) is significantly lighter than the Ash shaft (right). The tradeoff here is in a pretty big difference in stiffness between the two paddles.
Thanks for viewing and if you are out on the lake this weekend, watch out for the Bondo Boat. If they have their black sails up you better head for shore. |
Aaron Whalen:A blog about woodworking in Southwest Wisconsin Previous Projects
Archives
February 2024
|