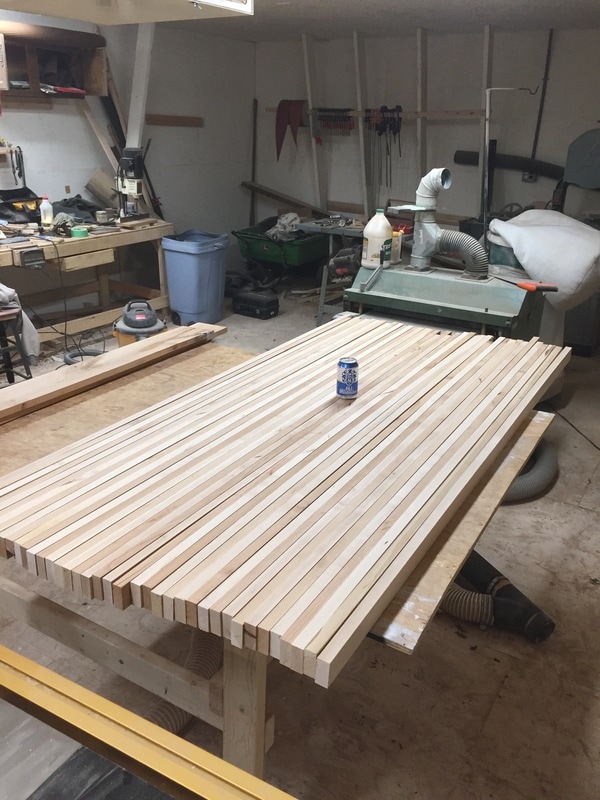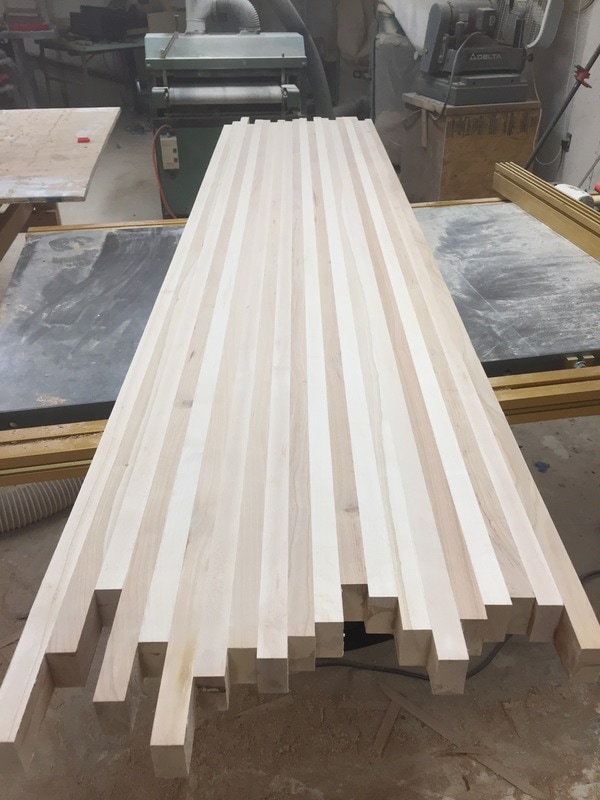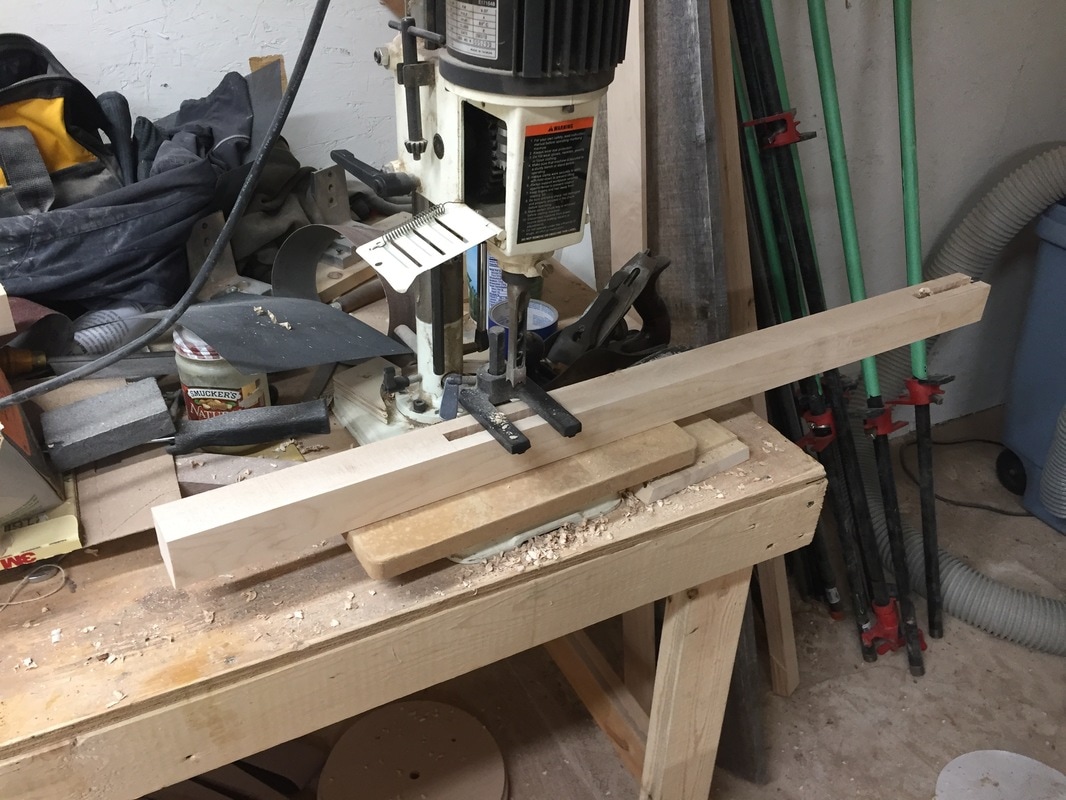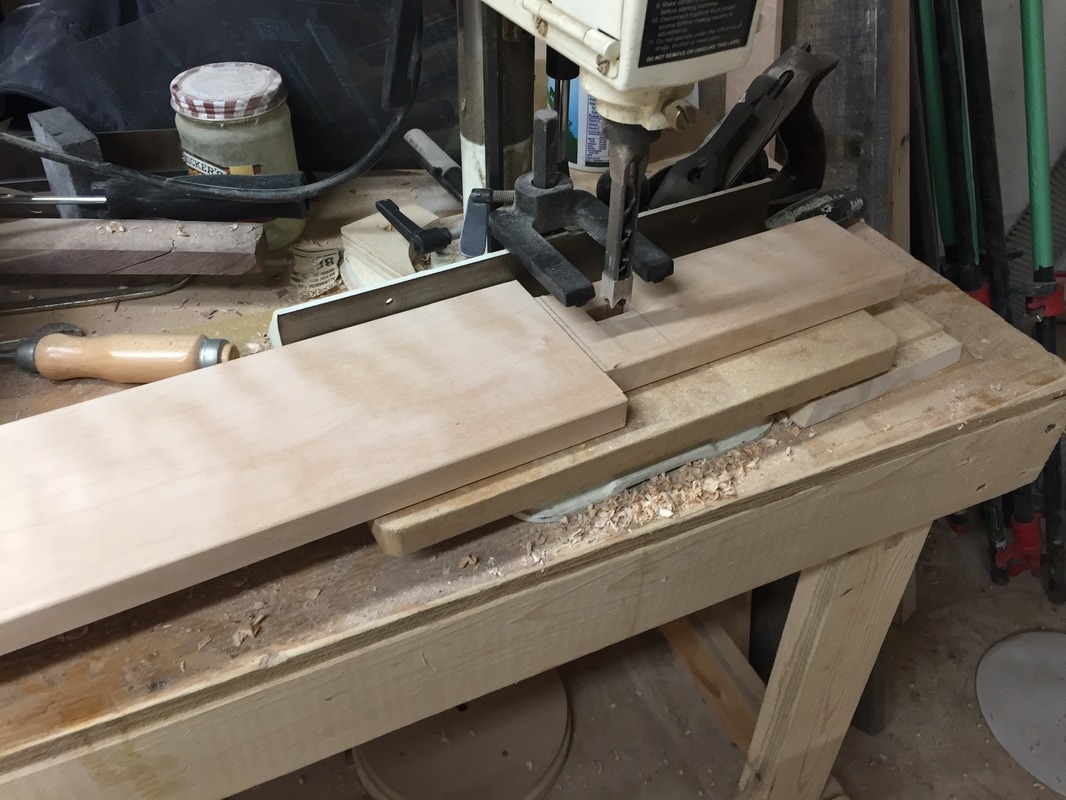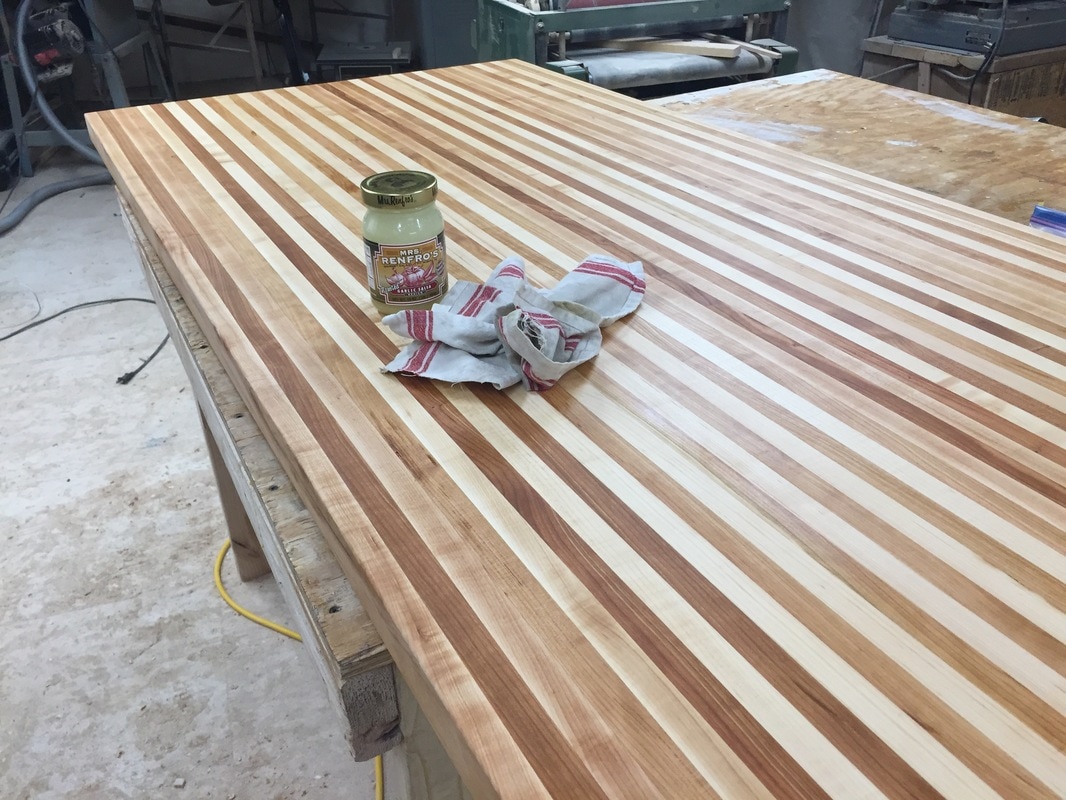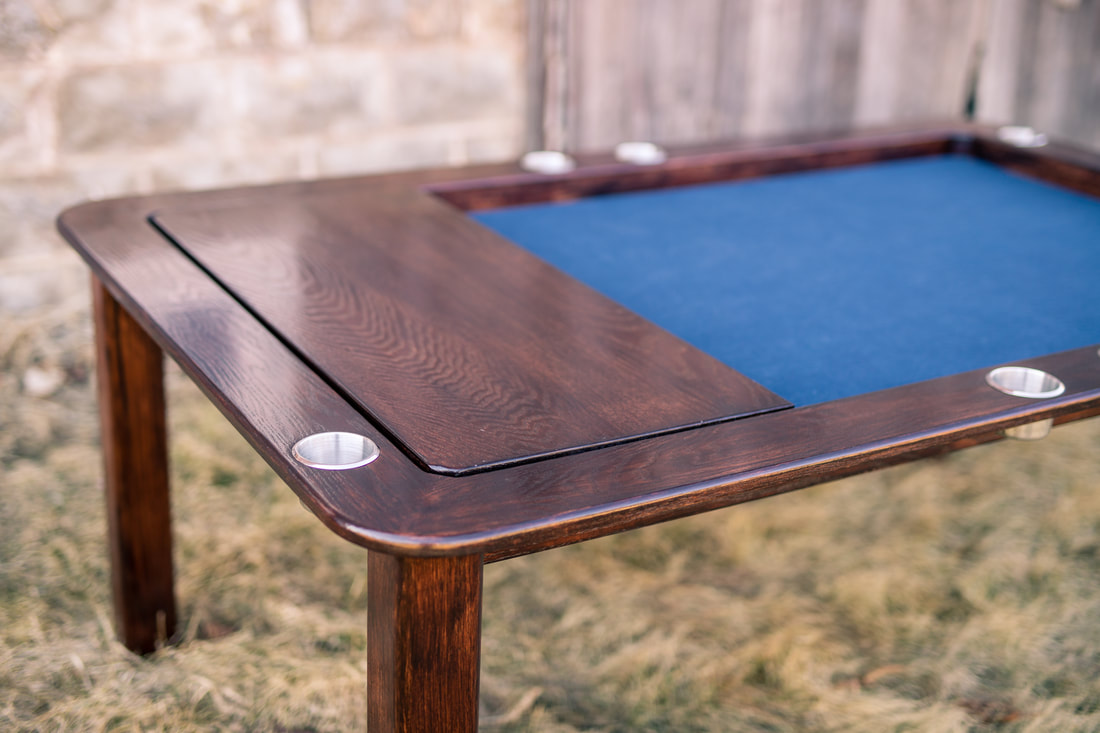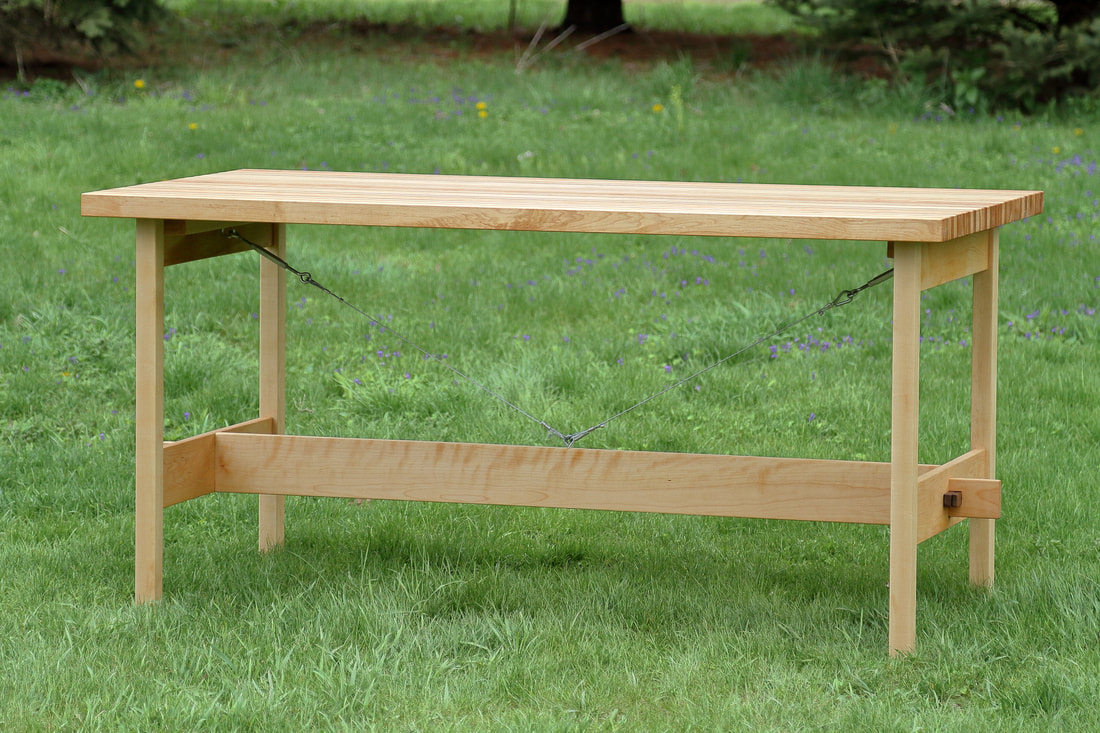
 Last fall I helped a friend (we'll call him Russ) butcher a pig (we'll call her Ruth). I'm no stranger to raising my own food and my dad taught me to process deer well before I could legally drive a car but this was my first pig. The local farm was very accommodating and had quite a few amenities for us to use while worked. We staged our things on the back of the truck and used a picnic table to hold some cleaning supplies, spare sharp knives, a bowl and some small cutting boards. I had been doing quite a bit of woodworking and Russ came up with idea of building a very large butcher block to aid in future outings and possibly take up north for hunting season. We talked a little about what it would take to build such a thing. Not long after that cool fall morning, I ate what was probably the best bacon I've ever had. The bacon was accompanied by few texts and a phone call about some of the details for a butcher block. The idea was simple - Glue 2"x1" strips of wood together, alternating between cherry and maple until there was a solid chunk of wood 6'x3' and 2" thick. This was a brilliant idea, but no one did any math on it. At 45 pounds per cubic foot, this could weigh up to 135 pounds.
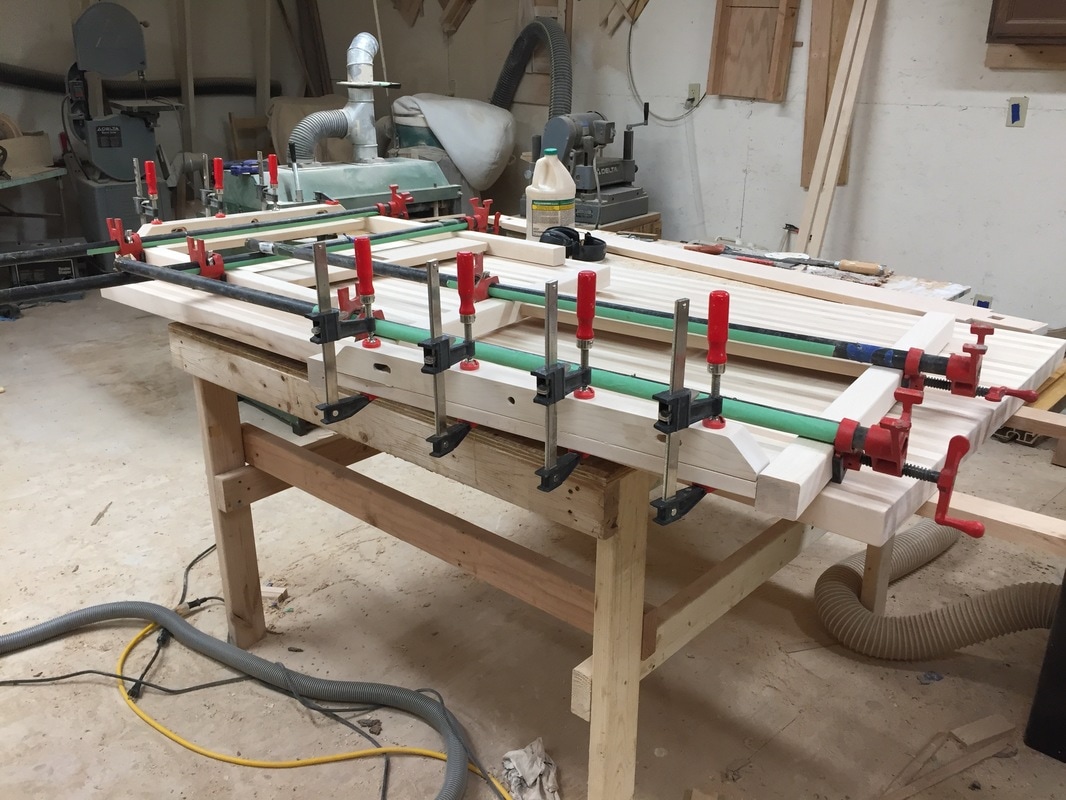
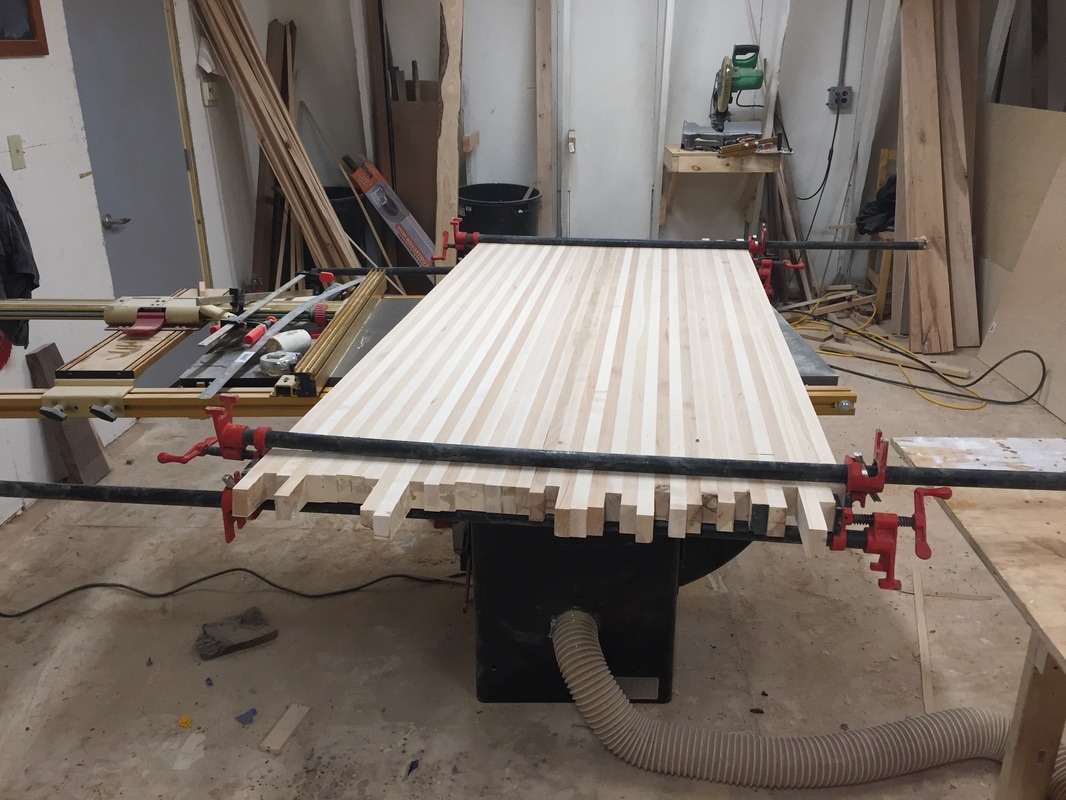 There's nothing special about the top except for how large and heavy it is. I couldn't be happier about how it turned out. I had just found a large drum sander on craigslist for a very reasonable price and I was itching to try it out. This was the perfect project. The top was built in two halves to fit through the two foot wide sander. After it was sanded flat I glued the halves together. 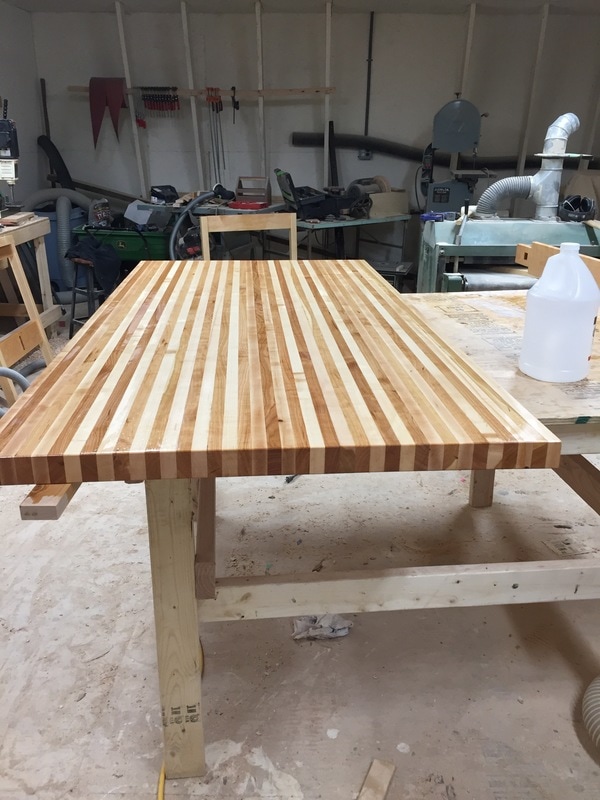 Just about the time I had the butcher block done I talked to Russ and he had decided he wanted a base to put it on. I sent him a sketch of what I had in mind, and within a couple days I was back in the shop.
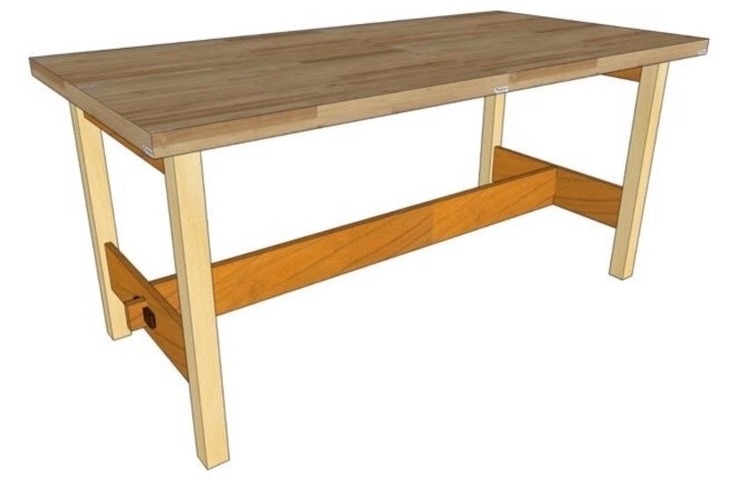
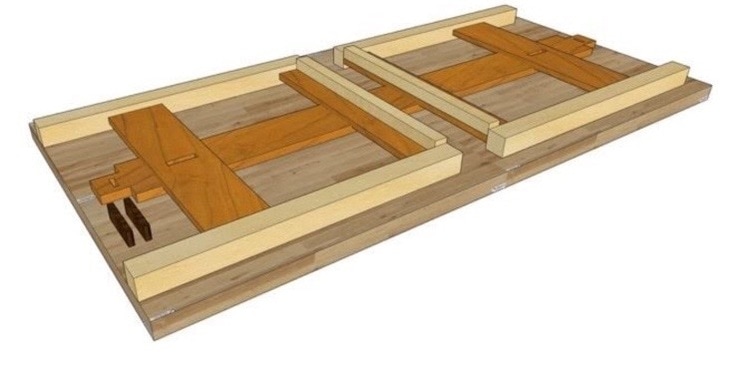
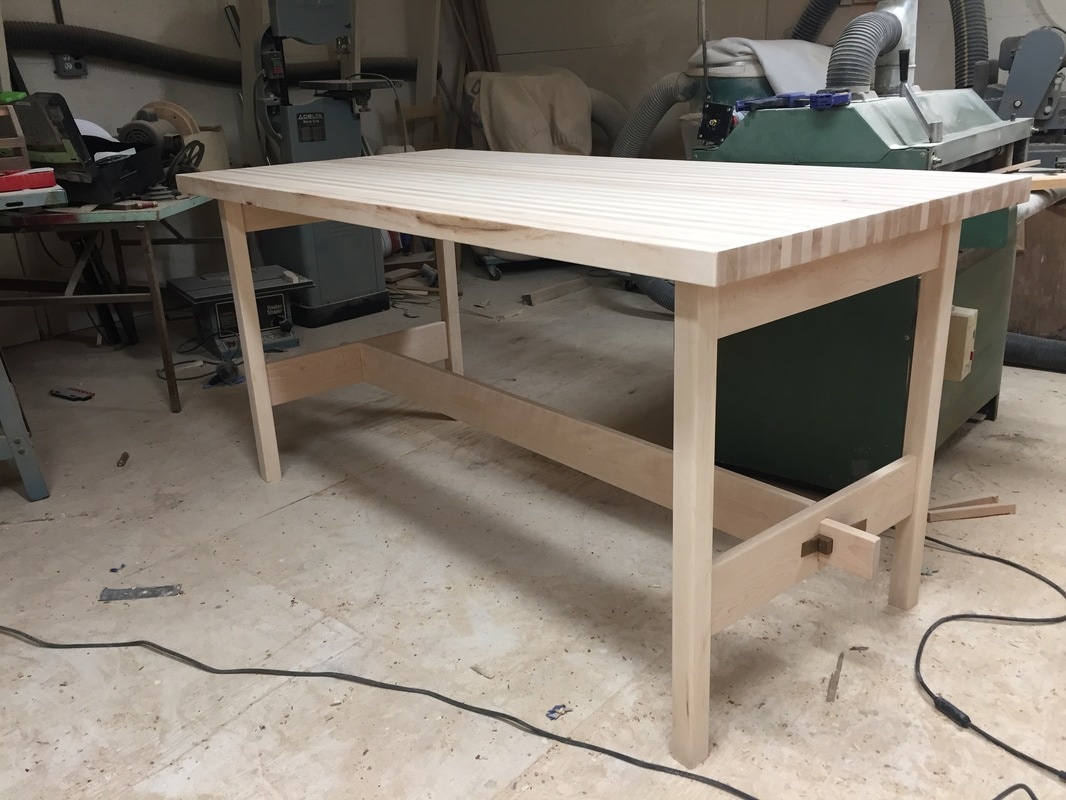
The base was 3 main parts, two sides and a board to go between them to stabilize the table. The table barrows some style from a Japanese Trestle table and the simple views of the Shakers. The design was born from the idea that Russ could be traveling with it. The entire table will fold down to less than 5" tall and can be assembled in a few minutes and with a few wedges and 4 bolts to hold the top on.
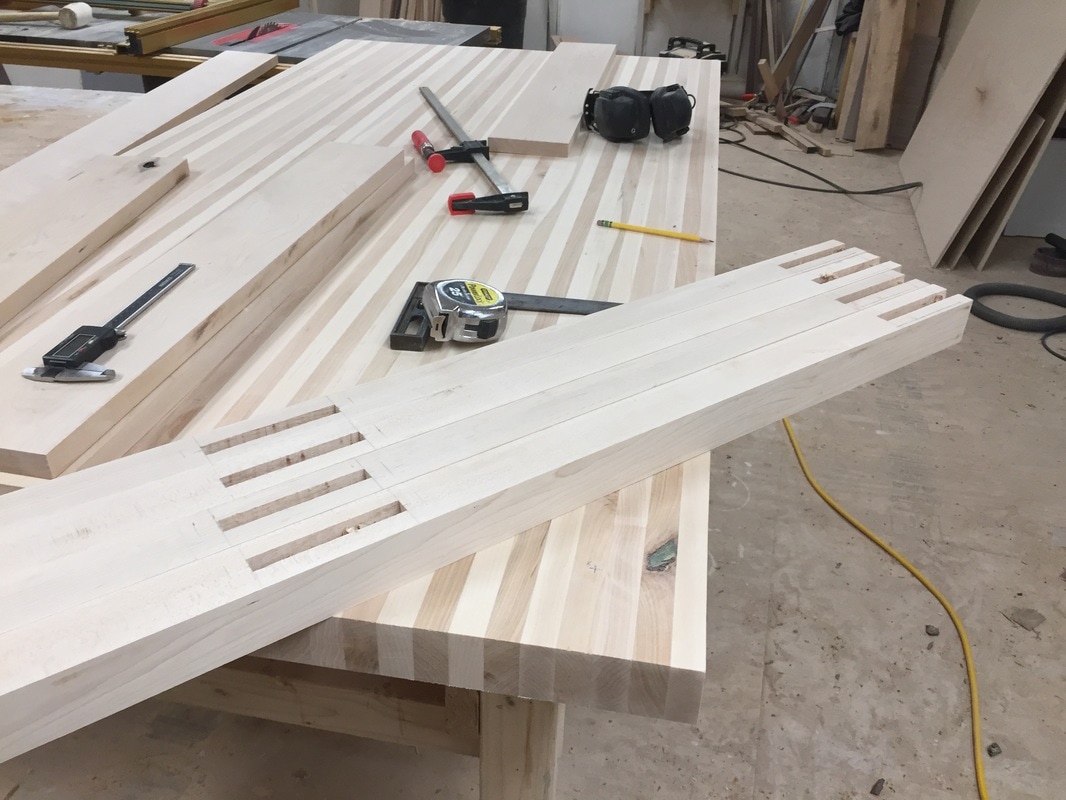
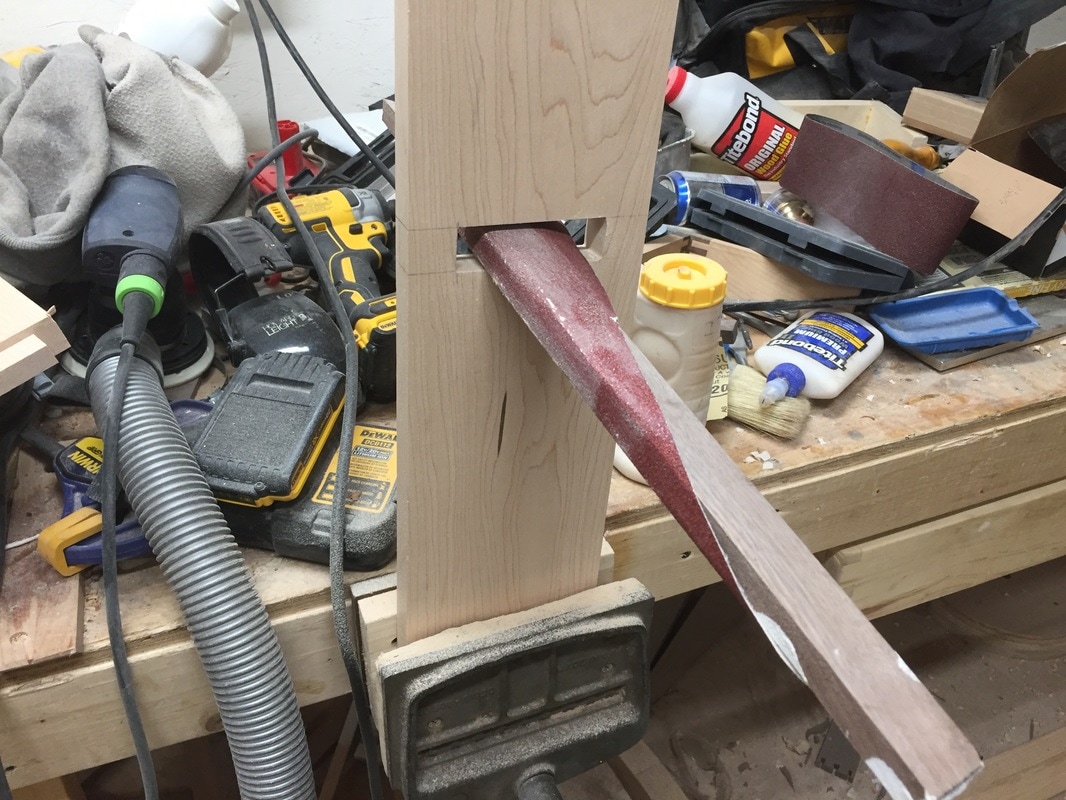
The base was made from maple and constructed with standard mortise and tenon joinery. The lower stretcher on each side has a hole for the board to join the two ends together. Sometimes I use really fancy custom tools like this stick with sandpaper on it.
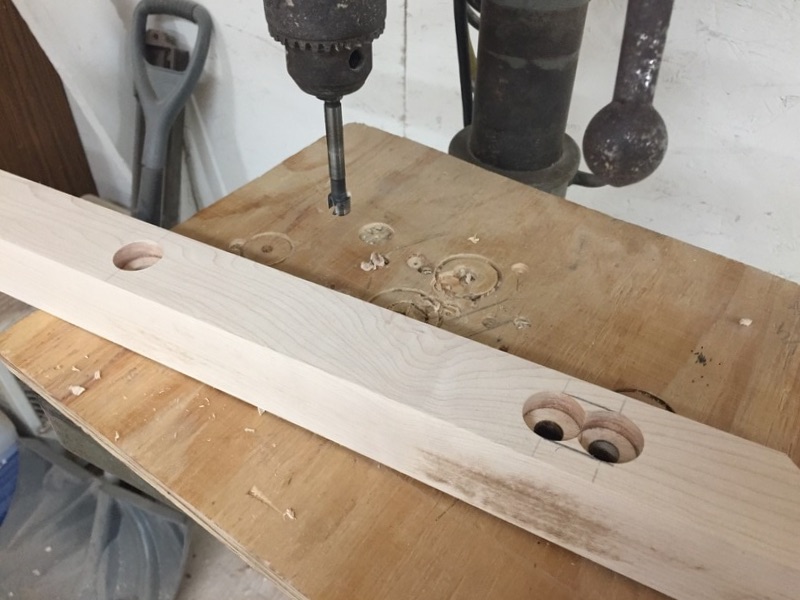
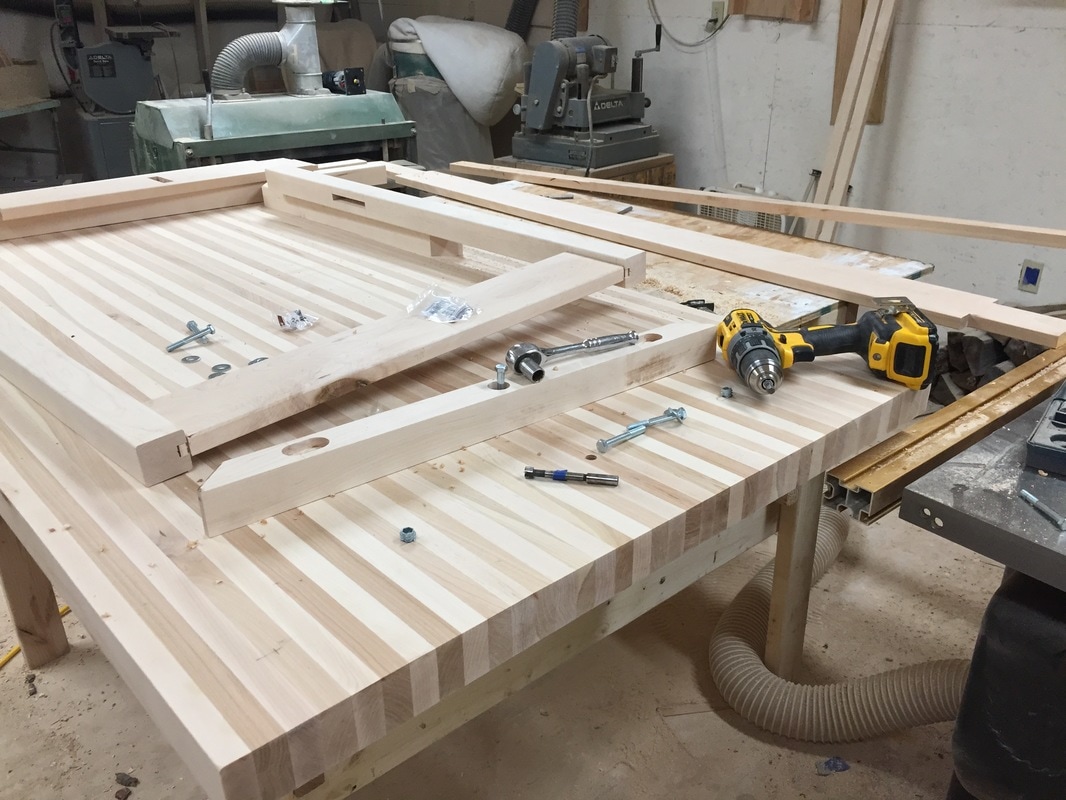
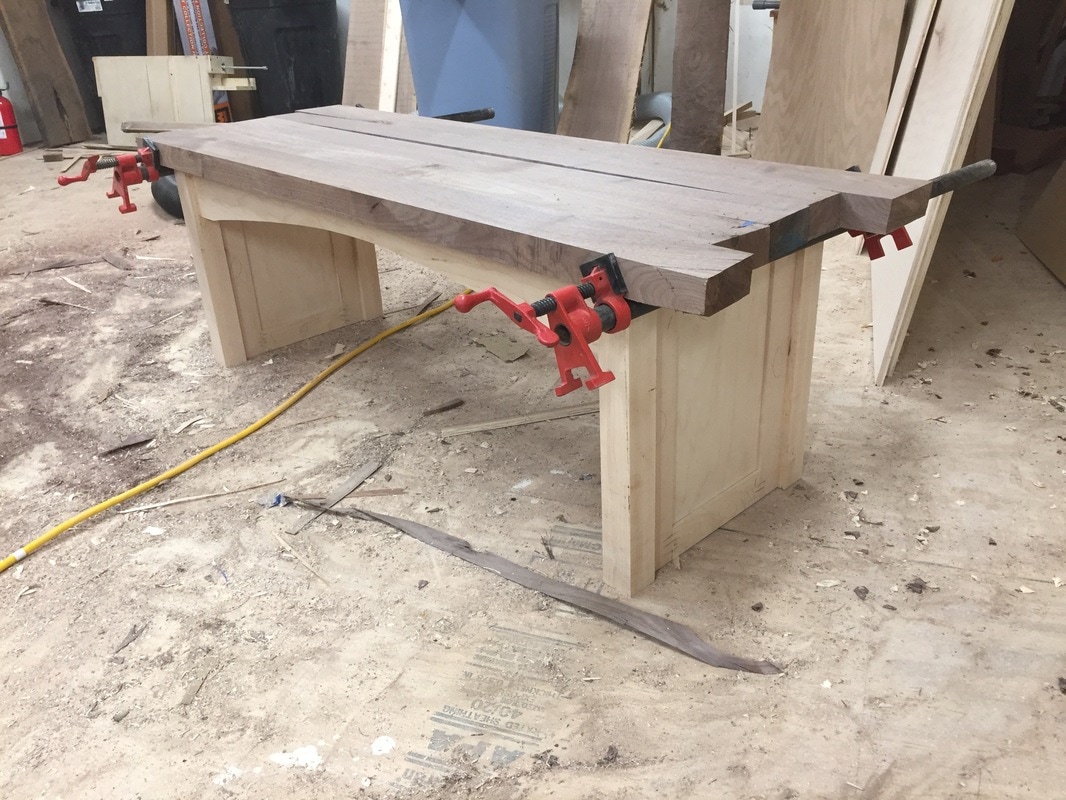
To hold the top on I drilled 3 holes into each side. The outer holes are slotted to account for wood movement. The center stretcher was roughed out on the mortiser and then finished with another custom sanding stick.
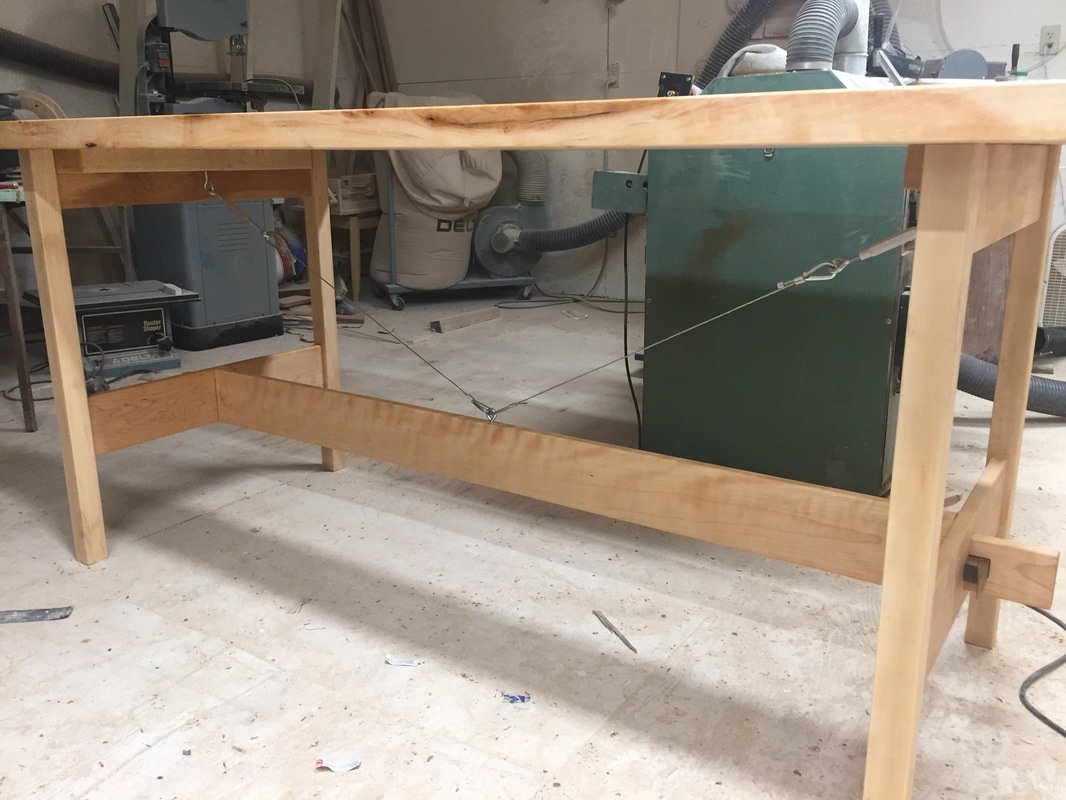
Time for some more glue followed by a test fit. Once I test fit everything I noticed something. The top is very heavy. So much so that the base was slightly wobbly no matter how tight I made the wedges. It was obvious it needed some sort of diagonal support.
I came up with a simple cable support that really solidified the entire table. Once tightened there is almost no movement.
Finish is probably the most difficult part of any project. It's almost done but the finish can make or break the final product. I use several different types of finishes depending on the end use. Since this will get used for food it's imperative the finish is food safe, durable, washable and easy to reapply. I ended up mixing my own finish for this project. The top was finished with special blend of butcher block oil mixed with beeswax to add durability. The base was finished with boiled linseed oil and beeswax for a slightly darker finish that made the grain pop. 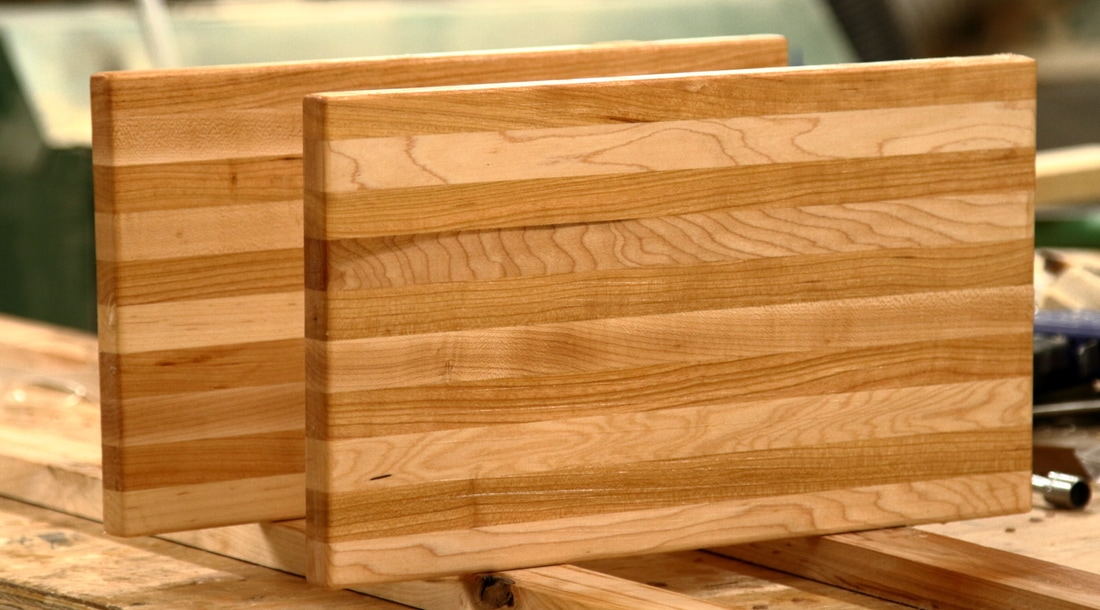 I had a few scraps left over so I built a couple small cutting boards for Russ as well. Maybe he'll cut on these for the first couple times he uses the table.  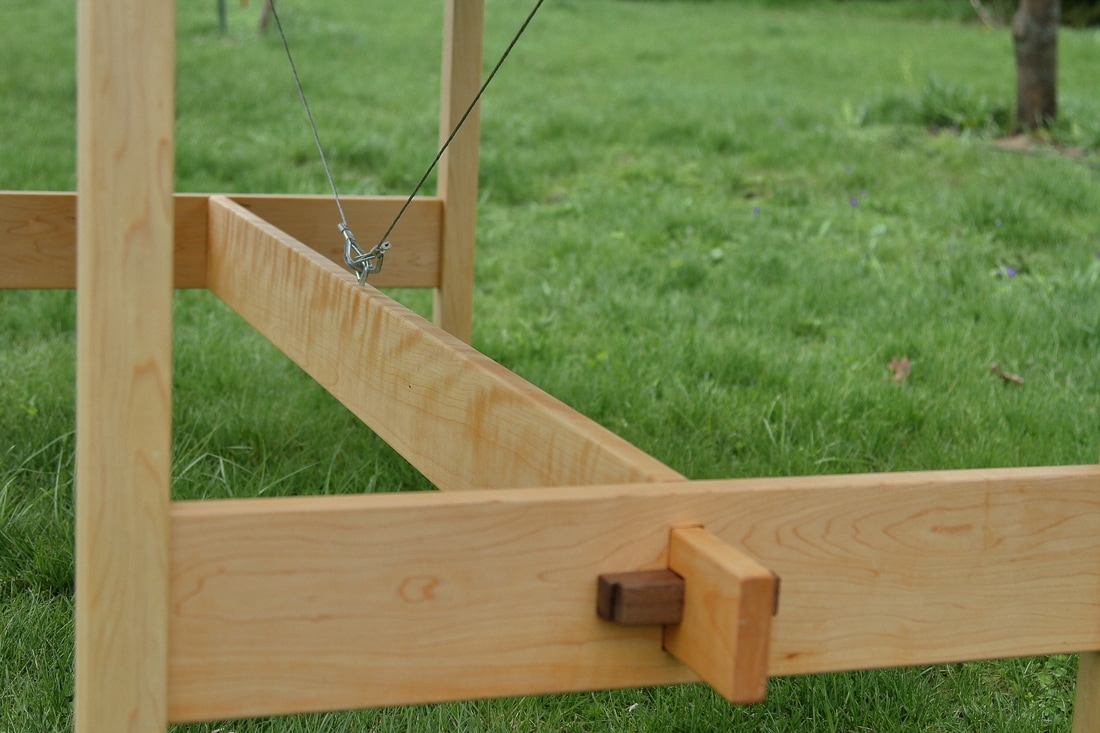 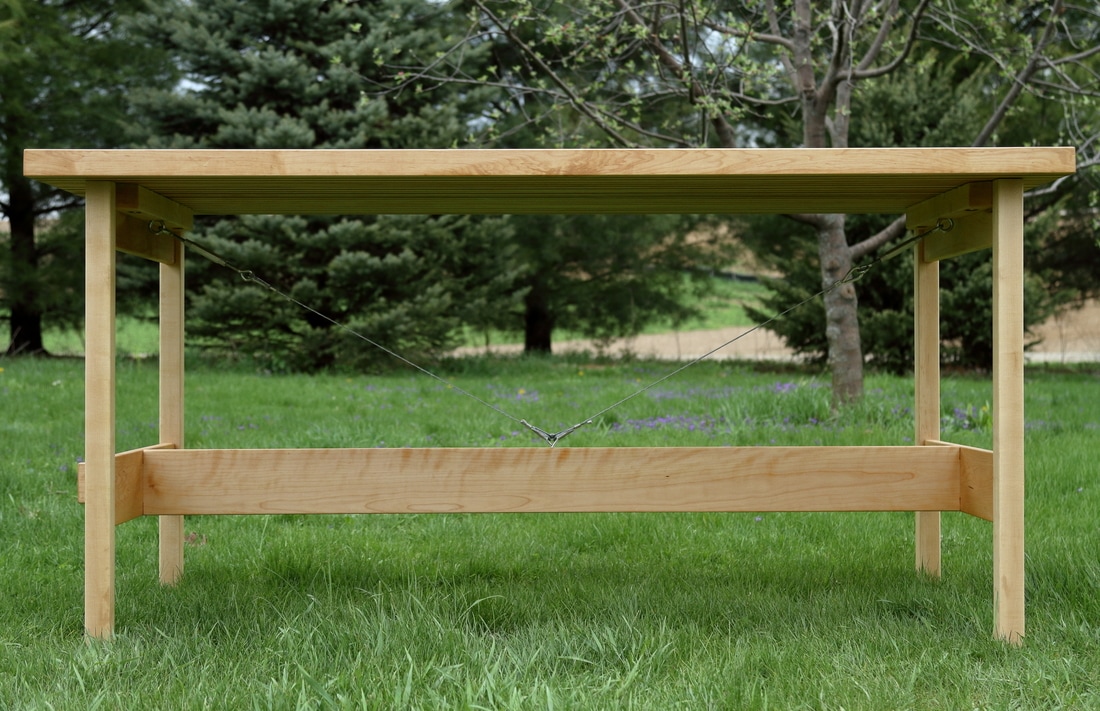 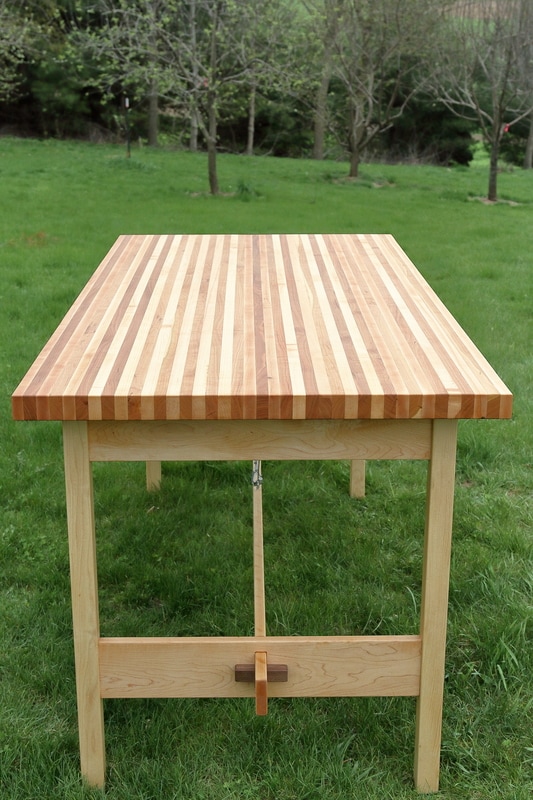 All assembled, I'd bet the whole table weighs in at about 200 lbs. It was another fun project. I can't wait to see it in use.
0 Comments
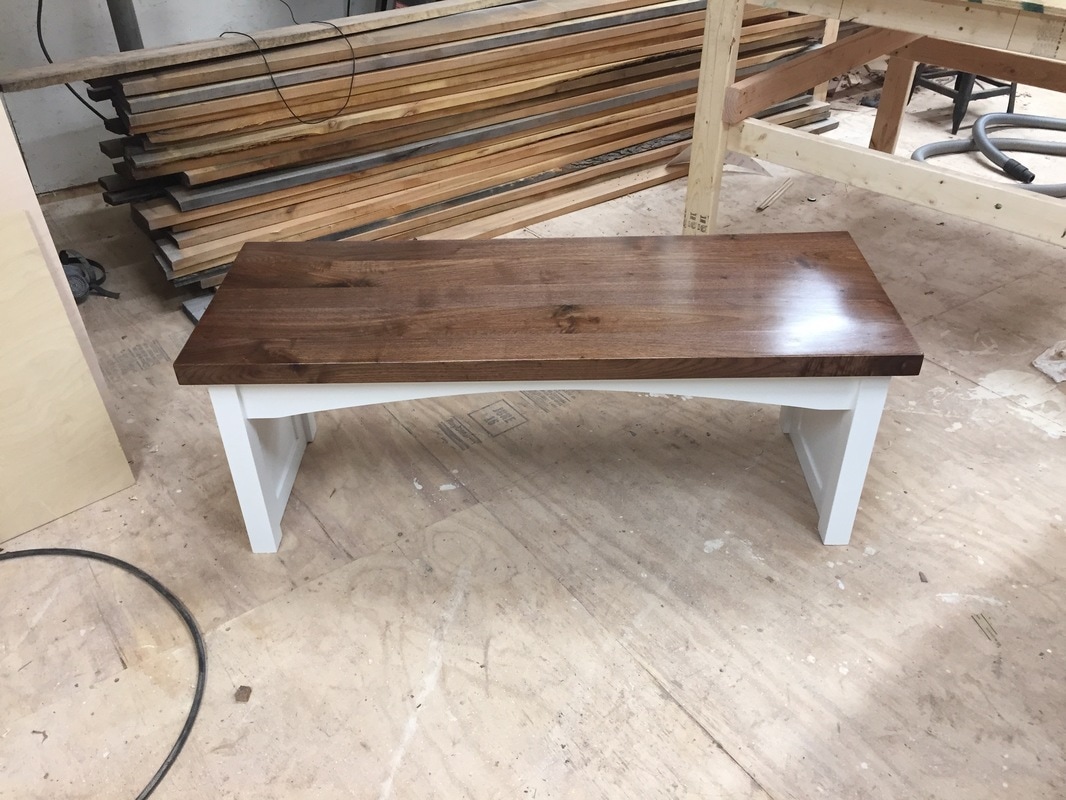
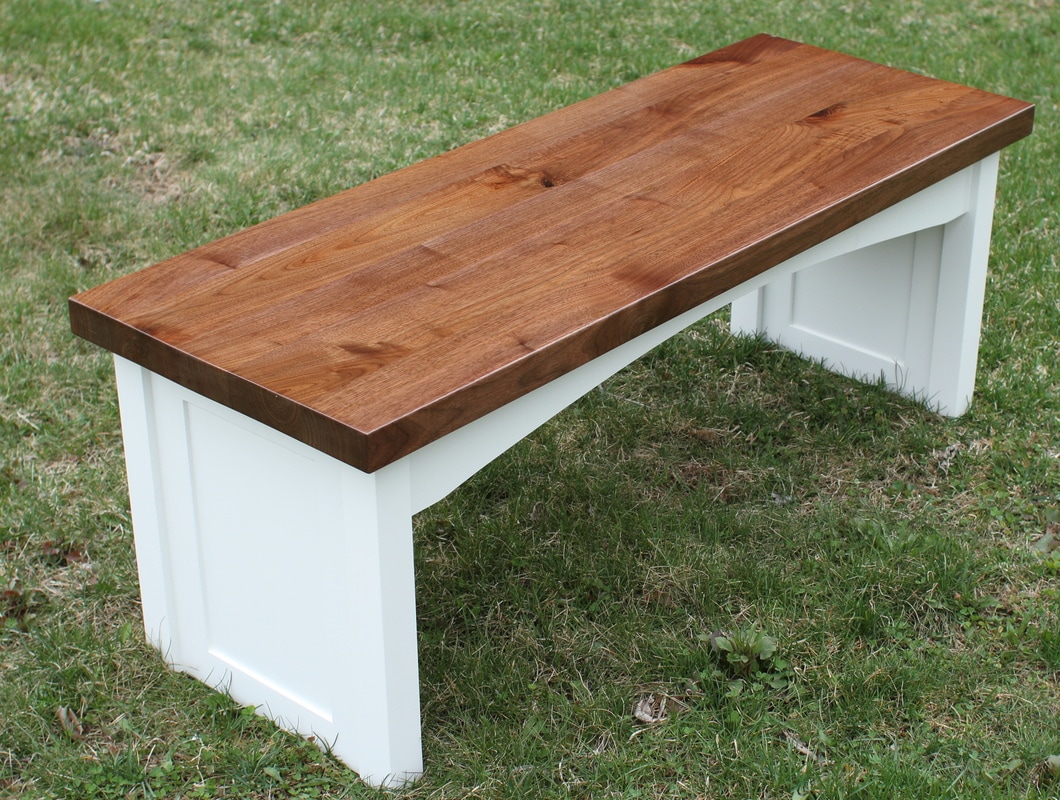
 One of my college friends (we'll call him Bob) sent me a text a couple months ago about a little project. He was getting ready to move into a new house he designed and wanted a custom bench for the foyer that matched the style of the some of the other pieces in the new house. Bob is the perfect customer, he understands construction, the design process, timelines and works with people very well. He sent me a Sketchup file of what he wanted but went along with almost all the suggestions I had for him. His requirements were few, but specific - a perfect mix of design direction and creative freedom.
Normally, I would start by glueing up the bench seat or table top first. This time I had an exact plan on what I was building and didn't have the top material so I actually started on the legs and skirt first. The top is normally built first so small adjustments can be made if the dimensions don't come out exactly how you planned.
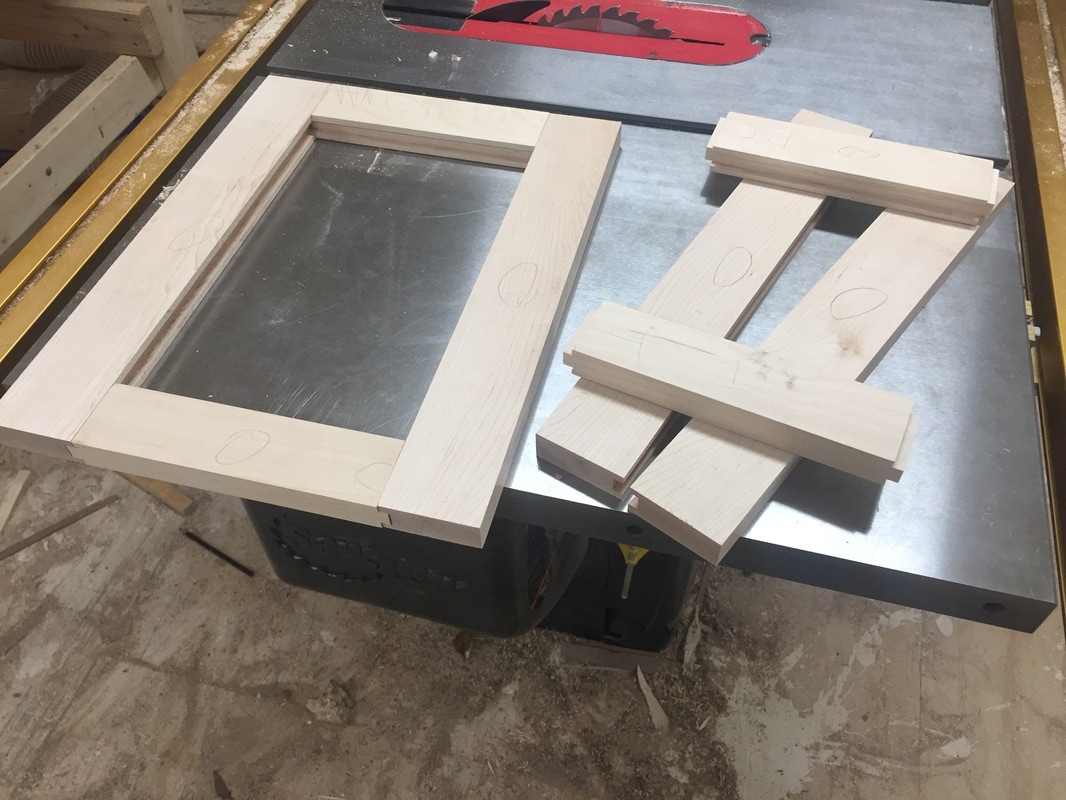
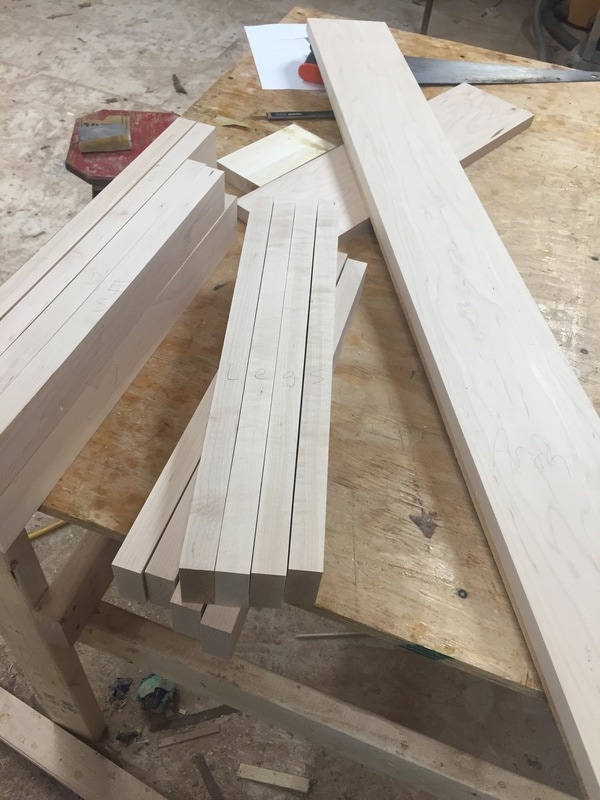
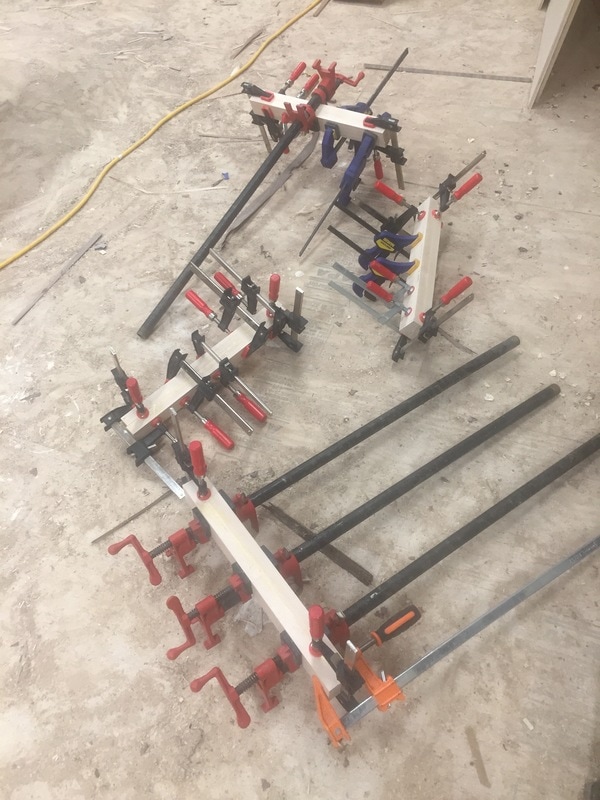
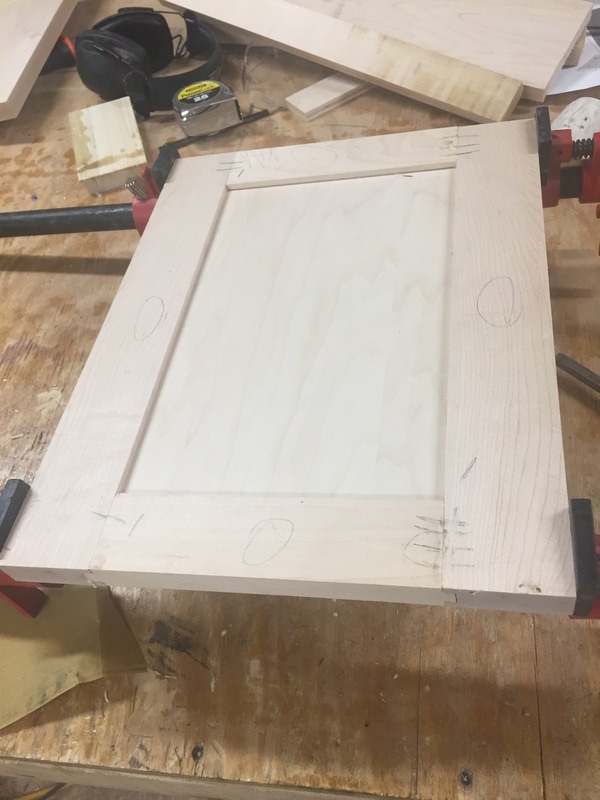
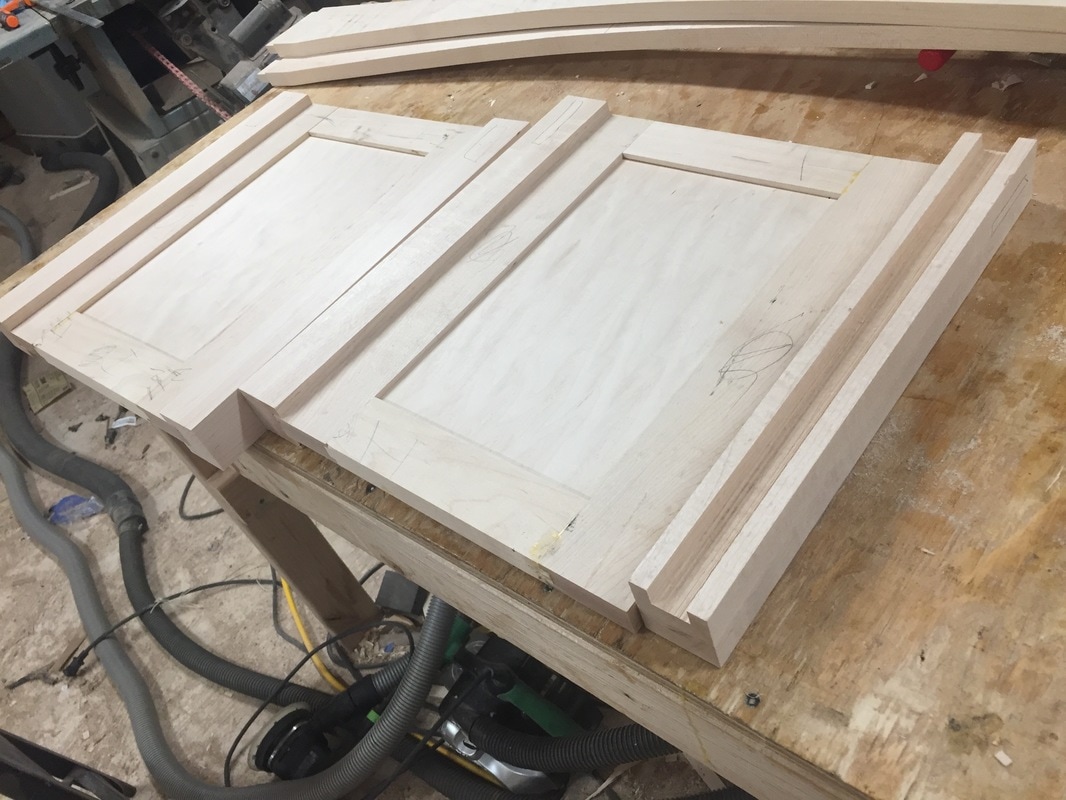
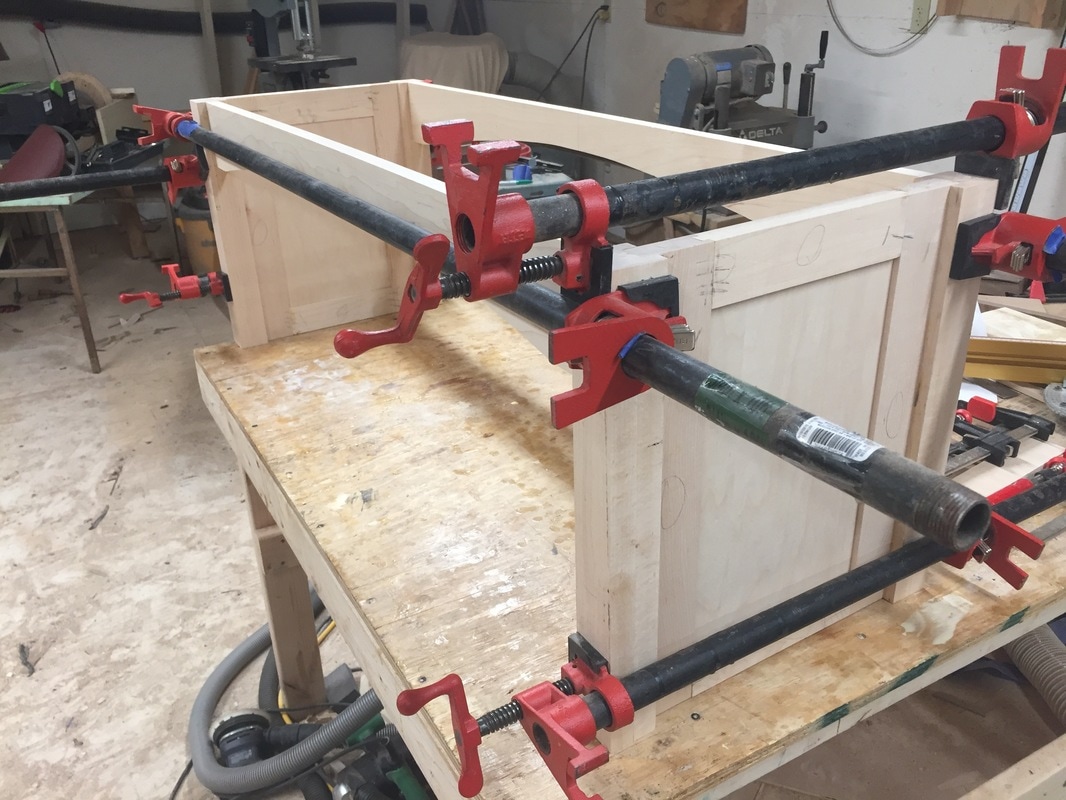
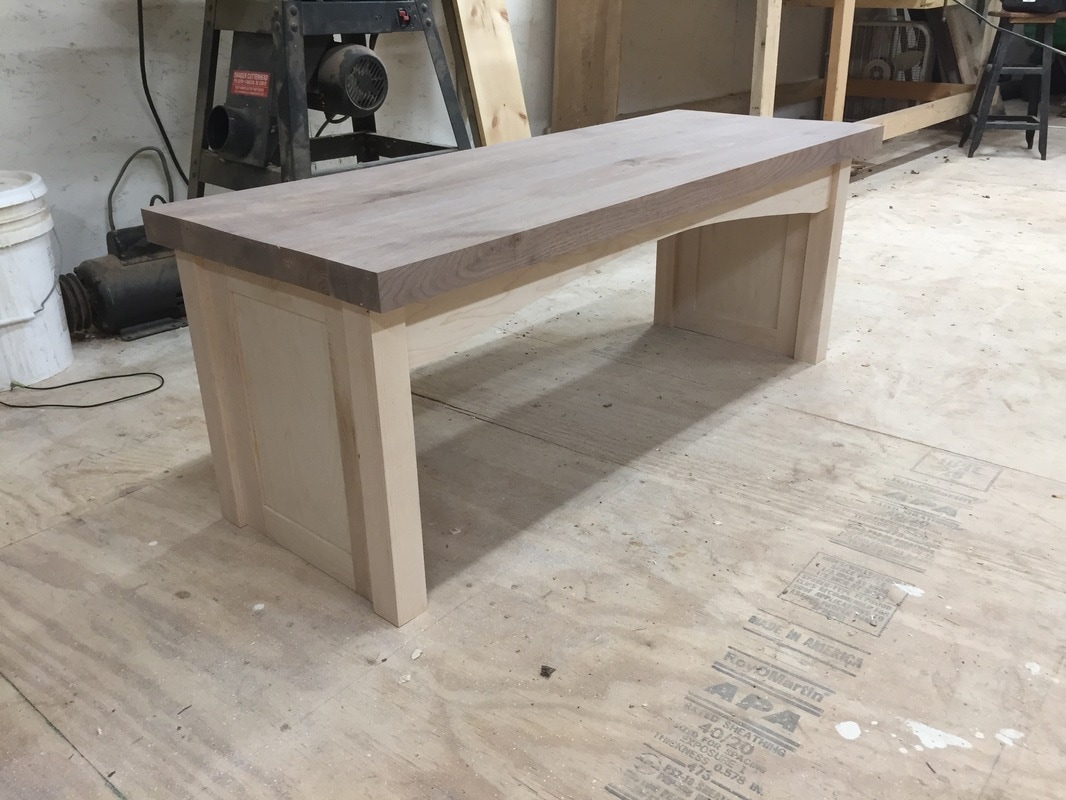
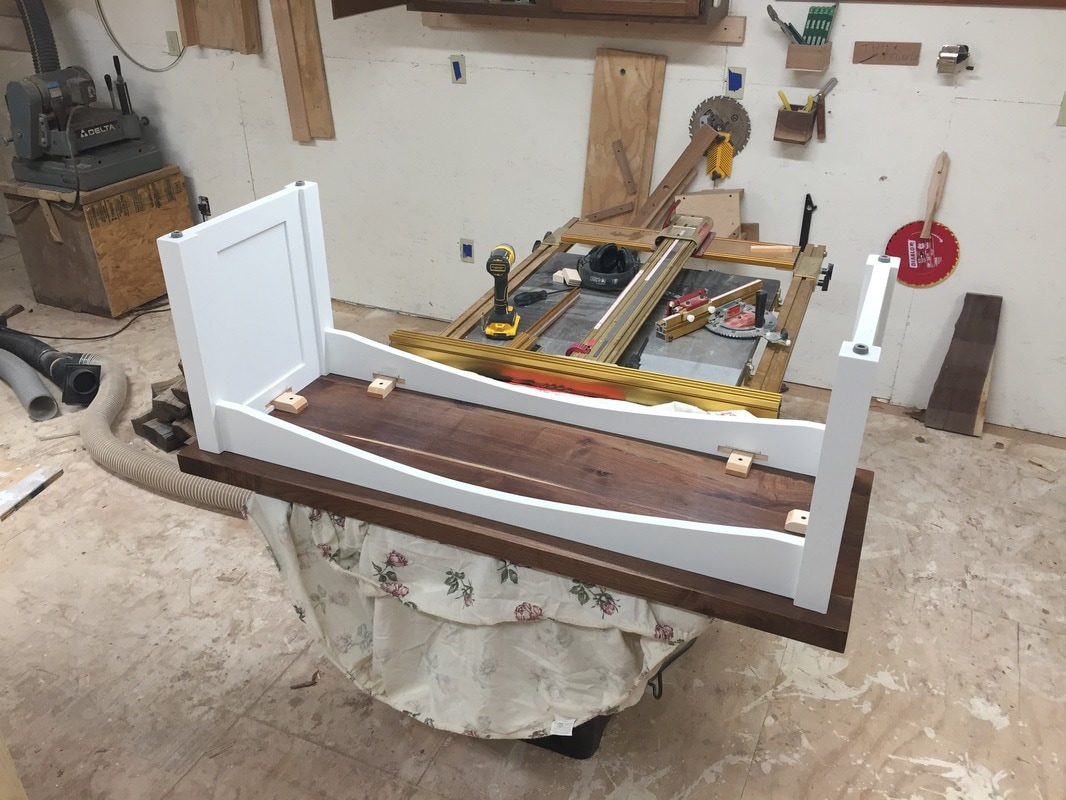
Every project has a requirement of using all of the clamps at least once. Glueing up the legs is a sure way of doing this. The side panels are constructed with traditional rails and stiles. The center panel is 1/2" plywood. All the base material is maple. I love the workability of maple. It's very hard, but each the cuts are predictable and it's always well behaved.
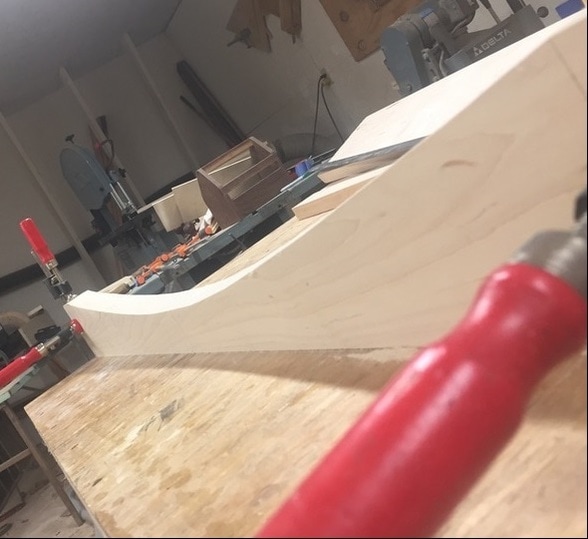
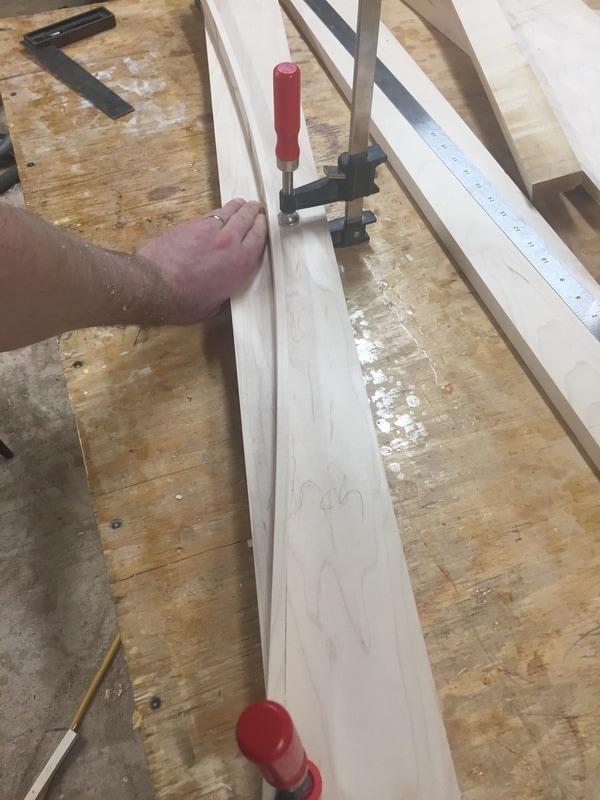
Details make woodworking projects fun and interesting. These are the two skirt pieces. A simple arch on these take the bench from chunky and boxy to slim and interesting.
The side panels slide into dados cut in the legs and the skirts are joined with mortise and tenon joints. The base is mostly compete at this stage.
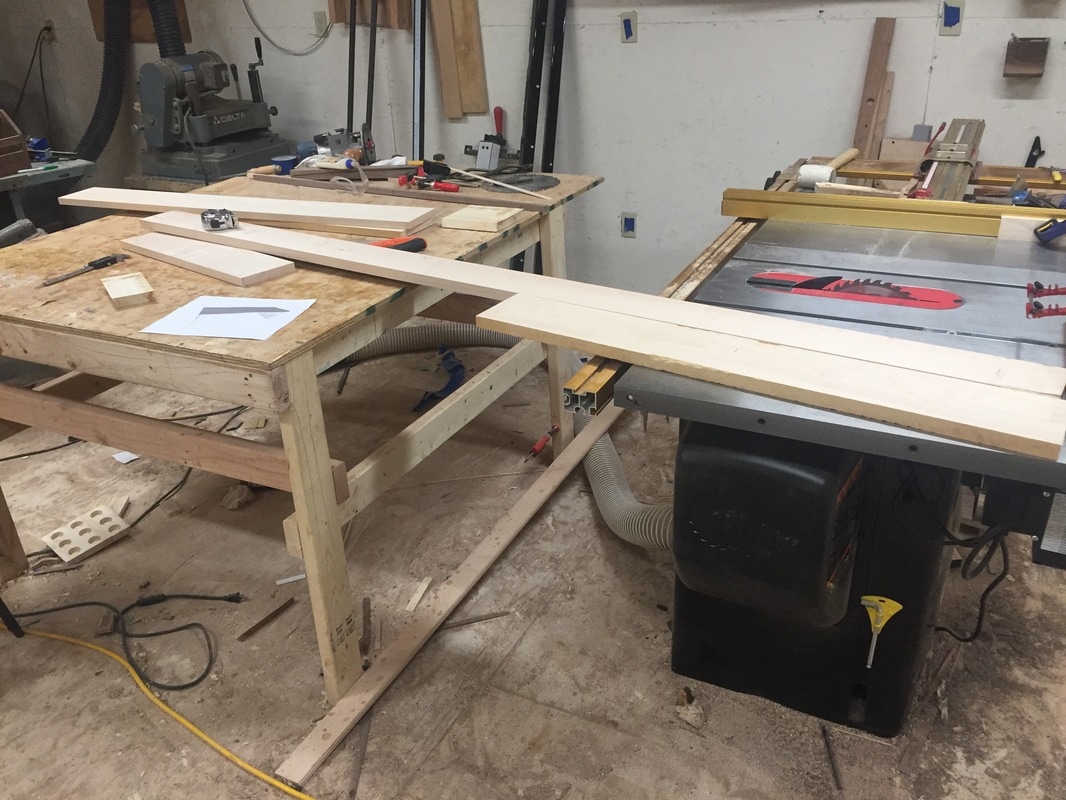
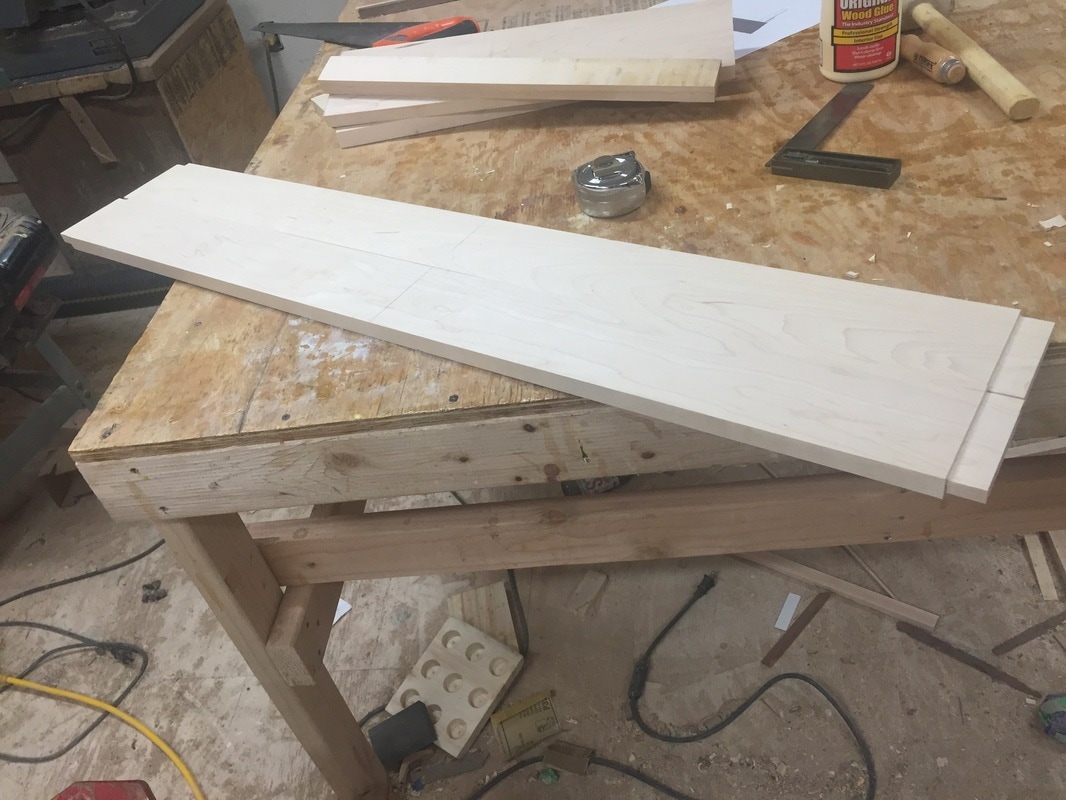
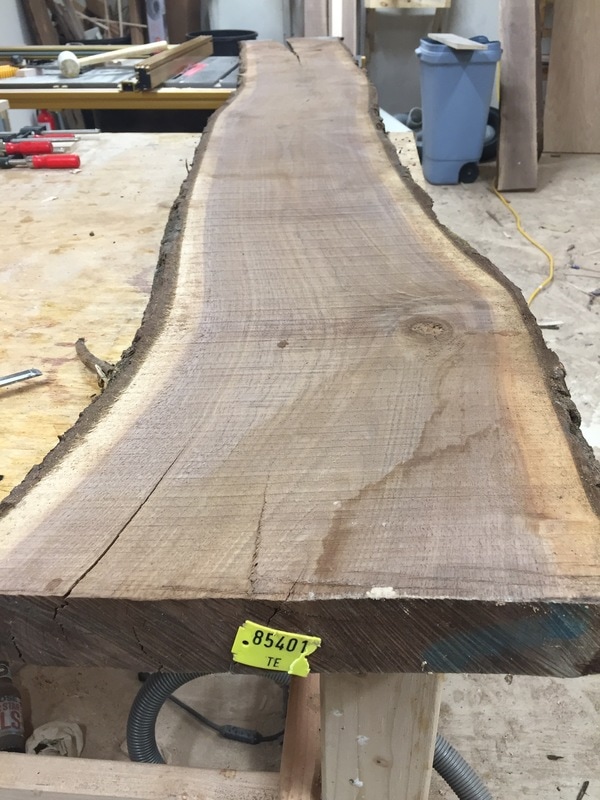
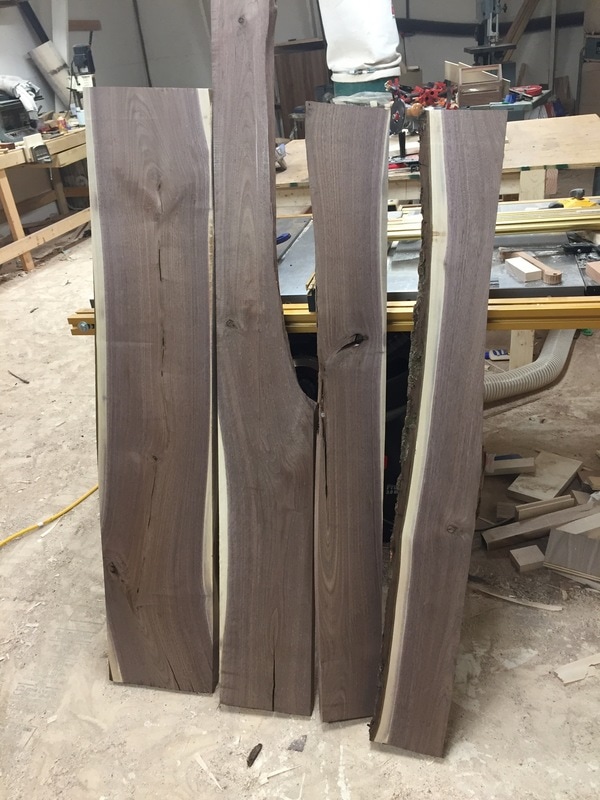
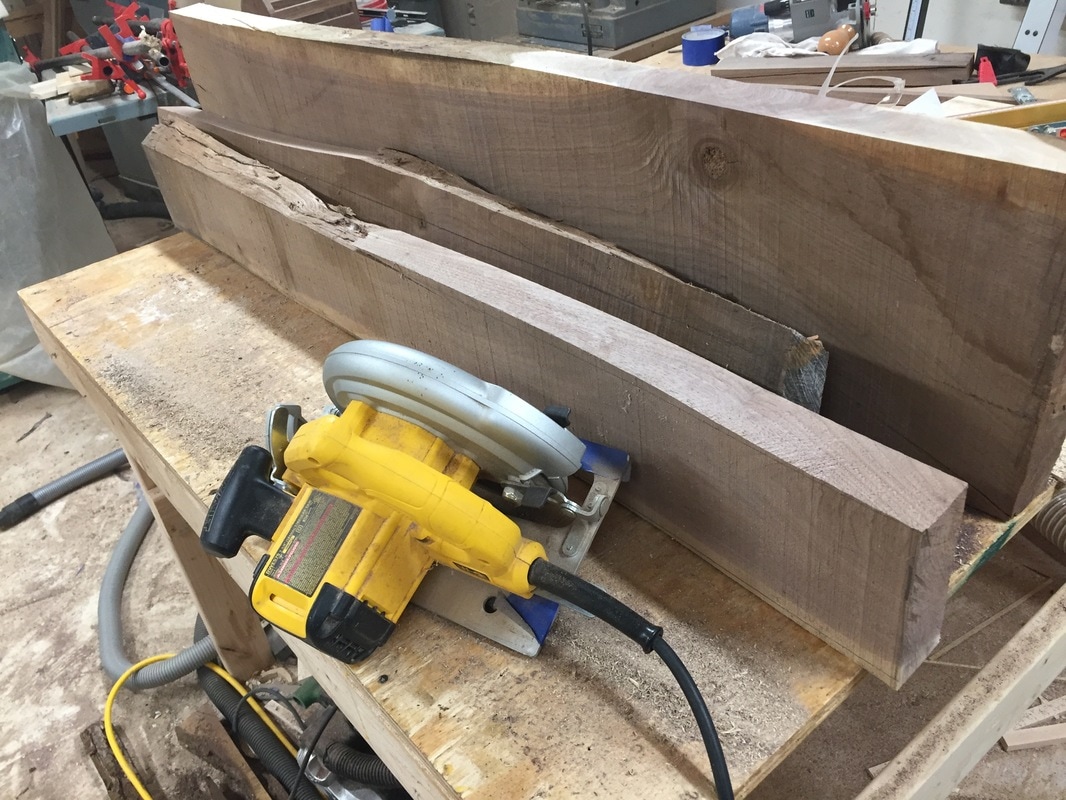
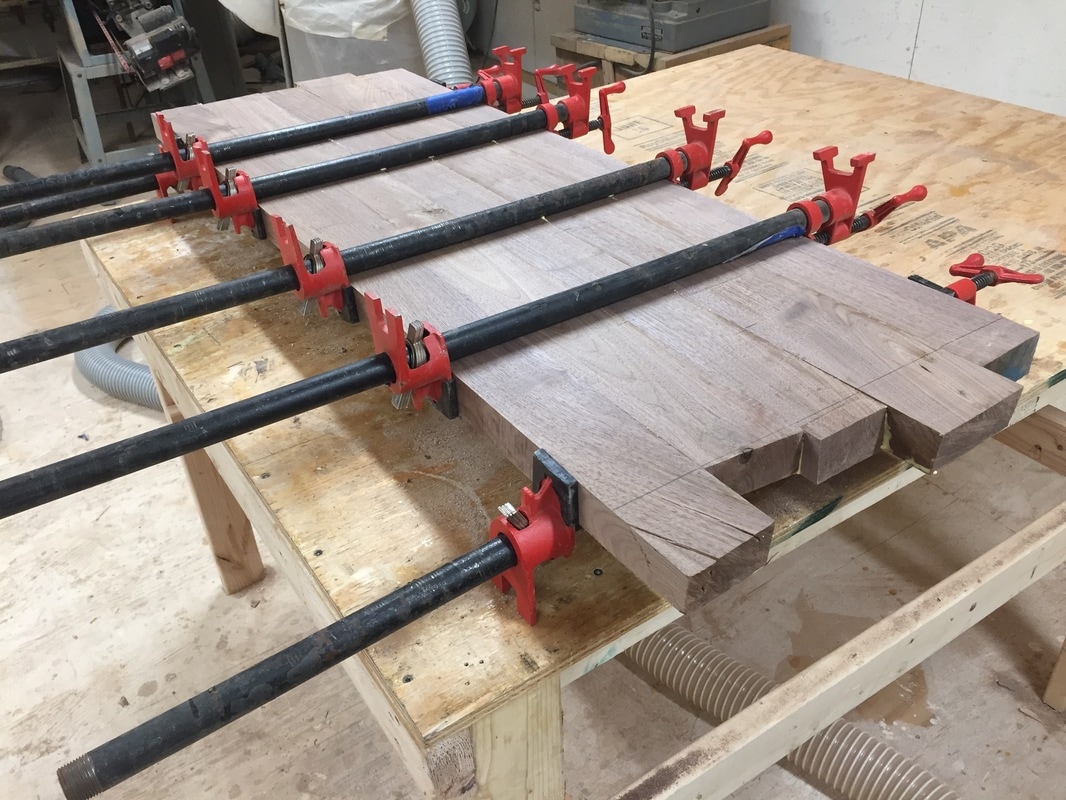
Breaking down big slabs can be challenging. This one was 2" thick, 11-13" wide and almost 9' long. It came from a local sawer down by me.
I used biscuits to line up the boards for the glue-up. Normally I would just do one board at a time, but this certainly made it go much faster.
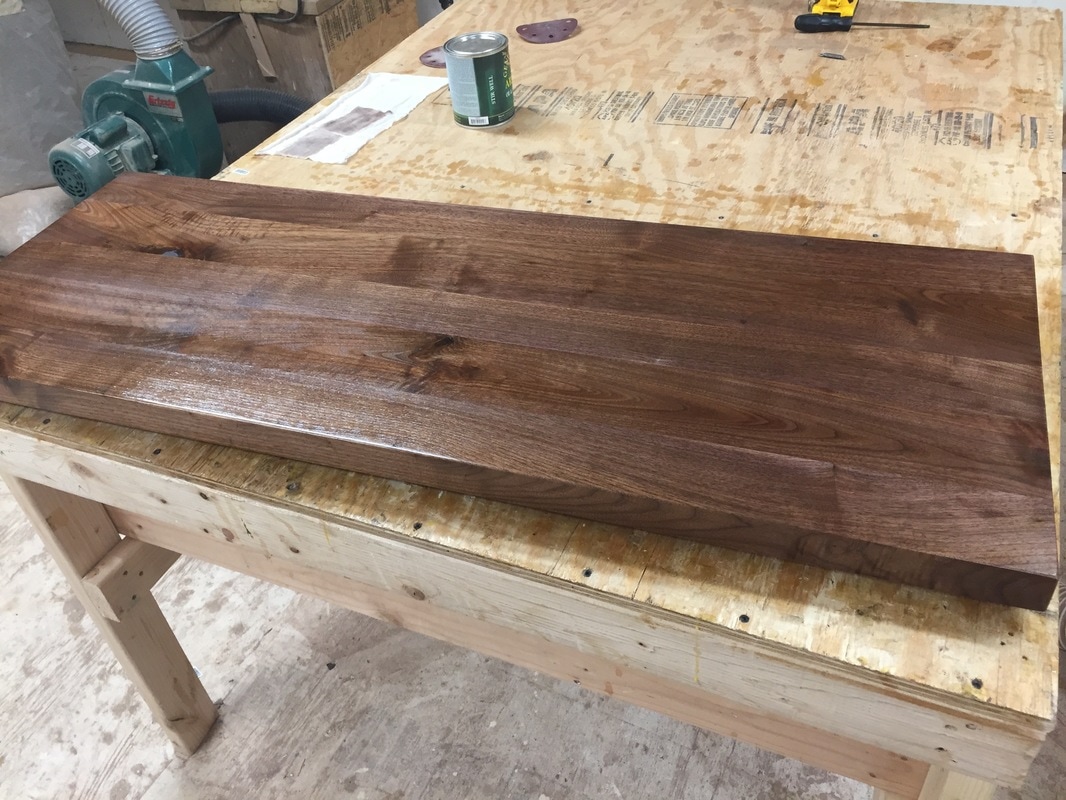
The top got five coats of Arm-R-Seal semigloss poly and the base got two coats of primer and two coats of Sherwin Williams Pure White Satin. Tabletop buttons hold the the two together and allow for wood movement. 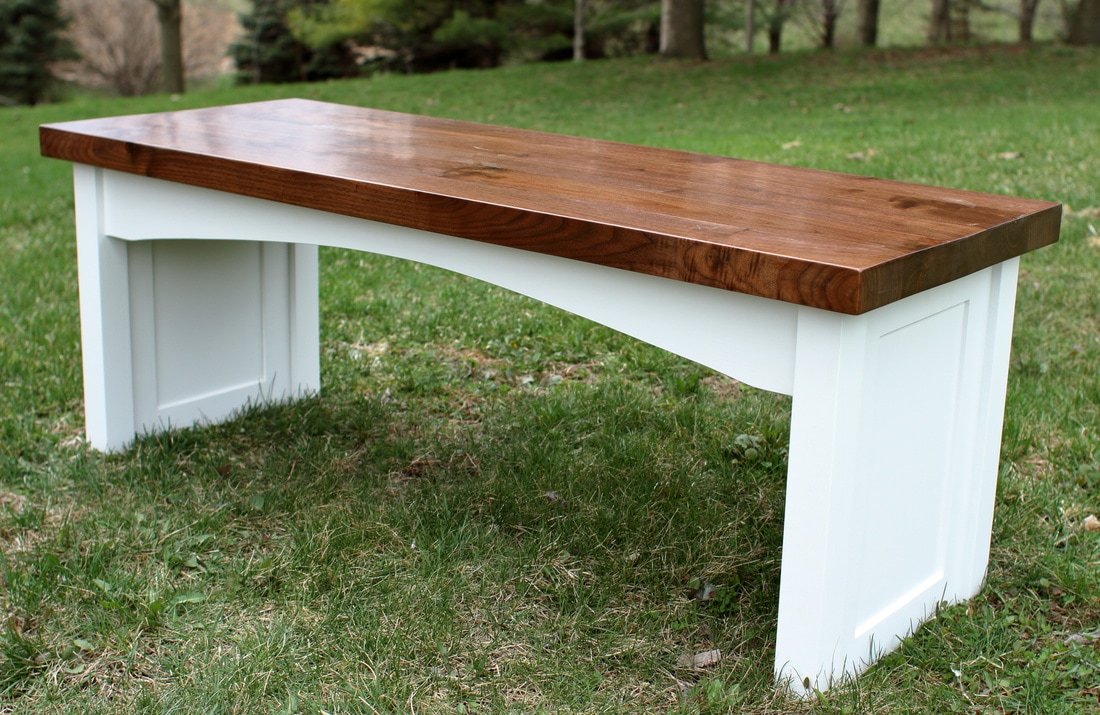   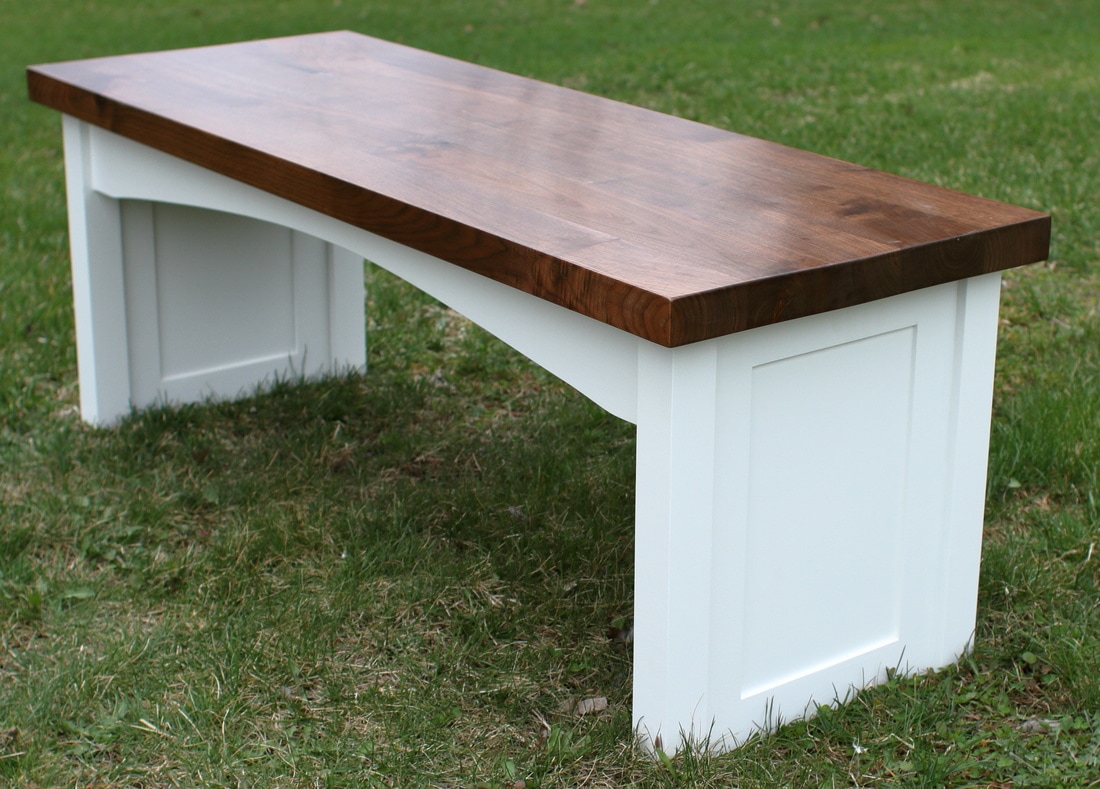 It's always fun working on new projects. This one took me out of my element a little bit with the painted finish but I'm really pleased with how it turned out and I hope Bob is too.
|
Aaron Whalen:A blog about woodworking in Southwest Wisconsin Previous Projects
Archives
February 2024
|